Posts tagged easy recipe
No Tuna Tuna Salad Dip

I love traditional tuna salad but you will be blown away by the way this tastes using zero tuna. It's some type of sorcery! It's one of those recipes I wish you could taste before knowing what's in it because it's so good but not what you think! I like serving this as a dip with tortilla chips but it's delicious on its own or served between two soft slices of bread. Watch my video below and then scroll down for the recipe! And then don’t forget to find me on Facebook, Instagram, Twitter and Tik Tok @BrandiMilloy

No Tuna Tuna Dip

by Brandi Milloy

Ingredients

  • 1- 15oz. can chickpeas, drained rinsed with skins removed

  • 2 celery stalks, chopped

  • 1/4 cup pickles, chopped

  • 1 -2 tbsp. capers with liquid drained

  • 2 tbsp. olives, chopped

  • Zest and juice from 1/2 lemon

  • 2 tbsp. mayo (I prefer Kewpie)

  • 1 tsp. mustard of your choice

  • 1/4 tsp sea salt and freshly cracked black pepper to taste

Directions

  1. In a large bowl, add the chickpeas and mash them up until they are quartered but not mushy. Add celery, pickles, capers, olives, zest and lemon juice, mayo and mustard and mix. Add sea salt and black pepper and taste. Keep in air tight container in the fridge and enjoy up to 3 days.

The Easiest Tiramisu Recipe Ever

Thank you to World Market for sponsoring this post

6D4A6015.jpg

This is the easiest tiramisu recipe ever! Transport yourself to Italy with espresso soaked lady fingers covered in whipped cream and mascarpone with shaved chocolate and cocoa. This dessert literally melts in your mouth and is so flavorful and delicious . I found these Italian lady fingers from World Market along with the cocoa, chocolate and Italian espresso. World Market has always been my go to shop for gourmet foods. They have everything from sauces to snacks to specialty treats and I get so much inspiration every time I go there.

6D4A6074.jpg

Next you'll need to grab heavy cream and mascarpone. Some tiramisu recipes add a liquor or Brandy but I feel like it can take away from the flavor of the espresso so I skipped it. Go here for this easy recipe and head to my instagram @BrandiMilloy to watch a video of me making it. This dessert is such a crowd pleaser! It gets better the longer you keep it in the fridge and anytime I serve, there isn't even a morsel left! What's your favorite entertaining dessert? Let me know below.

6D4A5962.jpg
Pan Seared Halibut with Butter Sauce

Thank you to Sunkist® Citrus for sponsoring this post.

fish7.jpg

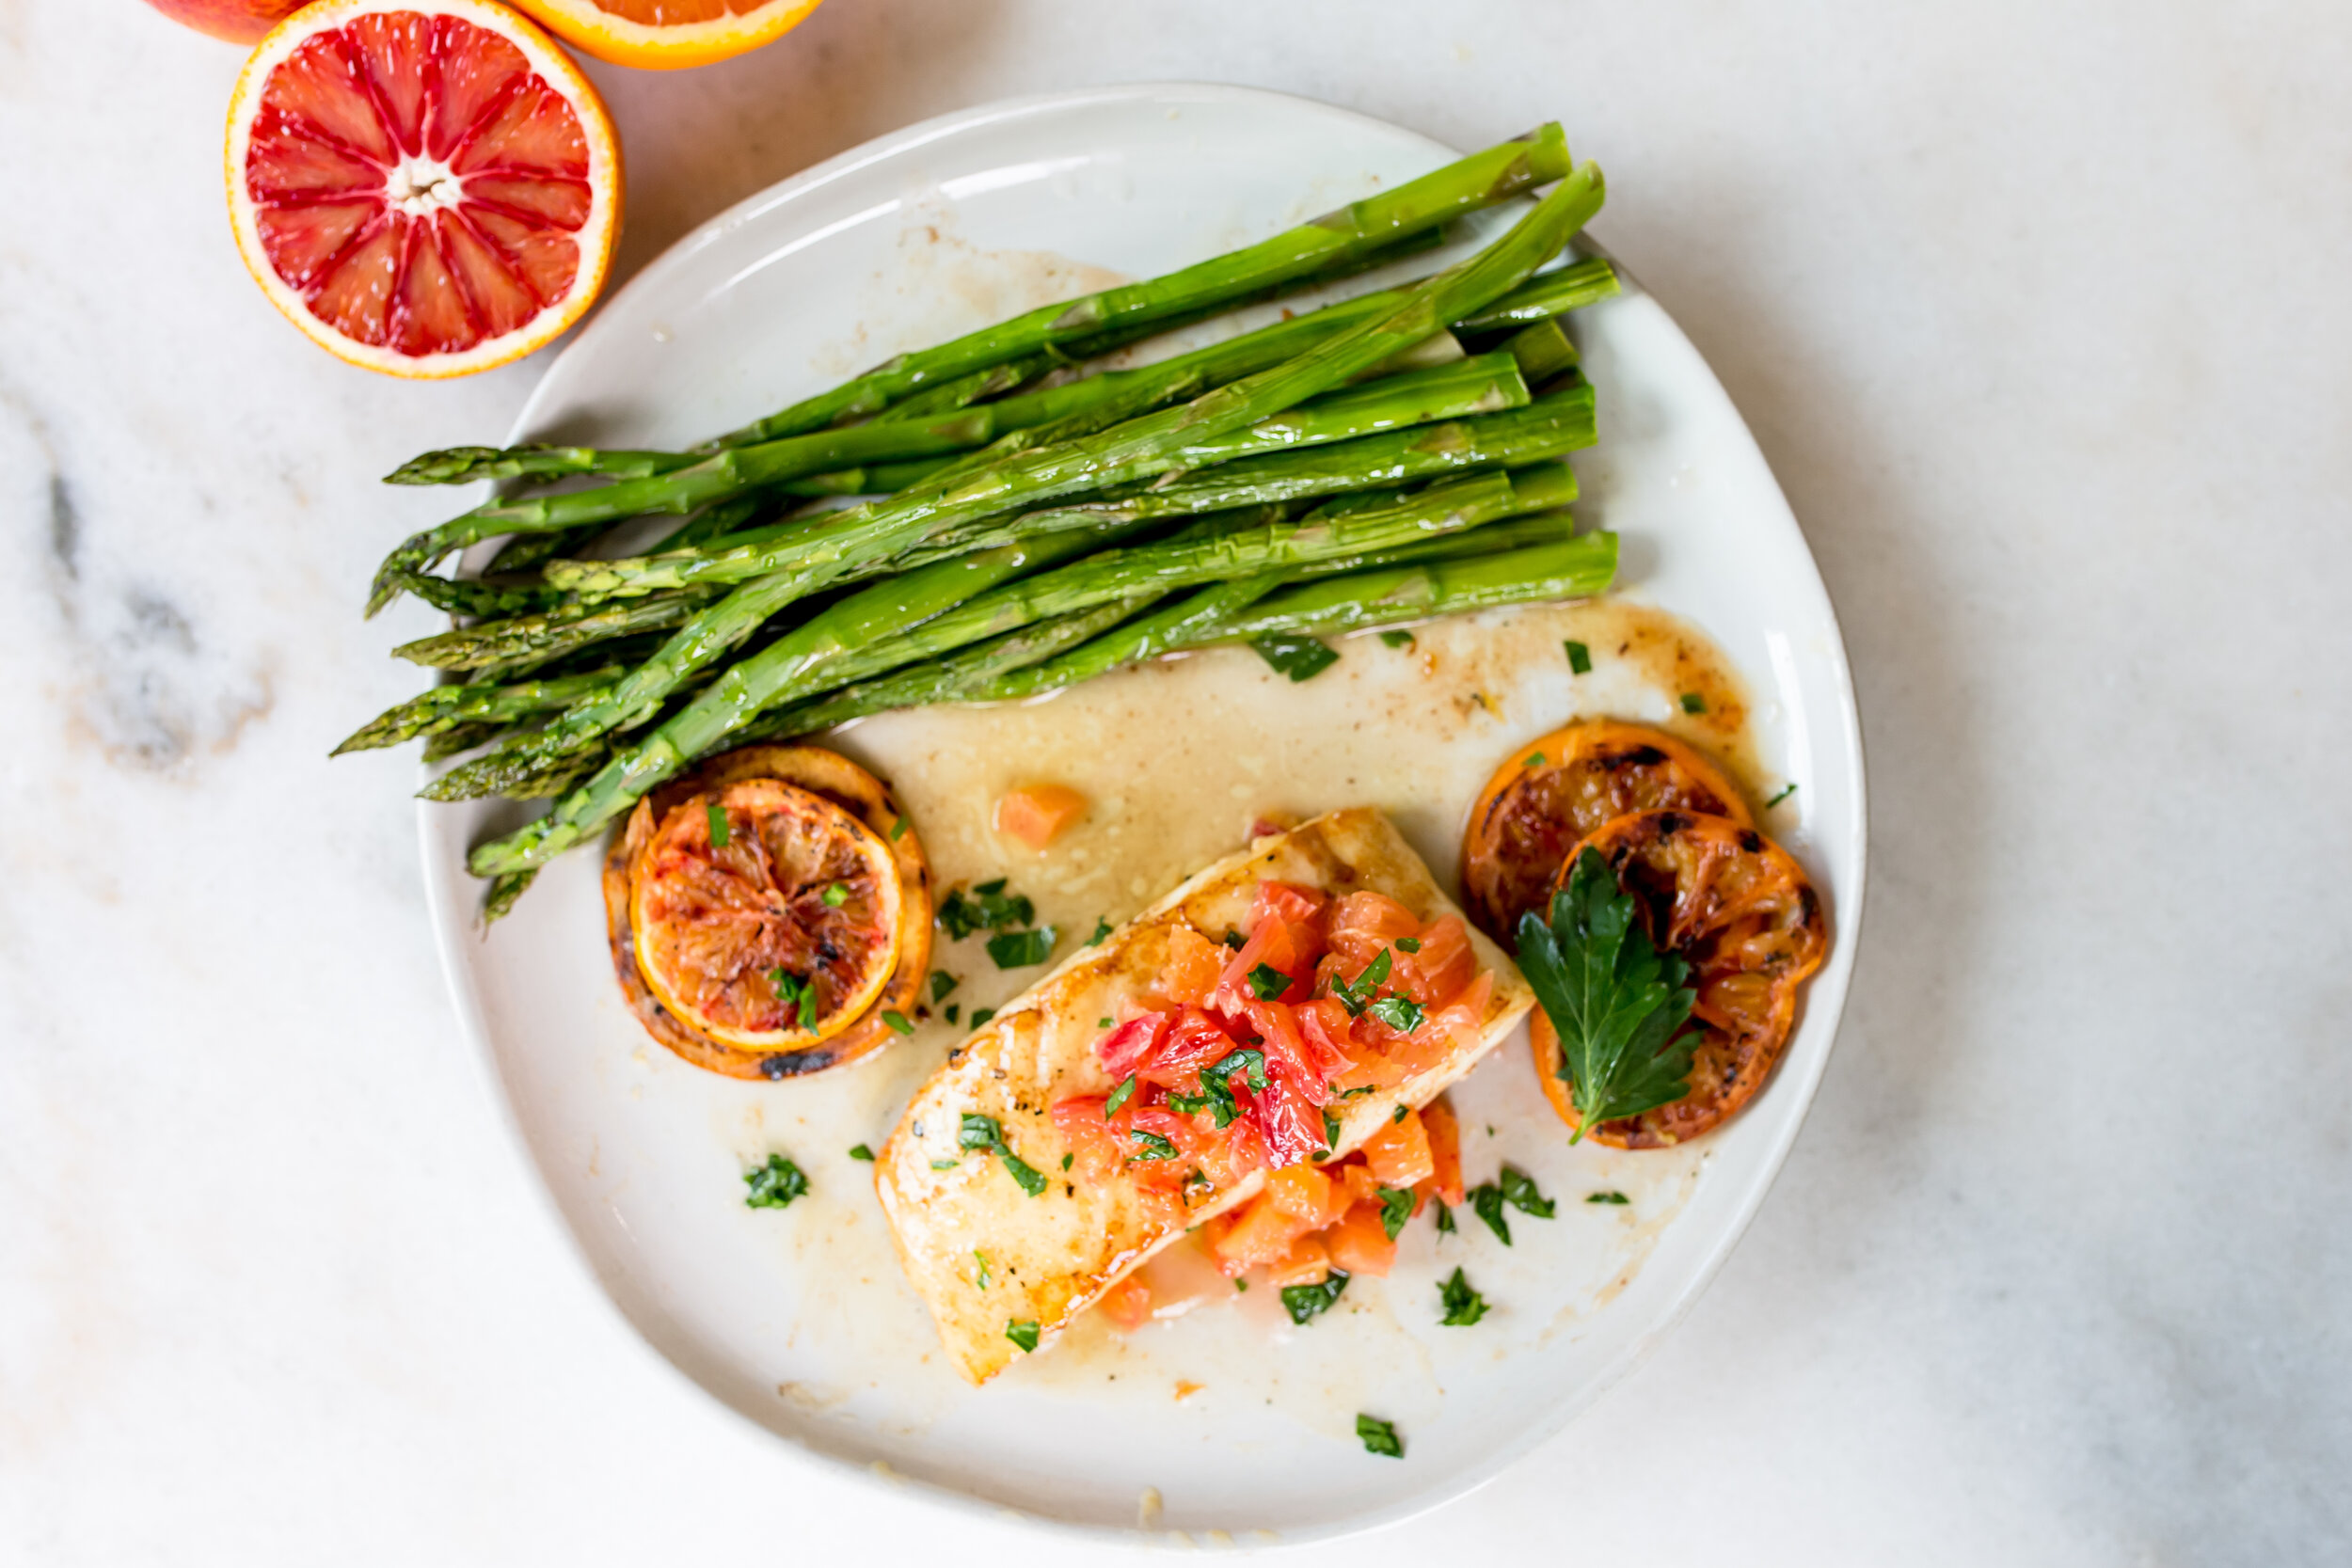
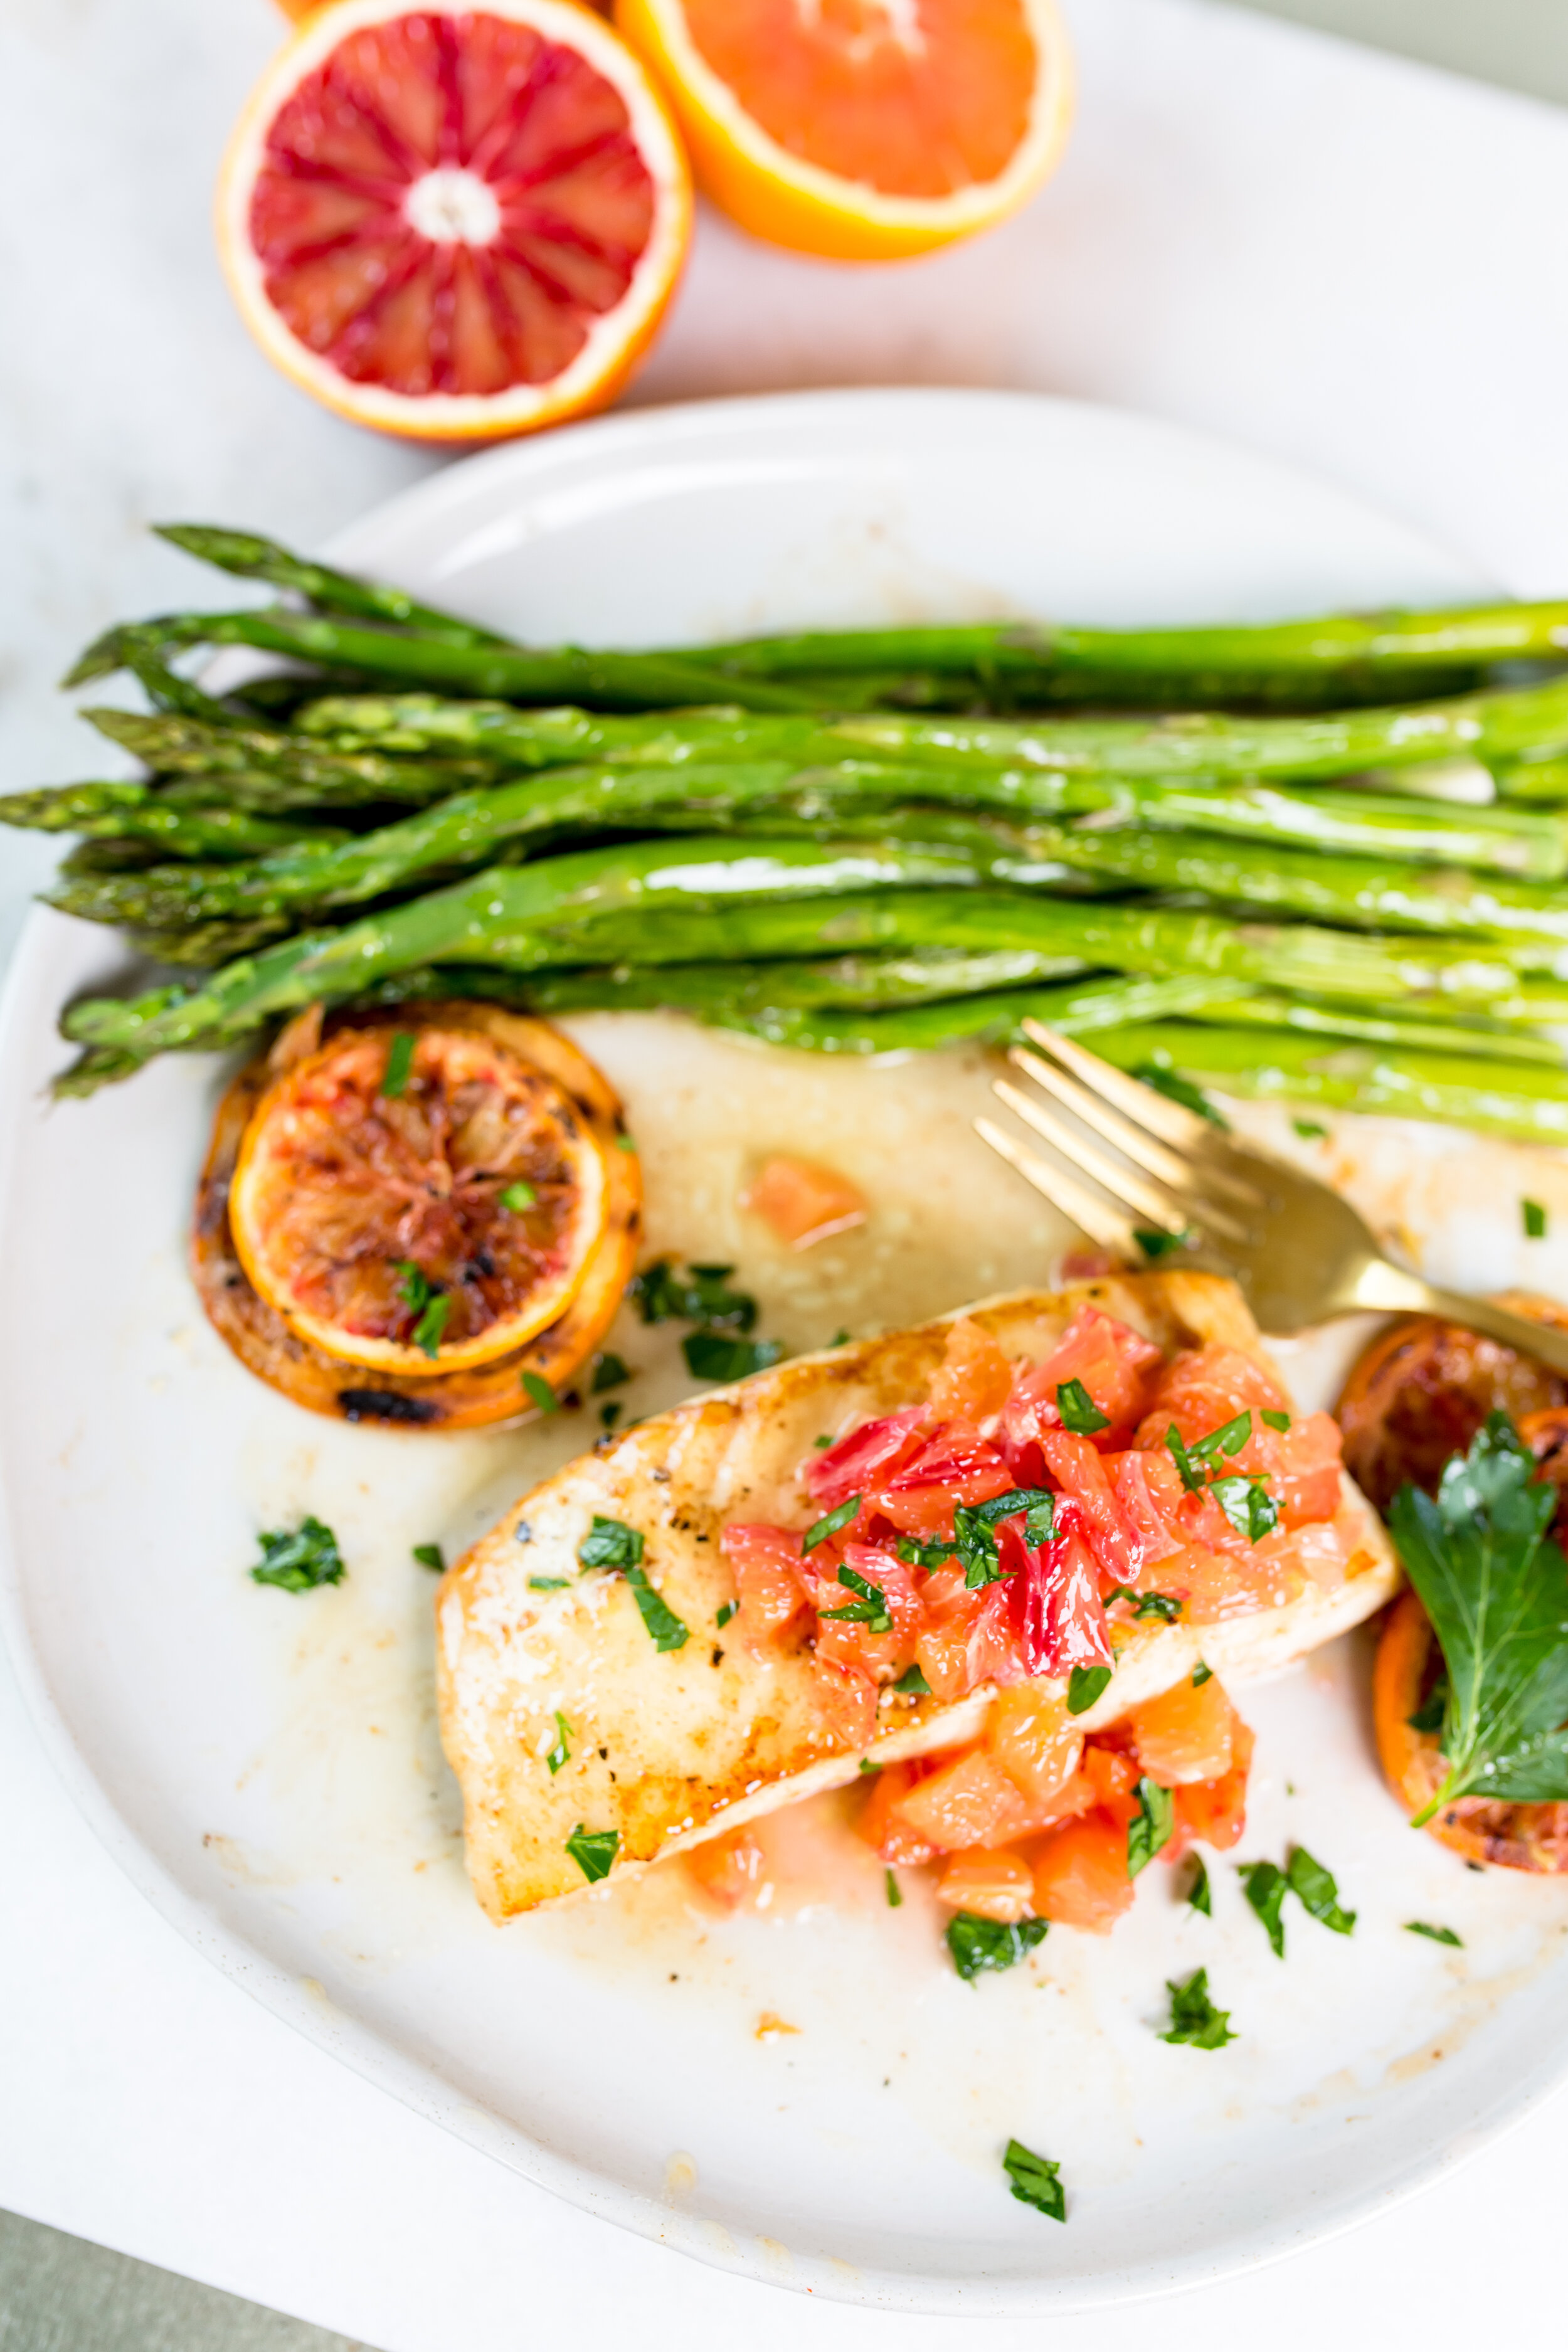
This is one of my favorite weeknight meals because it takes minutes to make and features a delicious Sunkist® Cara Cara and Blood Orange butter sauce. We eat a ton of fish in our house so I usually buy my seafood in bulk in the frozen section individually wrapped so I can just take out a couple filets in the morning to thaw. Then when I’m preparing dinner I toss whatever veggies I have on hand in the oven to roast and pan sear my fish, make my butter sauce and that’s it! The Sunkist® Cara Cara and Blood Orange are such flavorful pairings with the halibut but if you don’t have it on hand you could also swap in Mahi Mahi! Scroll down for the recipe or go to Sunkist.com/recipes.

fish11.jpg
fish21.jpg
fish2.jpg
fish9.jpg
fish8.jpg
fish10.jpg
Fish14.jpg

Pan Seared Halibut with Sunkist ® Blood Orange and Cara Cara Orange Butter Sauce

By Brandi Milloy

Ingredients

  • 3 tbsp. butter

  • 16 oz. halibut

  • salt and peper

  • Juice from 1/2 Sunkist® Blood Orange

  • Juice from 1/2 Cara Cara Orange

  • 1/2 segmented and chopped Sunkist® Blood Orange

  • 1/2 segmented and chopped Cara Cara Orange

Directions

  1. Heat pan on medium heat and add 1 tbsp. butter. Pat halibut dry on both sides and carefully place in pan. Season halibut with salt and pepper. Sear halibut without moving for 3-4 minutes. Flip halibut over and add 2 tbsp. butter. Add the Sunkist® Blood Orange and Cara Cara Orange Juice and the segmented and chopped oranges.

  2. Cook for 2-4 minutes more or until cooked through. Serve immediately and enjoy!

Gooey Pumpkiny Pumpkin Bread
IMG_8971.JPG
IMG_8970.JPG

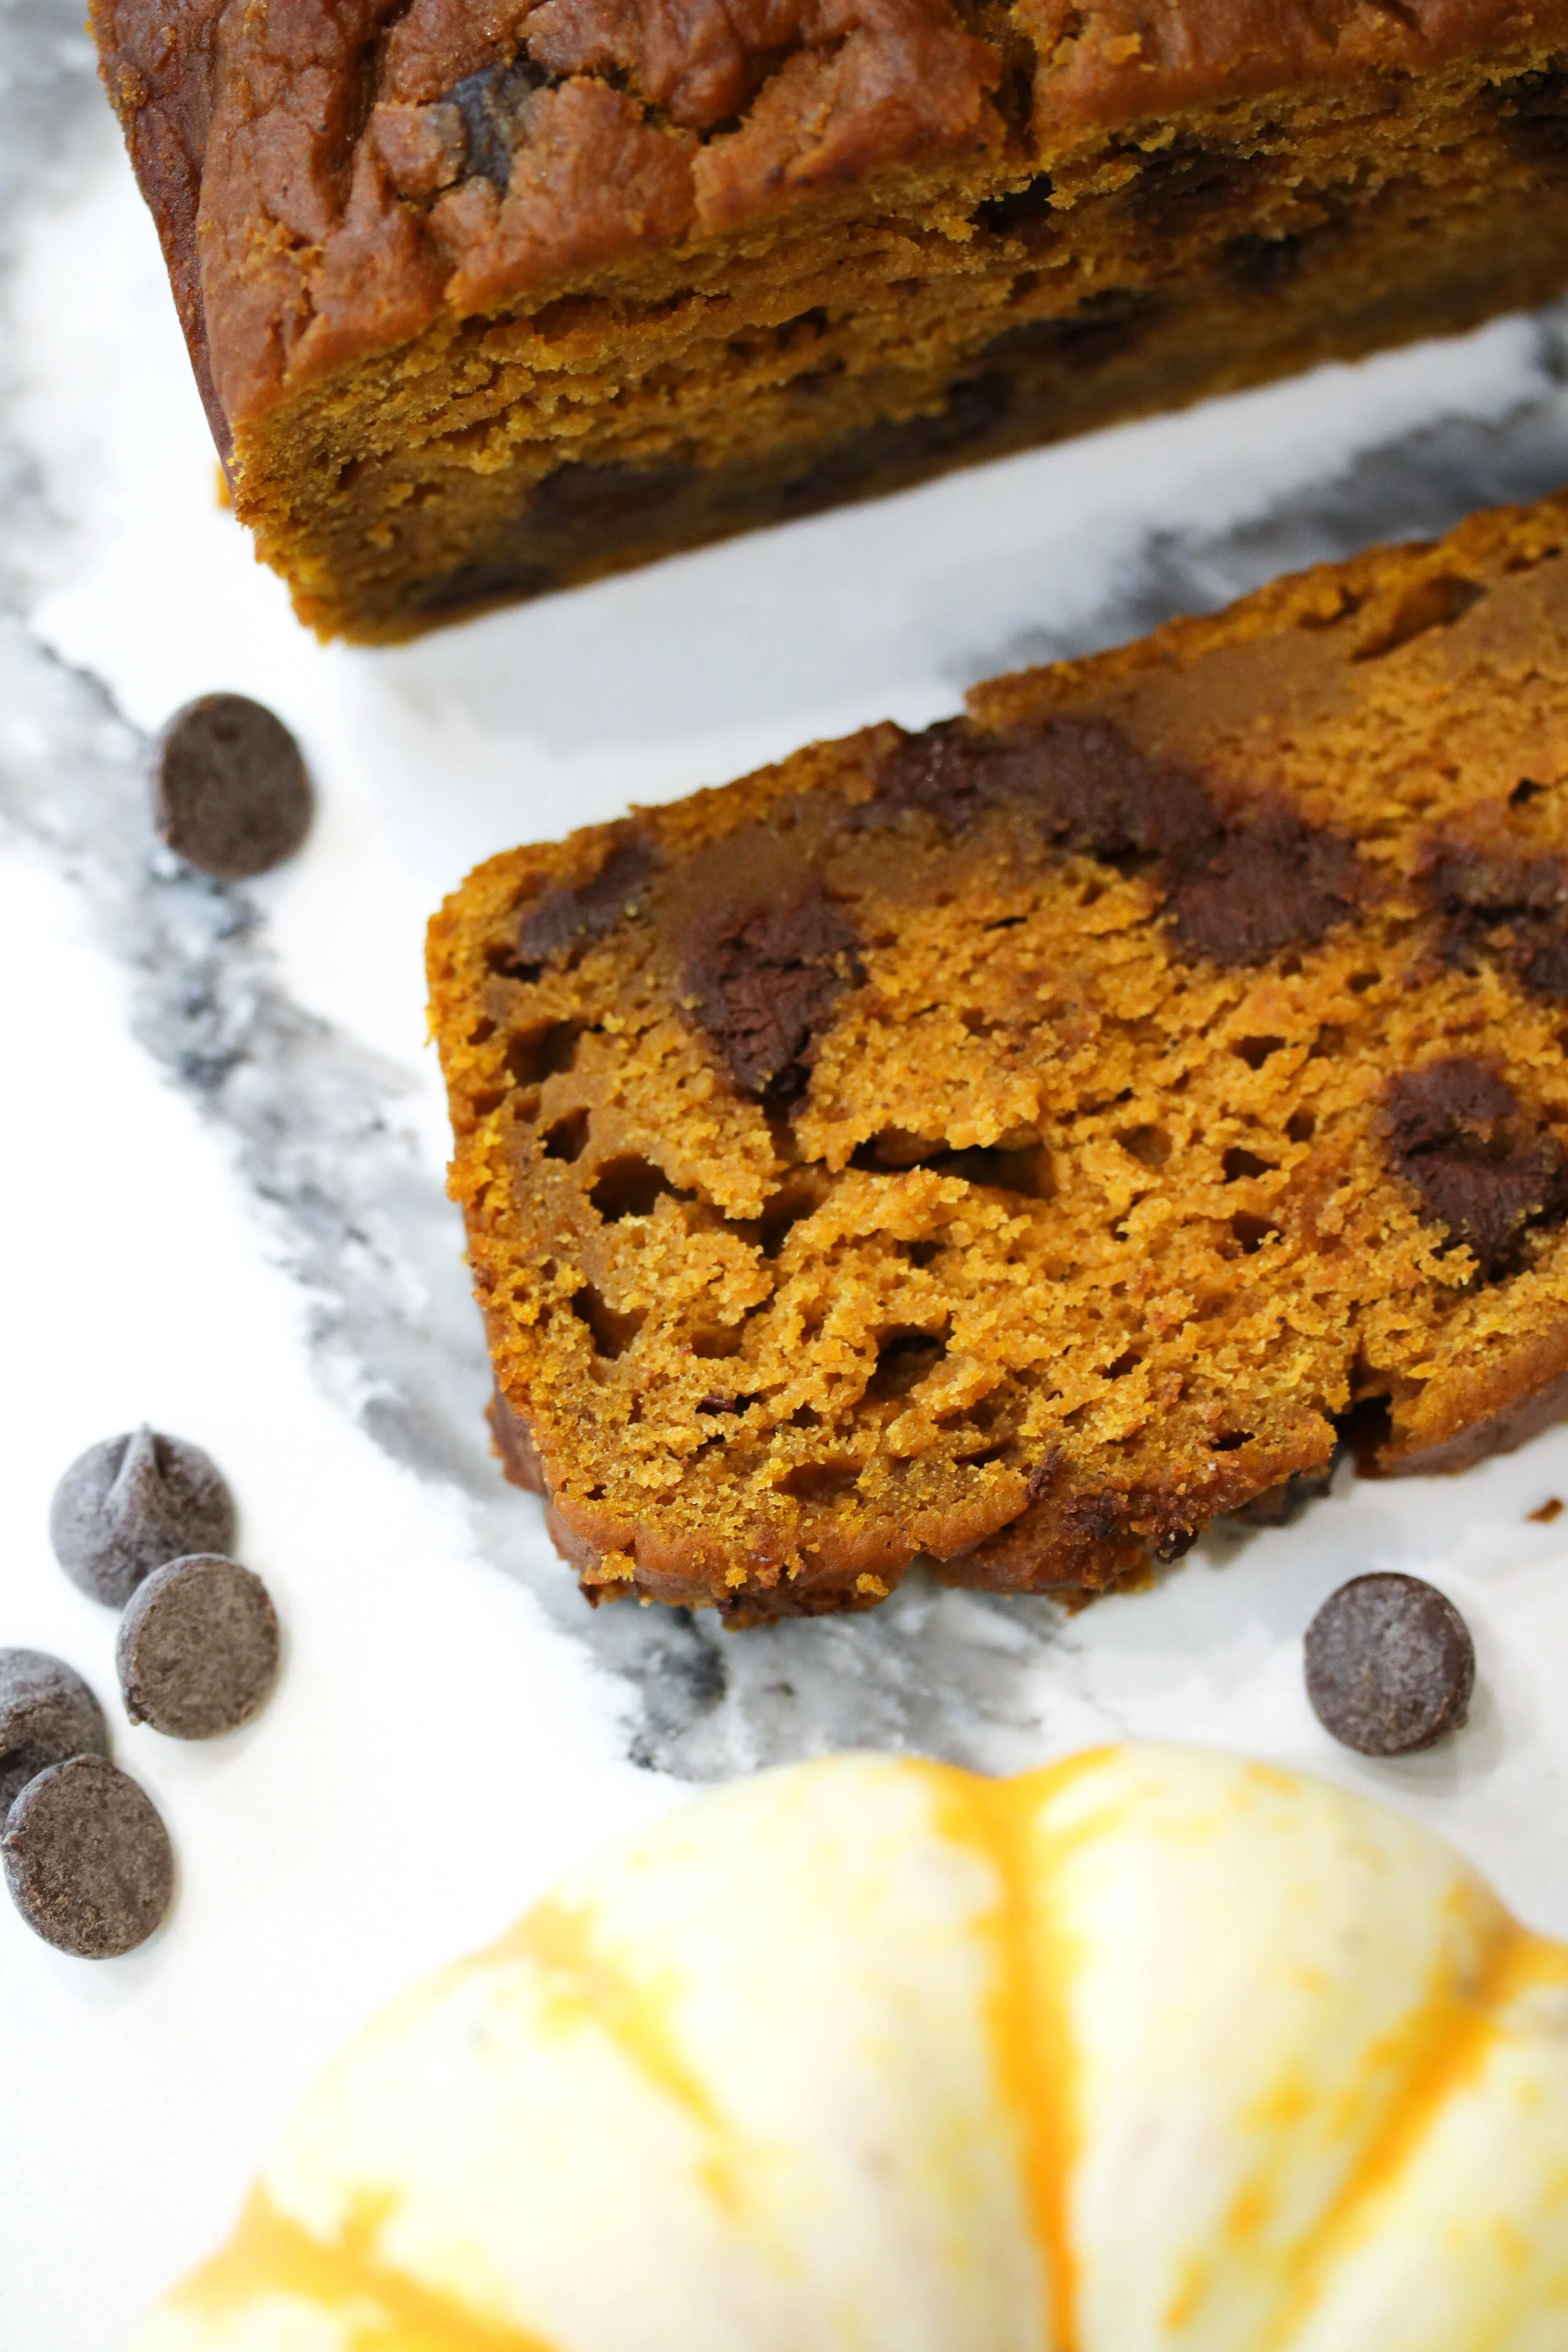
This is going to be the only pumpkin bread recipe you need. It’s packed with pumpkin flavor and has the most amazing gooey, soft, moist thing happening that you are gonna want to just keep this recipe handy. It’s one of those recipes you wanna double or quadruple and make a few loaves for family, friends and neighbors. Makes me so happy thinking of all of you showing your care by making food for others.

Facetune_18-10-2020-09-08-39.JPG
IMG_0835.JPG

The secret ingredient is two things: making sure there is plenty of pumpkin (we use a whole can of pumpkin here) and fresh squeezed orange juice. It’s not overpowering and still lets the pumpkin flavors shine. If you are into the idea of a pumpkin and orange flavor combo, add the zest of one orange and you’ll get it.

This is a recipe my family loves to make together because it kicks off the start of baking season in our home! Can’t wait to share many more recipes with you. I’d love to see your photos of your bread, tag me on instagram @BrandiMilloy and then scroll down for the recipe.

IMG_0838.JPG
IMG_8971.JPG

Happy baking friends!

Gooey Pumpkiny Pumpkin Bread Recipe

by Brandi Milloy

Ingredients

  • 2 large eggs, room temperature

  • 3/4 cup cane sugar

  • 1/2 cup brown sugar

  • 1 can (15 oz.) pumpkin puree

  • 1/2 cup butter, melted

  • 1/4 cup fresh squeezed orange or mandarin juice

  • 1 and 3/4 cup all-purpose flour

  • 1 tsp. baking soda

  • 2 tsp. ground cinnamon

  • 1/4 tsp. ground nutmeg

  • 3/4 tsp. salt

  • 2/3 cup chocolate chips (or half chips, half chopped chocolate)

Directions

  1. Preheat oven to 350F. Spray a 9 x 5” inch pan with non-stick spray and set aside.

  2. Into a large bowl, mix the eggs together with the sugars, pumpkin, butter and orange juice.

  3. Into another bowl mix the flour, baking soda, cinnamon, nutmeg and salt.

  4. Add the dry ingredients to the wet ingredients and mix until combined. Fold in the chocolate.

  5. Pour the batter into the baking pan and bake for 45 minutes.

  6. After 45 minutes, cover pan with aluminum foil or parchment paper to prevent the top for getting too brown and continue cooking for another 5-10 minutes. The bread is done with an inserted toothpick comes out mostly dry.

  7. Allow your bread to cool before slicing. Give it 10 minutes and it will still be warm in the center and just right. Enjoy!

Blueberry Bacon Bites

Thank you to the U.S. Highbush Blueberry Council for sponsoring this post

Blueberry Bacon Bites Recipe

by Brandi Milloy

Ingredients

  • 8 oz. bacon or 8 slices bacon

  • 1/2 cup packed brown sugar

  • 1/4 tsp. cracked black pepper

  • 2 cups blueberries

  • 1 tbsp. maple syrup

  • 1 roll refrigerated crescent dough

Directions

  1. Preheat oven to 350F. Into a bowl add your bacon, brown sugar and black pepper and mix to coat. Place bacon on baking sheet and bake in oven for 18 minutes, rotating halfway through. Remove from oven and cool.

  2. Meanwhile make your blueberry spread by adding blueberries and maple syrup into a pot. Place on medium high heat and bring to a boil. Cook for about 3 minutes and then remove from heat and let it cool.

  3. To assemble, lay out crescent dough on a baking sheet keeping the dough in one large rectangle shape. Brush about 4 tbsp. of the blueberry spread onto dough. Top with bacon and bake at 350F for about 15 minutes. Chop into pieces and serve warm or room temperature.

Blueberry Banana Maple Muffins
IMG_2738.JPG

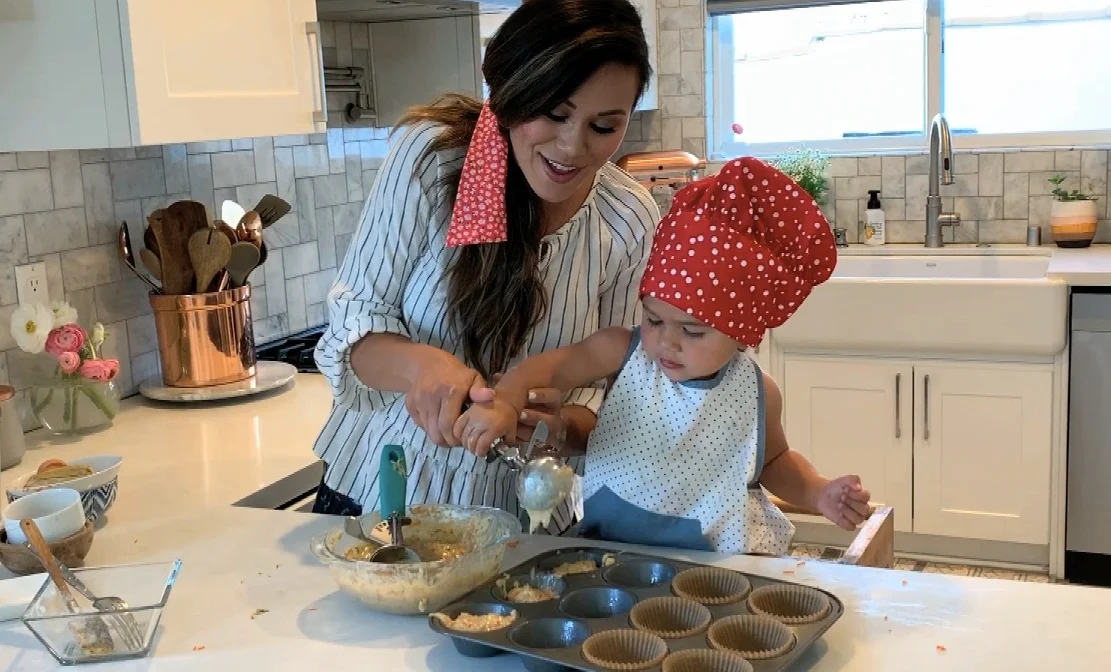
Wanted to get this recipe up really quick since so many of you have asked for it on IG! I decided to make these for Milly’s 2nd birthday breakfast and to have on hand throughout the week. Baby #2 will be here any day now and you can never have enough snacks around for a growing toddler!

I came up with this idea because I wanted to make something super easy for her and we always have both of these on hand. We keep blueberries in our refrigerator (fridge & freezer) all the time. And then Mr. A eats a banana every morning with almond butter and often we end up with over ripe bananas that we usually toss in the freezer for weekly smoothies. This time though, I looked at those brown bananas and decided to put them in some Milly muffins. Excuse the basic post on this one. I haven’t had time to take gorgeous photos of these but they are delicious in every way! Don’t forget to post pics anytime you use a recipe and tag me. I love to see them! xo, Brandi

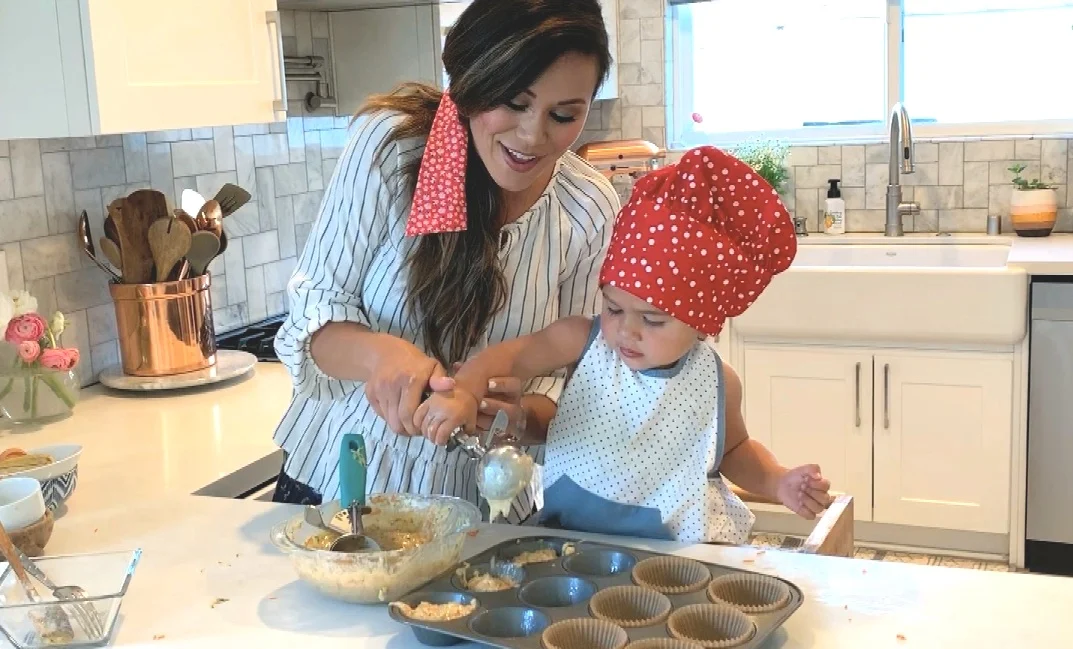
Use a cookie or ice cream scoop to make even sized muffins

Use a cookie or ice cream scoop to make even sized muffins

Blueberry Banana Maple Muffins

by Brandi Milloy

(Makes about 16 muffins)

Ingredients

  • 1/2 cup unsalted butter, room temperature

  • 2/3 cups maple syrup (can always use granulated sugar instead)

  • 1 large egg, room temperature

  • 2 small ripe bananas, mashed

  • 1/3 cup milk

  • 1 tsp. almond extract

  • 2 cups all-purpose flour

  • 1 1/2 tsp. baking powder

  • 1 tsp. baking soda

  • sprinkle of salt

  • 2 cups blueberries (I used frozen-see below for a tip-keep blueberries in freezer until adding to batter but you can also use fresh blueberries if you have them on hand)

  • brown sugar or turbinado sugar, for topping

Directions

  1. Preheat oven to 350F and line muffin tin with cupcake liners.

  2. Into a bowl using an electric mixer, cream together the butter and maple syrup. Add egg, banana, milk and almond extract and keep mixing.

  3. In a separate bowl, whisk together flour, baking powder, baking soda and salt. If you are using fresh blueberries add the flour mixture to the banana mixture and mix just until combined. If you are using frozen blueberries, add 3/4 of the flour mixture to the banana mixture and mix. Then add your frozen blueberries to the remaining flour mixture and toss. This will keep the frozen blueberries from sinking to the bottom of the muffins.

  4. Scoop batter into muffin tins until they’re about 3/4 of the way full and top with a generous sprinkle of brown sugar or turbinado sugar.

  5. Bake for about 25 minutes or until a toothpick inserted into the center of the muffin comes out clean. Cool on wire rack.

Three Ingredient Donuts
donut+cake4.jpg
donut cake2.jpg

When Home & Family invited me on the show to share something special for #NationalDonutDay I knew exactly what I wanted to make! These three ingredient donuts are so easy they will blow your mind. Essentially being only 1 ingredient made with biscuit dough, you can transform these donuts into your favorite glazed, cinnamon sugar or jelly donut! For something extra special, stack your donuts on a tiered cake stand and add a few sugar pearls and edible gold to make a donut cake! You can watch my segment on the show here and then scroll down for the full recipe!

donut cake3.jpg

Three Ingredient Donuts

By Brandi Milloy

Ingredients:

3 packages of biscuit dough (like Pillsbury)

6 cups powdered sugar 

3/4 cup half & half 

3 teaspoons vanilla extract 

2 cups granulated sugar 

3 tablespoons cinnamon 

Vegetable oil, for frying

Edible flowers, for garnish 

Gold leaf, for garnish 

Directions

To make the donuts:

1. Fill heavy bottomed pot (at least 2 quart) with oil, about 3” high and heat over medium heat until 350F. 

2.  Open container and separate each biscuit. Using a small 1” cookie cutter, cut hole in center of each biscuit. 

3. Fry the dough in hot oil for 60-90 seconds on each side until golden brown and cooked through. Drain on paper towel lined baking sheet allowing them to cool. Repeat until you’ve fried all of your donuts. 

For glazed donuts:

1. Into a bowl, add powdered sugar, half and half and vanilla and mix. 

2. Drizzle or dip each donut in the glaze and allow to set. 

For cinnamon sugar donuts:

1. Into a bowl, add granulated sugar and cinnamon and mix. 

2. Dip each donut in the cinnamon sugar mixture. 

To assemble donut cake: 

Arrange donuts on cake stand, filling the stand completely to make the first layer. Begin to lay the rest of the donuts on top between each of the first layer to create a sacked cake. Repeat until you’ve created your donut cake! Alternatively, you can also stack three cake stands and fill each with your donuts. Once you’ve created your cake, garnish with edible flowers and edible gold leaf. 

Mini Blueberry Hand Pies

This post is sponsored by the U.S. Highbush Blueberry Council

6D4A8694.jpg

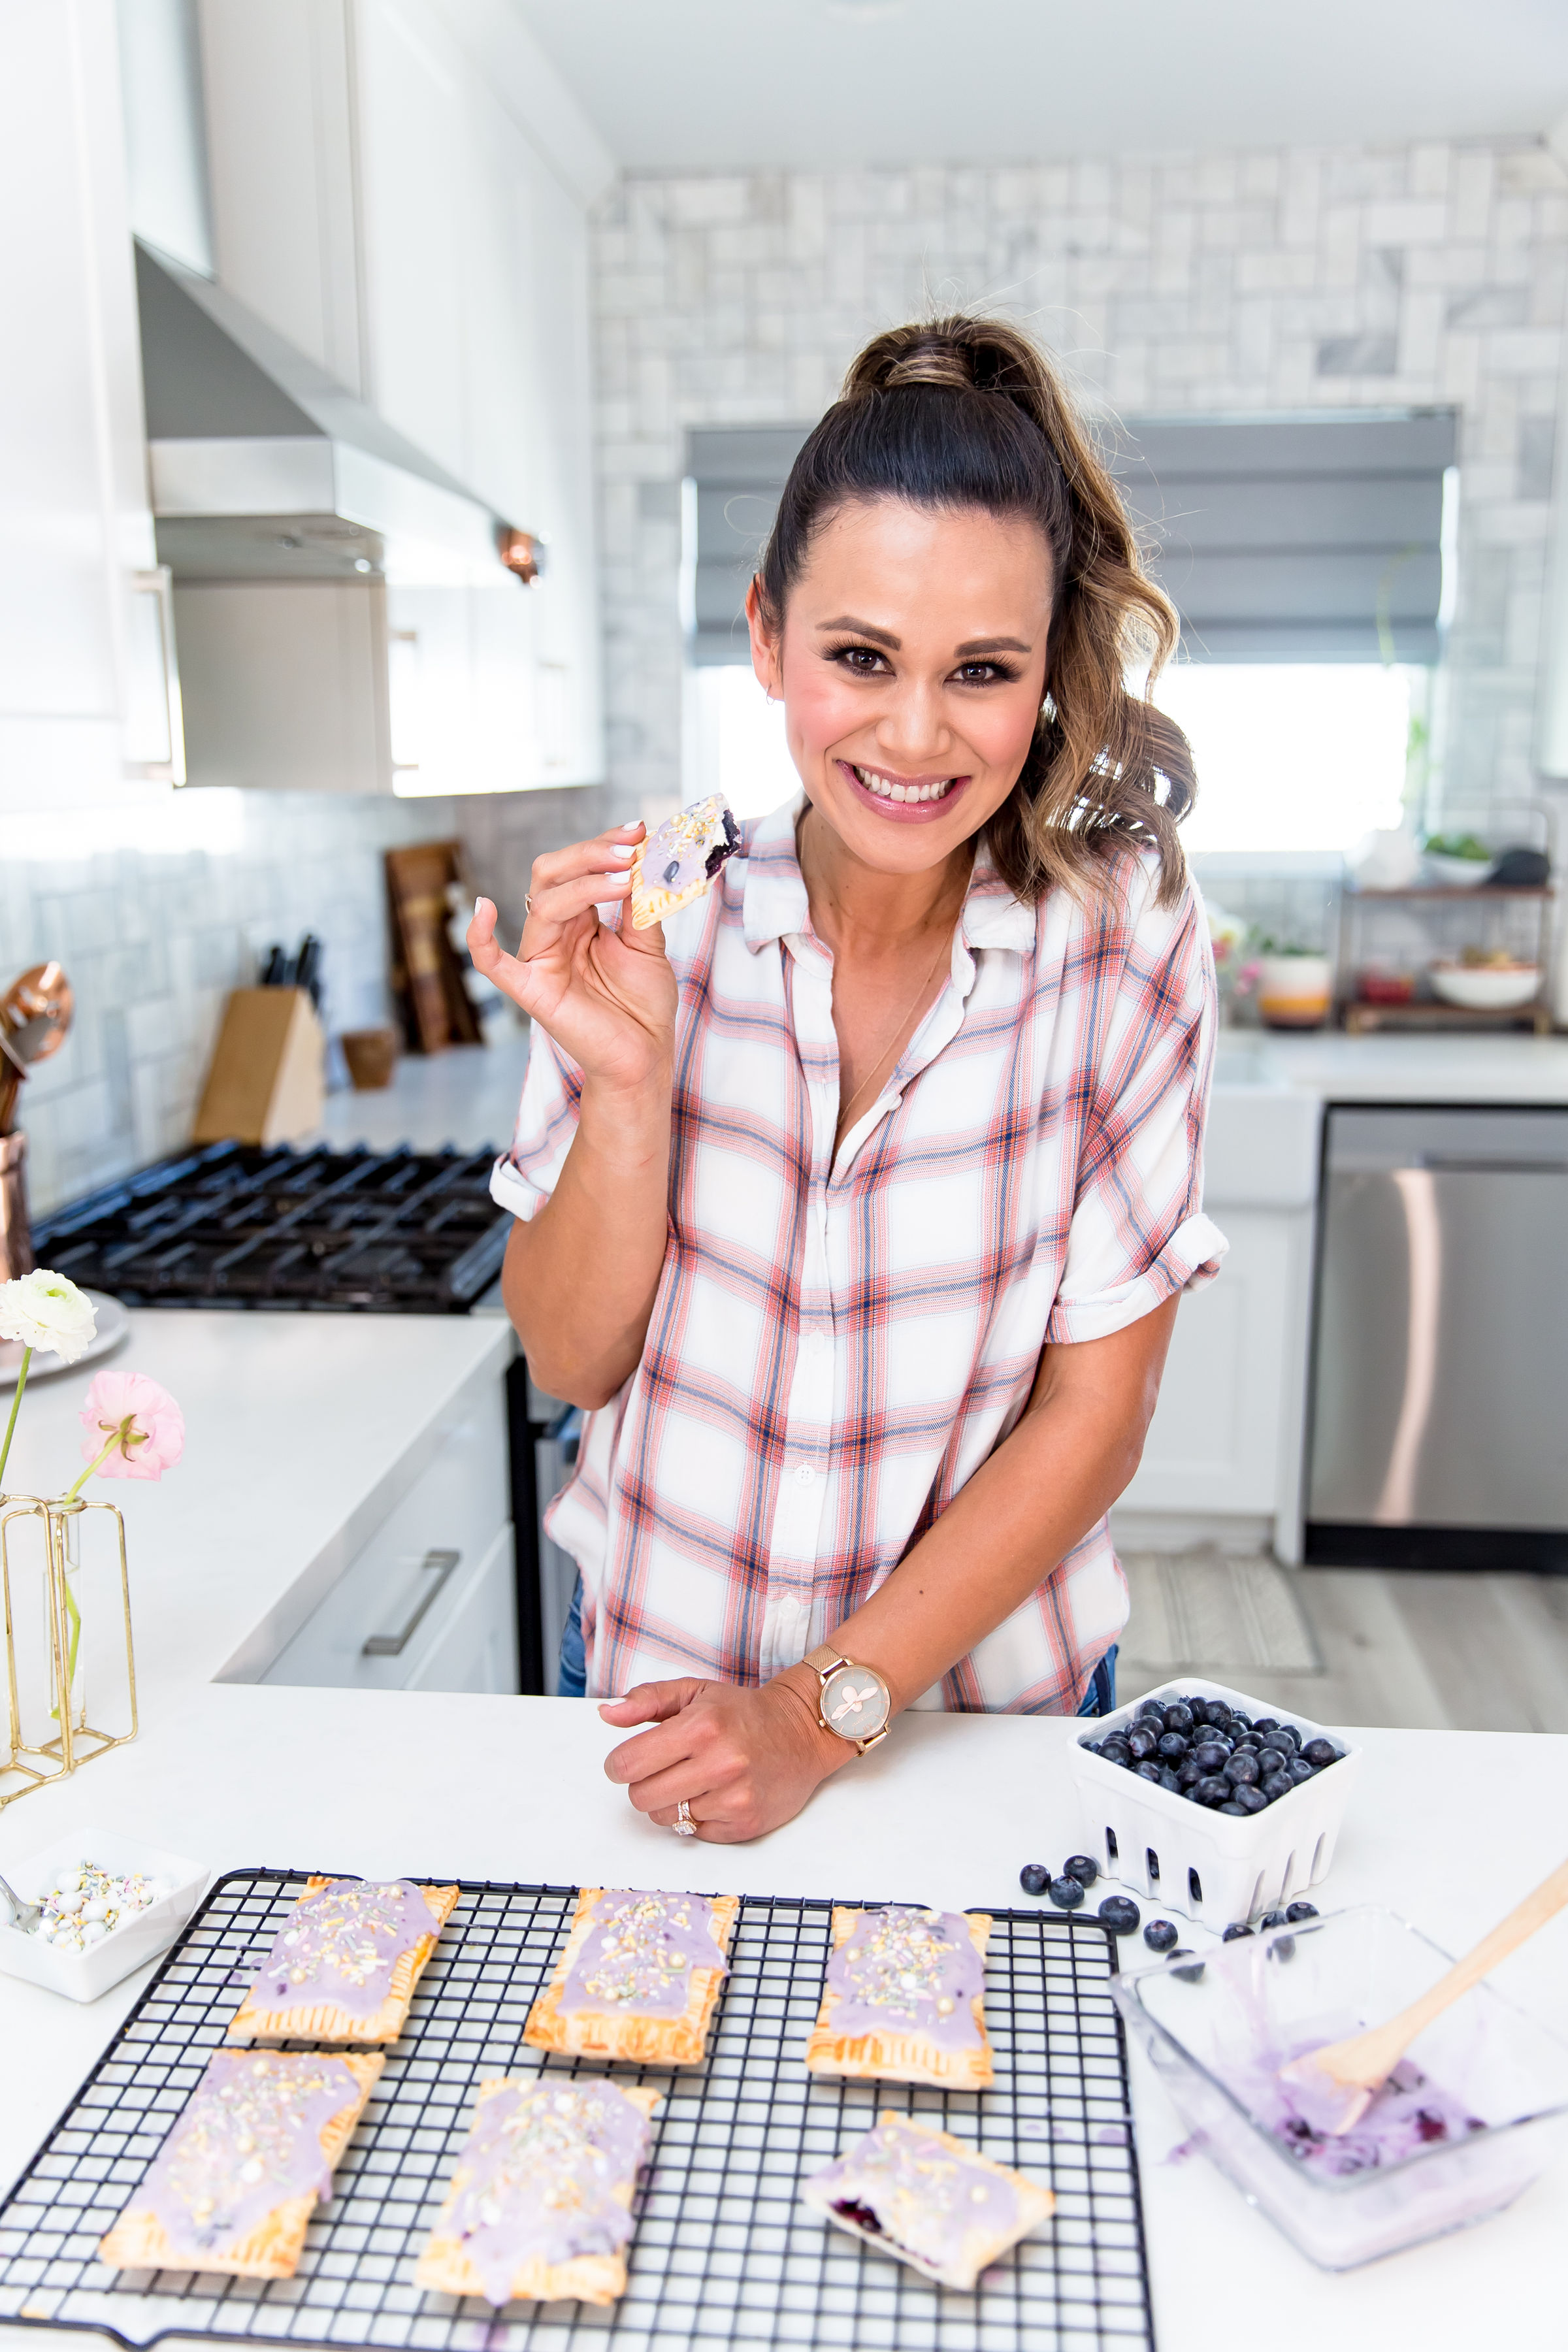
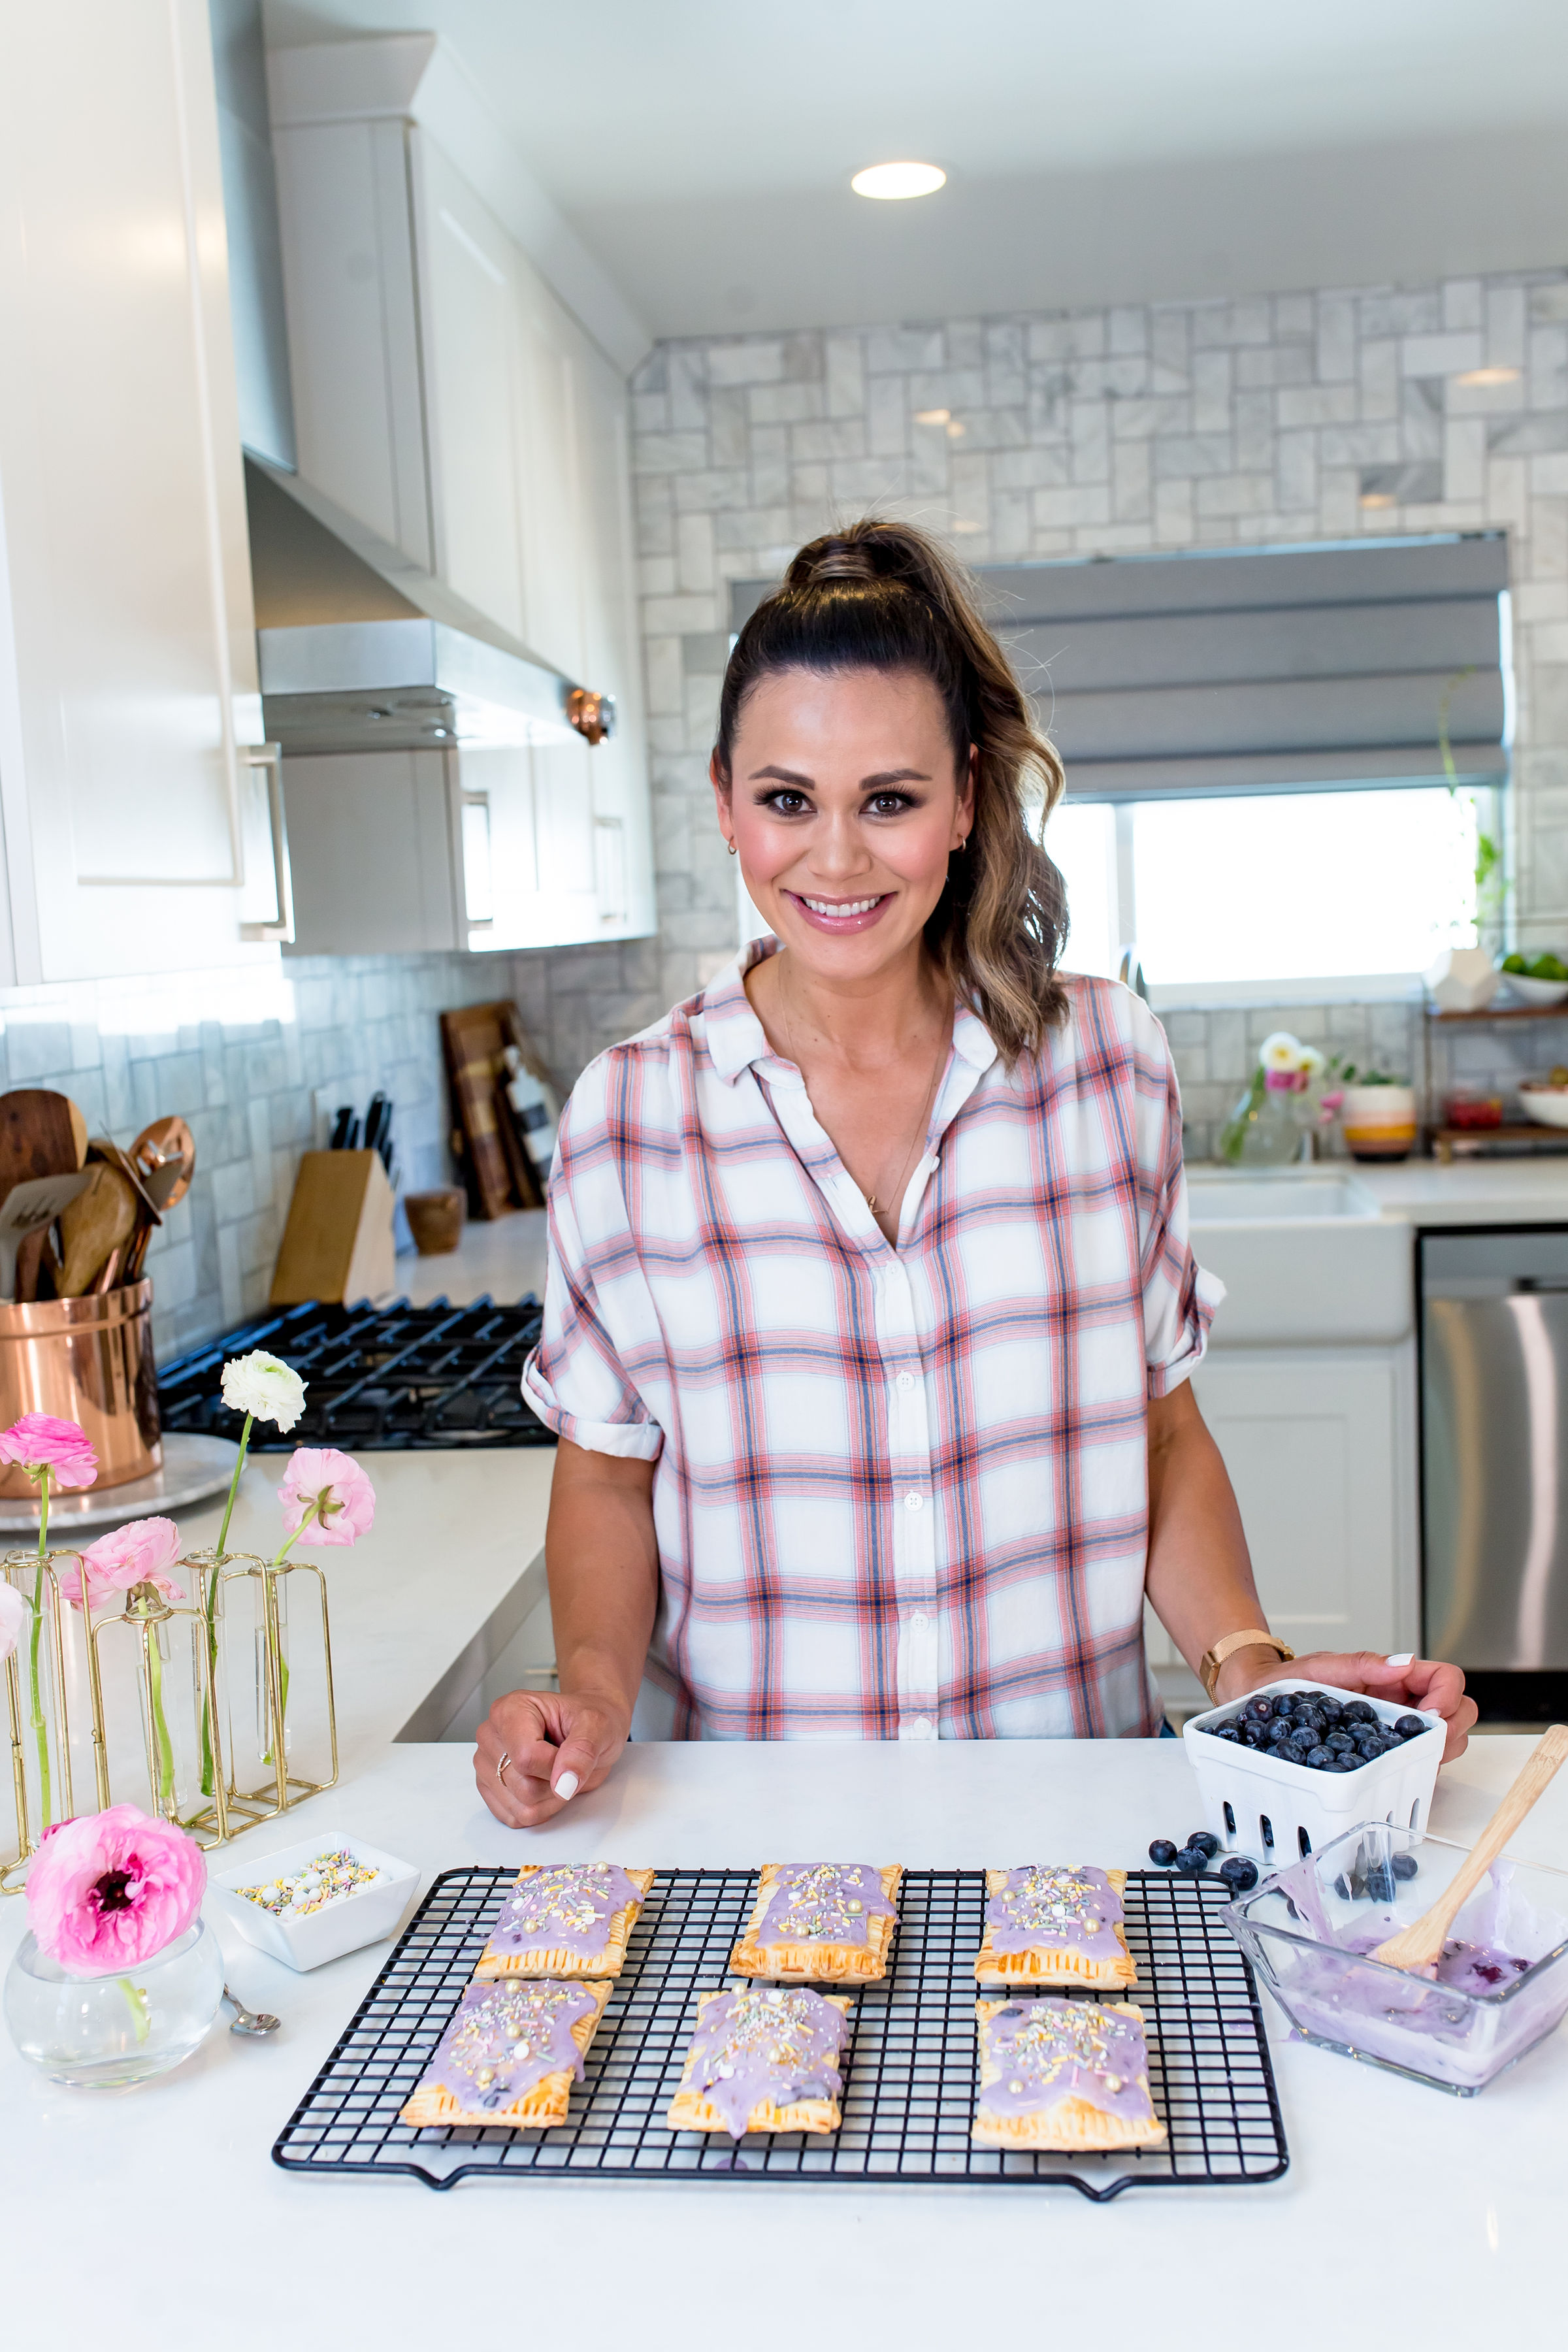
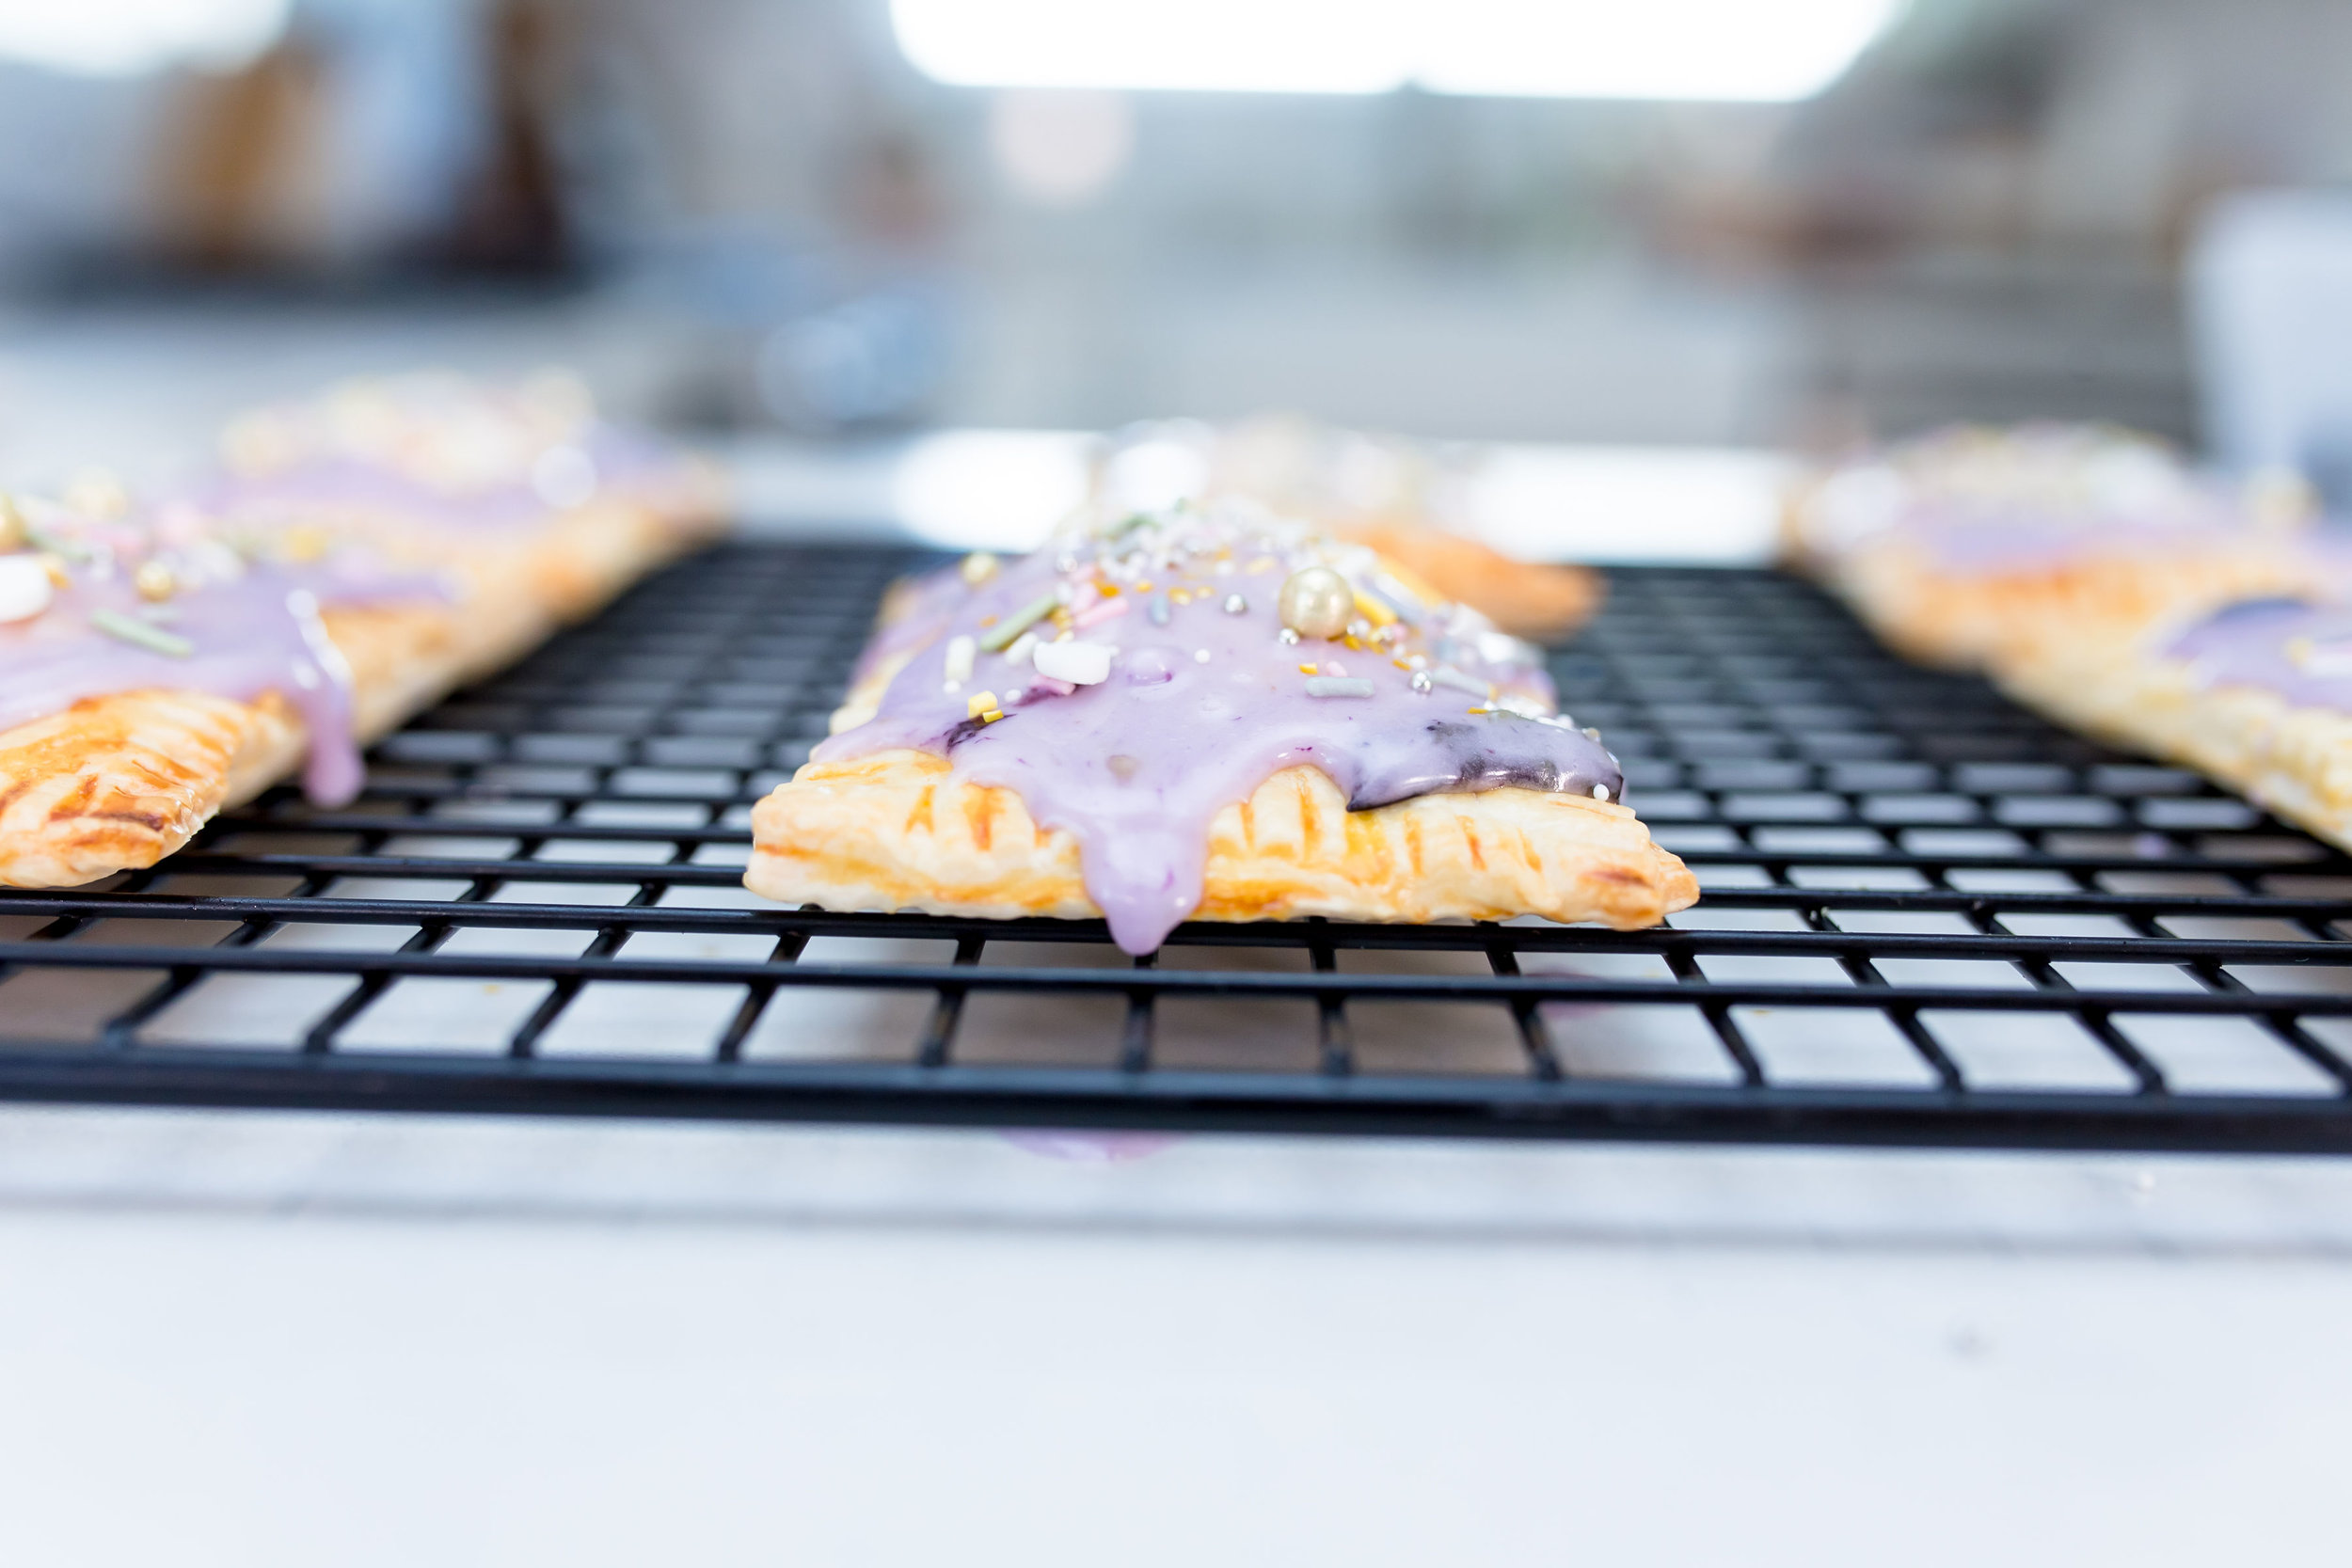
These are one of my favorite anytime treats and are way better than the toaster pastry in the box that you ate when you were 10. Bursting with bluetiful blueberry flavor, these are straight up sublime!

6D4A8630.jpg

Super simple to make and made with three ingredients (store bought pie crust, homemade blueberry jam and glaze), I find myself whipping these up during the week for a sweet treat.

6D4A8588.jpg

Filled with delicious blueberry jam and topped with sweet glaze and sprinkles, they are almost too pretty to eat! Check out my latest episode on IGTV where i show you how to make these and then scroll down for the full recipe!

6D4A8627.jpg
6D4A8654.jpg
6D4A8675.jpg
6D4A8696.jpg

BLUEBERRY HAND PIE RECIPE

by BRANDI MILLOY

INGREDIENTS

  • BLUEBERRY JAM

    • 4 heaping cups organic blueberries, rinsed

    • 1 cup sugar

  • HAND PIES

    • 1/2 cup blueberry jam (recipe above)

    • 1 large egg

    • 2 refrigerated pie crusts

  • ICING

    • 1½ cup powdered sugar

    • 1 tablespoon heavy cream or milk

    • 1 tablespoon blueberry jam (recipe above)

    • 1 teaspoon almond extract, optional

  • Sprinkles, for garnish

DIRECTIONS

  1. For the blueberry jam:

    Place berries in a stainless steel pot and bring to a full boil, mashing the berries with a spoon. Boil for 1 minute on high heat, stirring constantly.

    Using a potato masher, break and smash blueberries. Add sugar and continue to gently boil for 3-5 minutes. Keep cooking and stirring for about 10 minutes or until thickened.

    For the hand pies:

    1. Preheat oven to 400°F. Line a baking sheet with parchment paper and set aside.

    2. Crack egg into small bowl with a teaspoon of water, whisk and set aside.

    4. Unroll pie crusts and using a pizza cutter, cut the edges off (about 1 inch off all sides to create two 9-inch squares). Then cut each square into three 3-inch wide strips. You should have 6 total.

    5. Place 1½ tablespoons of jam on the bottom end of each strip. Brush exposed piecrust with egg to glue the sides. Gently fold top part of piecrust over the jam end. Using a fork, crimp the edges together on all sides. Repeat the process with the remaining piecrust.

    6. Place hand pies on prepared baking sheet and bake for 15-18 minutes.

    For the icing:

    In a bowl, whisk together powdered sugar, heavy cream, 1 tablespoon of jam and almond extract until smooth.

    To serve:

    Drizzle icing on top of each pastry tart and garnish with sprinkles.


Grapefruit Creamsicle Popsicles

This post is sponsored by Sunkist

All photography by @Ographr

All photography by @Ographr

These popsicles are creamy, tart, sweet and so refreshing! Made with fresh squeezed Sunkist California Star Ruby Grapefruit juice and vanilla bean ice cream, they are like the older, more sophisticated sister of the orange dreamsicle. You know, the one that traveled after college and lived in Europe for a year so she could immerse herself in another culture!

6D4A9764.jpg

This grapefruit creamsicle popsicle is luxurious but also super easy to make and the best treat to serve after an evening of al fresco dining. I keep at least half a dozen on hand in the freezer for those hot summer days too. Great for grown ups and children, it’s my go to sweet for summer. I hope you enjoy this recipe as much as I do. Be sure to scroll down for the full recipe!

6D4A9278.jpg

GRAPEFRUIT CREAMSICLE POPSICLE

Makes 10 popsicles

Ingredients

  • About 2.5 cups of fresh squeezed Sunkist California Star Ruby Grapefruit juice (2-3 grapefruits)

  • 2-3 tablespoons of agave (optional)

  • About 2.5 cups of vanilla bean ice cream, softened

  • Supplies: Frozen Popsicle Molds with Sticks

Directions

  1. If you’d like your grapefruit juice sweeter, sweeten juice to taste, adding 1 tablespoon of agave at a time.

  2. Fill each popsicle vessel with about 1/4 cup of juice. Top with about 1/4 cup of ice cream.

  3. Add popsicle sticks and freeze for 4 hours or overnight.

  4. Enjoy!

6D4A9980.jpg
Milly's Zucchini Carrot Banana Muffins

Anytime I post these muffins on IG, I get dozens of comments asking for the recipe. I finally wrote it up and even shot a video with Milly making them!!! Still need to take pics but it’s on my list of things to do!

These are my go to homemade snacks for Milly. She loves them and as I’ve said before, I never give Milly food I don’t love too. These muffins are slightly sweet, packed with veggies, whole wheat and I did a few healthier swaps too (no refined sugar). One batch makes 12 standard muffins or 24 mini muffins. I usually double the batch and freeze half for those weeks when I open the fridge or pantry and feel like there’s nothing to eat between meals. They are great for on the go. Anytime we travel, you can find these in our bag! If you like zucchini/banana bread and carrot cake you’ll love them too!

Screen Shot 2019-05-14 at 11.14.20 PM.png

Last fall I swapped out carrots for pumpkin puree because I had some leftover in a can already. So instead of adding 1/2 cup of carrots, just add 1/2 cup of pumpkin. I know there are many of you reading this right now thinking “Blasphemy! You can’t have pumpkin if it’s not fall!” and I actually agree with you LOL but from what I know about all you PSL Basic B’s out there, you’re already imagining it so I’m giving you permission. Do it! This photo is from last year when I did just that! Scroll down for the full recipe and then tag me on IG when you make these!

6D4A0924.jpg

Zucchini Carrot Banana Muffins

By Brandi Milloy

Ingredients

  • 1 large egg

  • 2 tablespoons butter, unsalted and at room temperature

  • 1 cup zucchini, finely grated and patted dry (about 2 small zucchini)

  • 1/2 cup carrots, finely grated

  • 1 ripe banana, mashed

  • 1/2 cup applesauce

  • 1/2 cup pure maple syrup (you can also use honey or agave)

  • 1 cup whole wheat flour (we use white whole wheat flour) or all purpose flour is fine!

  • 1/2 teaspoon cinnamon

  • 1/2 teaspoon nutmeg

  • 1 teaspoon baking soda

  • 1/4 teaspoon salt

Directions

  1. Preheat oven to 350F. Place cupcake liners in muffin tin.

  2. Into a bowl, mix your wet ingredients (egg, butter, zucchini, carrots, banana, applesauce, syrup). Into another bowl, mix your dry ingredients (flour, cinnamon, nutmeg, baking soda, salt).

  3. Combine wet and dry ingredients and mix.

  4. Using an ice cream scoop, fill each tin about 3/4 full.

  5. Bake for 18-20 minutes or until muffins rise and bounce to the touch.

Screen+Shot+2019-05-14+at+11.18.36+PM.jpg
Sunkist Cara Cara Navel Orange Yogurt Donuts

This post is sponsored by Sunkist

Photography Credit: @Ographr

Photography Credit: @Ographr

These donuts are the sweet secret weapon you are going to want to add to your recipe arsenal.  Using only 5 ingredients you probably already have on hand, it’s the perfect treat to whip up any time of the day. And if you're as obsessed with Pantone's Color of the Year: Living Coral as I am, you'll love my trick to getting the perfect shade of glaze. I mean, even if you just want to make these for the insta-likes, you might as well, but the flavor of these donuts are bursting with bright citrus from the Sunkist Cara Cara Navel oranges. And because they’re baked instead of fried like traditional donuts, they are super light and fluffy but every bit delicious so let’s get started!

6D4A8883.jpg

Here’s what you need: pancake mix, sugar, freshly squeezed Sunkist Cara Cara Navel orange juice, yogurt, and eggs.

6D4A8791.jpg

(Your eggs don’t need to be blue or brown but I couldn’t help it because they’re so pretty!)

Preheat your oven to 355°F and then into a bowl, mix all of the ingredients until the batter is nice and smooth.

6D4A8916.jpg
6D4A8912.jpg

That’s it. Really. You toss 5 ingredients into one dish, give it a mix, and now we’re ready to pour the batter into our donut pan.

6D4A8927.jpg

A quick tip to getting the filling in the donut pan easily is to create a homemade piping bag. Just place a gallon size plastic bag in a jar and pour the batter into the bag, snip one of the corners and fill each well evenly.

6D4A8937.jpg

Tap the bottom of the pan to release any air bubbles and then bake for 15-18 minutes or until golden brown and baked through.

6D4A8949.jpg

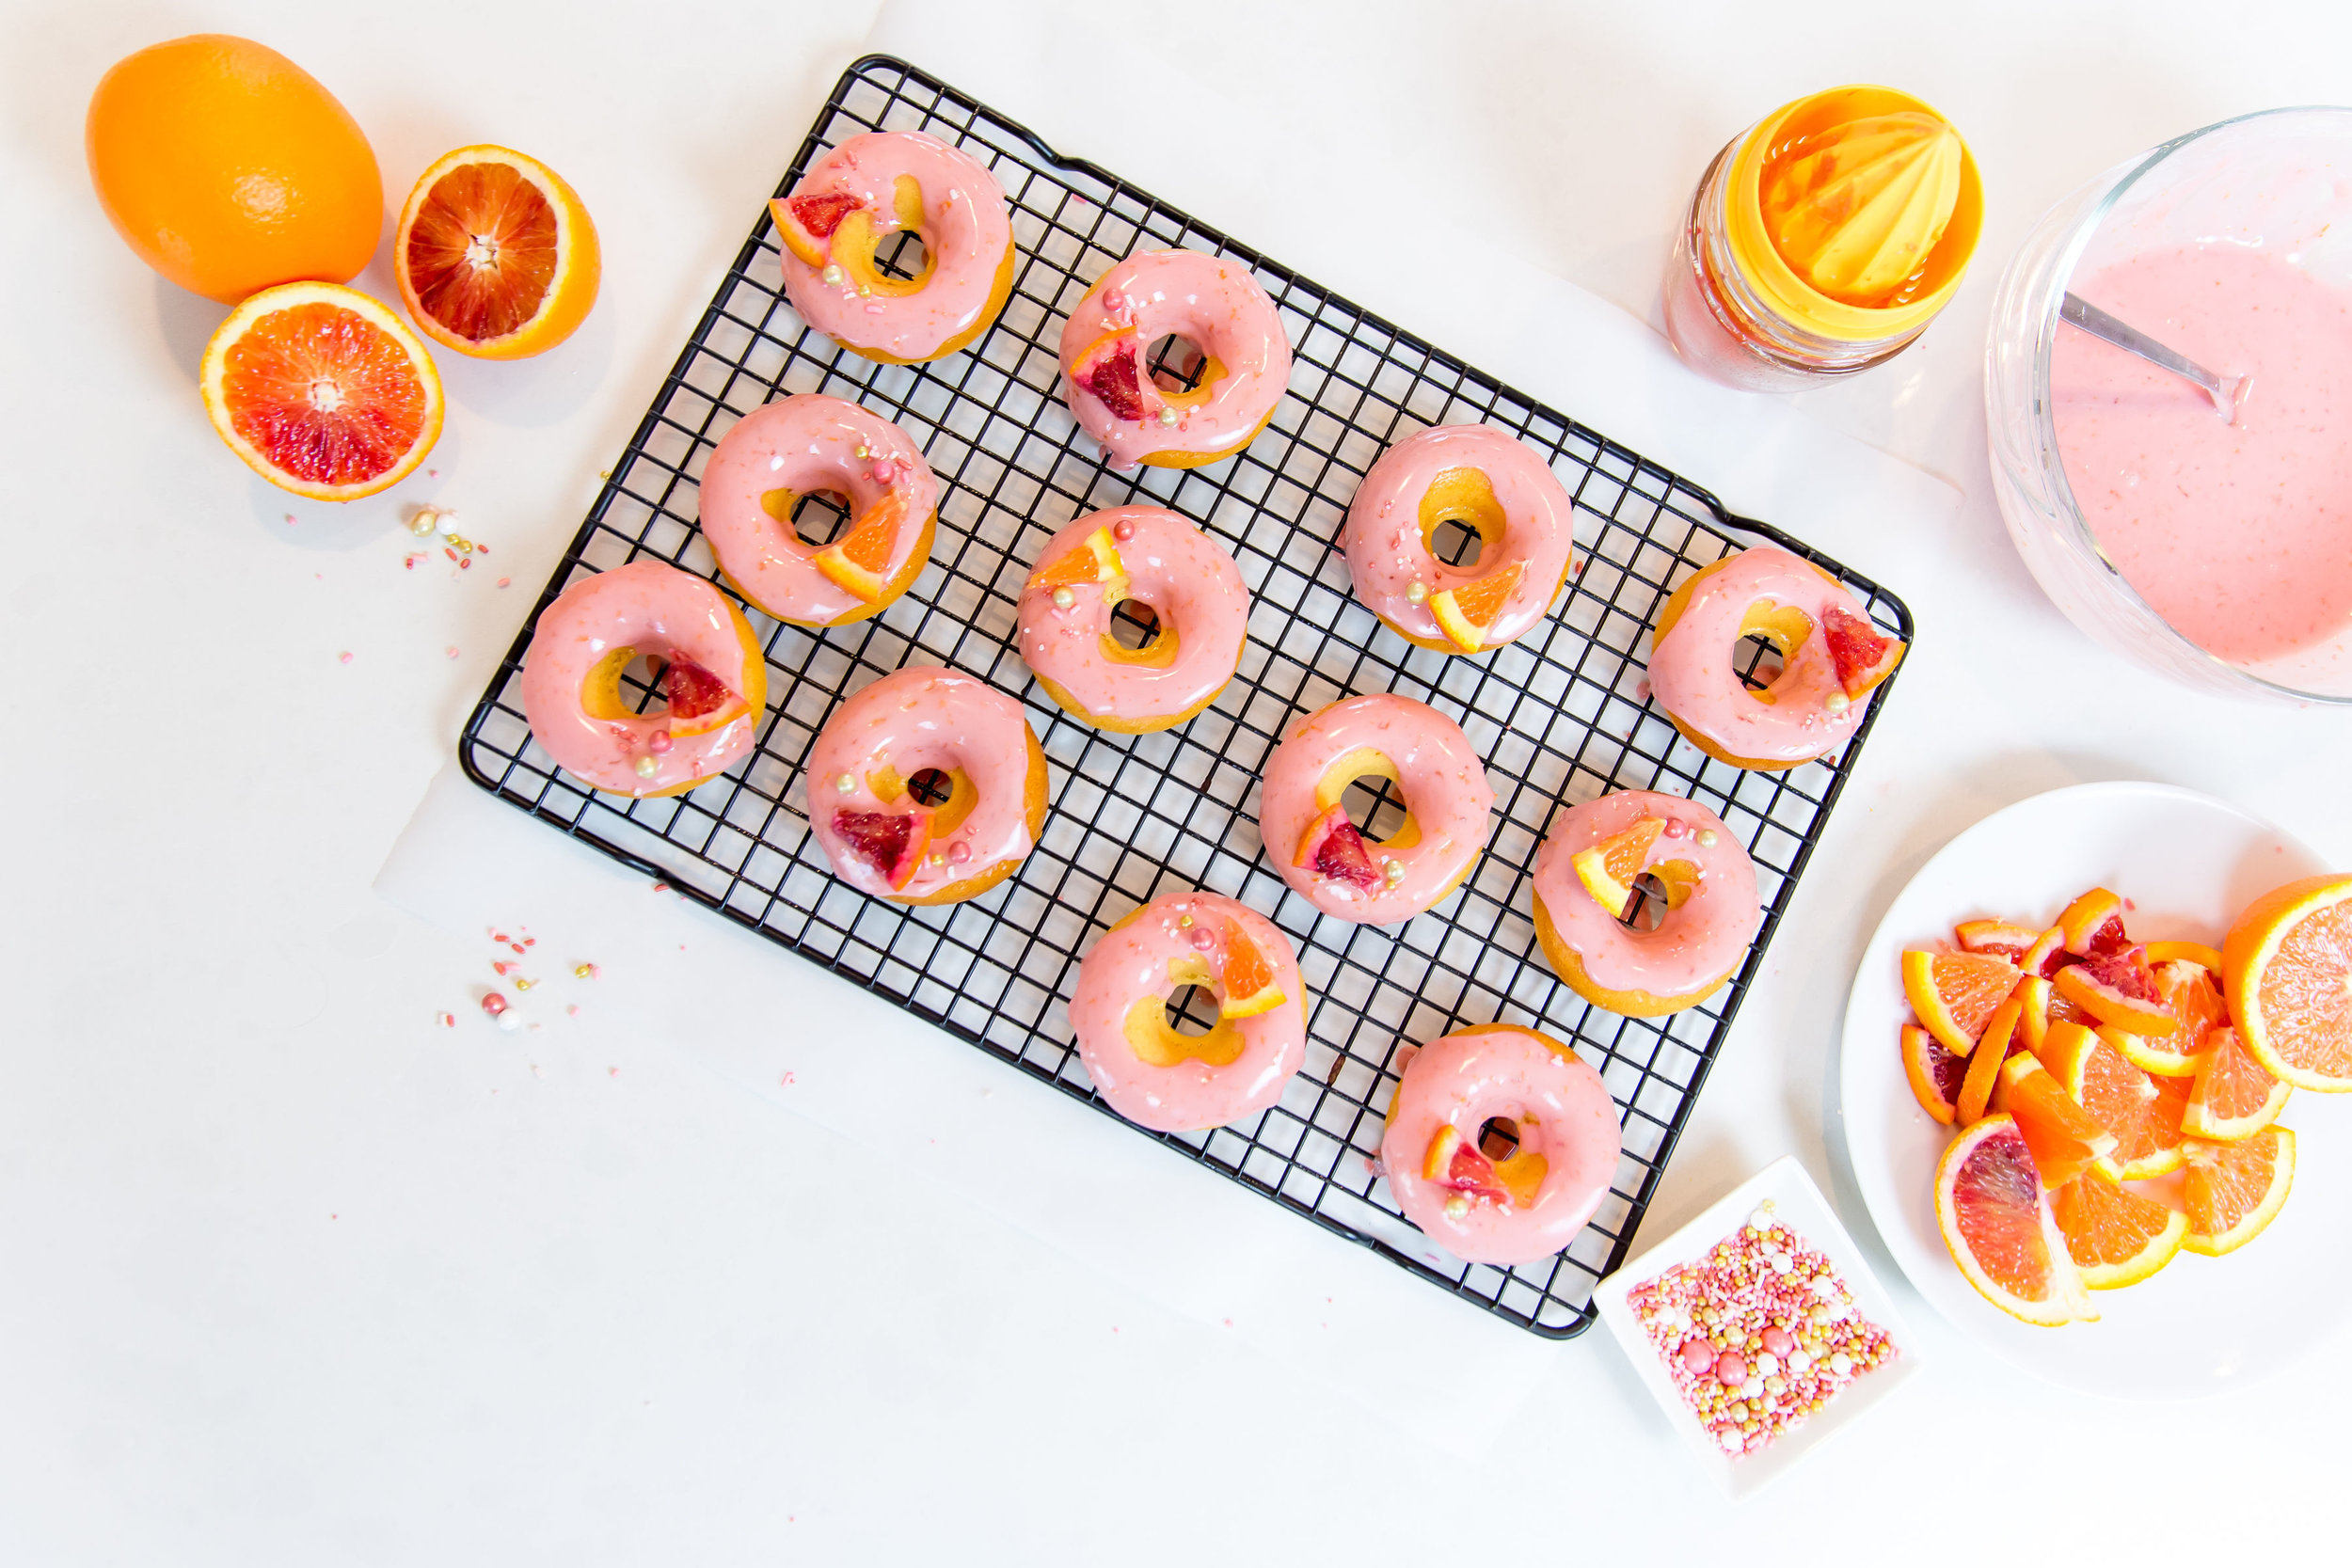
Once the donuts are baked, place them on a wire rack to cool and then make your glaze. It’s just powdered sugar and some freshly squeezed Sunkist blood orange juice. Depending on how bold the color is of your blood orange will determine the color of your glaze. I love how mine ended up having this muted maroon shade! So pretty!

6D4A8986.jpg

To frost the donuts, you can drizzle the glaze on top or spread some glaze around the top of the donut and let the excess fall. I love this “Homer Simpson” style look! If you’d like to add a garnish, do so while the glaze is still wet. I added a few sprinkles and a small segment of citrus on top of each!

6D4A9070.jpg
6D4A9051.jpg
6D4A9079.jpg

I mean, if you haven’t already paused scrolling to check your pantry to make sure you have everything to make these….

Oh and by the way I should mention that Sunkist Cara Cara Navel oranges are available December through May so you can make these all season long! I’d love to see your photos of these donuts and how you gave them your own special touch so post your photos on Instagram and tag me @BrandiMilloy! Also, to watch the full video of me making these just go to my IGTV Channel! Then scroll down for the full recipe, I donut mind at all! :) And for more delicious recipes visit Sunkist.com/recipes

6D4A9111.jpg
6D4A9140.jpg
6D4A9146.jpg

Sunkist Cara Cara Navel Orange Yogurt Donuts

PREPARATION: 10 minutes

COOKING: 15 minutes

INGREDIENTS

  • 1 1/4 cups pancake mix

  • 1/3 cup granulated sugar

  • 1/8 cup Sunkist Cara Cara Navel orange juice, freshly squeezed

  • 1/2 cup plain yogurt

  • 2 eggs, large

  • 2 cups powdered sugar

  • Zest from 2 Sunkist blood oranges

  • 1/4 cup freshly squeezed Sunkist Blood orange juice

  • Sprinkles, optional (these are the vintage rose gold sprinkles I used)

DIRECTIONS

  1. Preheat oven to 355°F.

  2. In a large bowl, combine the pancake mix and sugar. Add in the orange juice, yogurt and eggs.

  3. Stir well to combine. Batter should be smooth, but do not over-mix. Divide the batter evenly among the donut ring molds (a few tablespoons, depending on the size of the ring mold).

  4. Bake in preheated oven for 15-18 minutes. (Cooking times will vary depending on your oven. Start checking at the 12 minute mark.) Donuts should be golden brown and dry to the touch.

  5. Remove from the oven, and allow donuts to cool completely in the ring molds. 

  6. Meanwhile, make glaze by mixing powdered sugar, zest and juice. If glaze is too thick, add 1/2 tablespoon of juice at a time until desired consistency. Frost donuts and garnish with sprinkles if desired.

    Note:
    • A donut pan is required for this recipe.
    • Before removing from the oven, test donuts with toothpick to ensure they are cooked through.


Grilled Strawberries & Brie
IMG_7384.JPG

This is one of those dishes where no one knows what to expect and then they give it a try and they are totally coming back for more. I made this recipe on my show, Let’s Eat! on Food Network and my co-hosts were totally surprised too. Maybe you’ve seen raspberry jam paired with brie but strawberries? They aren’t even the star of the show, really. I think the fresh thyme is really what pulls this dish together and grabs you. But who am I to tell you who the star is. Make it for yourself and then let me know what you think. I’d love it if you even posted your photo on instagram and tagged me @BrandiMilloy with the hashtag #BrandisBites

xo,

B

Grilled Strawberries & Brie

by Brandi Milloy

Ingredients

  • One 8.8-ounce wheel Brie

  • 2 tablespoons peanut oil

  • 8 ounces strawberries, hulled and sliced in half lengthwise

  • 1/4 cup packed light brown sugar

  • 3 sprigs fresh thyme

  • Pinch fleur de sel

  • Pinch red pepper flakes

  • Crackers, for serving

    Directions

  1. Preheat a grill or grill pan to medium-high heat. Brush the Brie with some of the oil. Grill until softened and grill marks appear, 3 to 4 minutes per side. Carefully transfer to a serving platter or board.

  2. Toss the strawberries in the brown sugar in a bowl until coated. Brush the grill with the remaining oil and add the strawberries cut-side down. Grill until the sugar is caramelized and the strawberries are tender, 1 to 2 minutes per side.

  3. Arrange the strawberries around and on top of the Brie. Garnish with the thyme and sprinkle with the fleur de sel and red pepper flakes. Serve warm with crackers.

Optional: Try a drizzle of balsamic glaze for a decadent touch.

Baked Brie & Blueberry Wreath

This post was made possible by the U.S. Highbush Blueberry Council. Thank you for your support!

6D4A9813.jpg

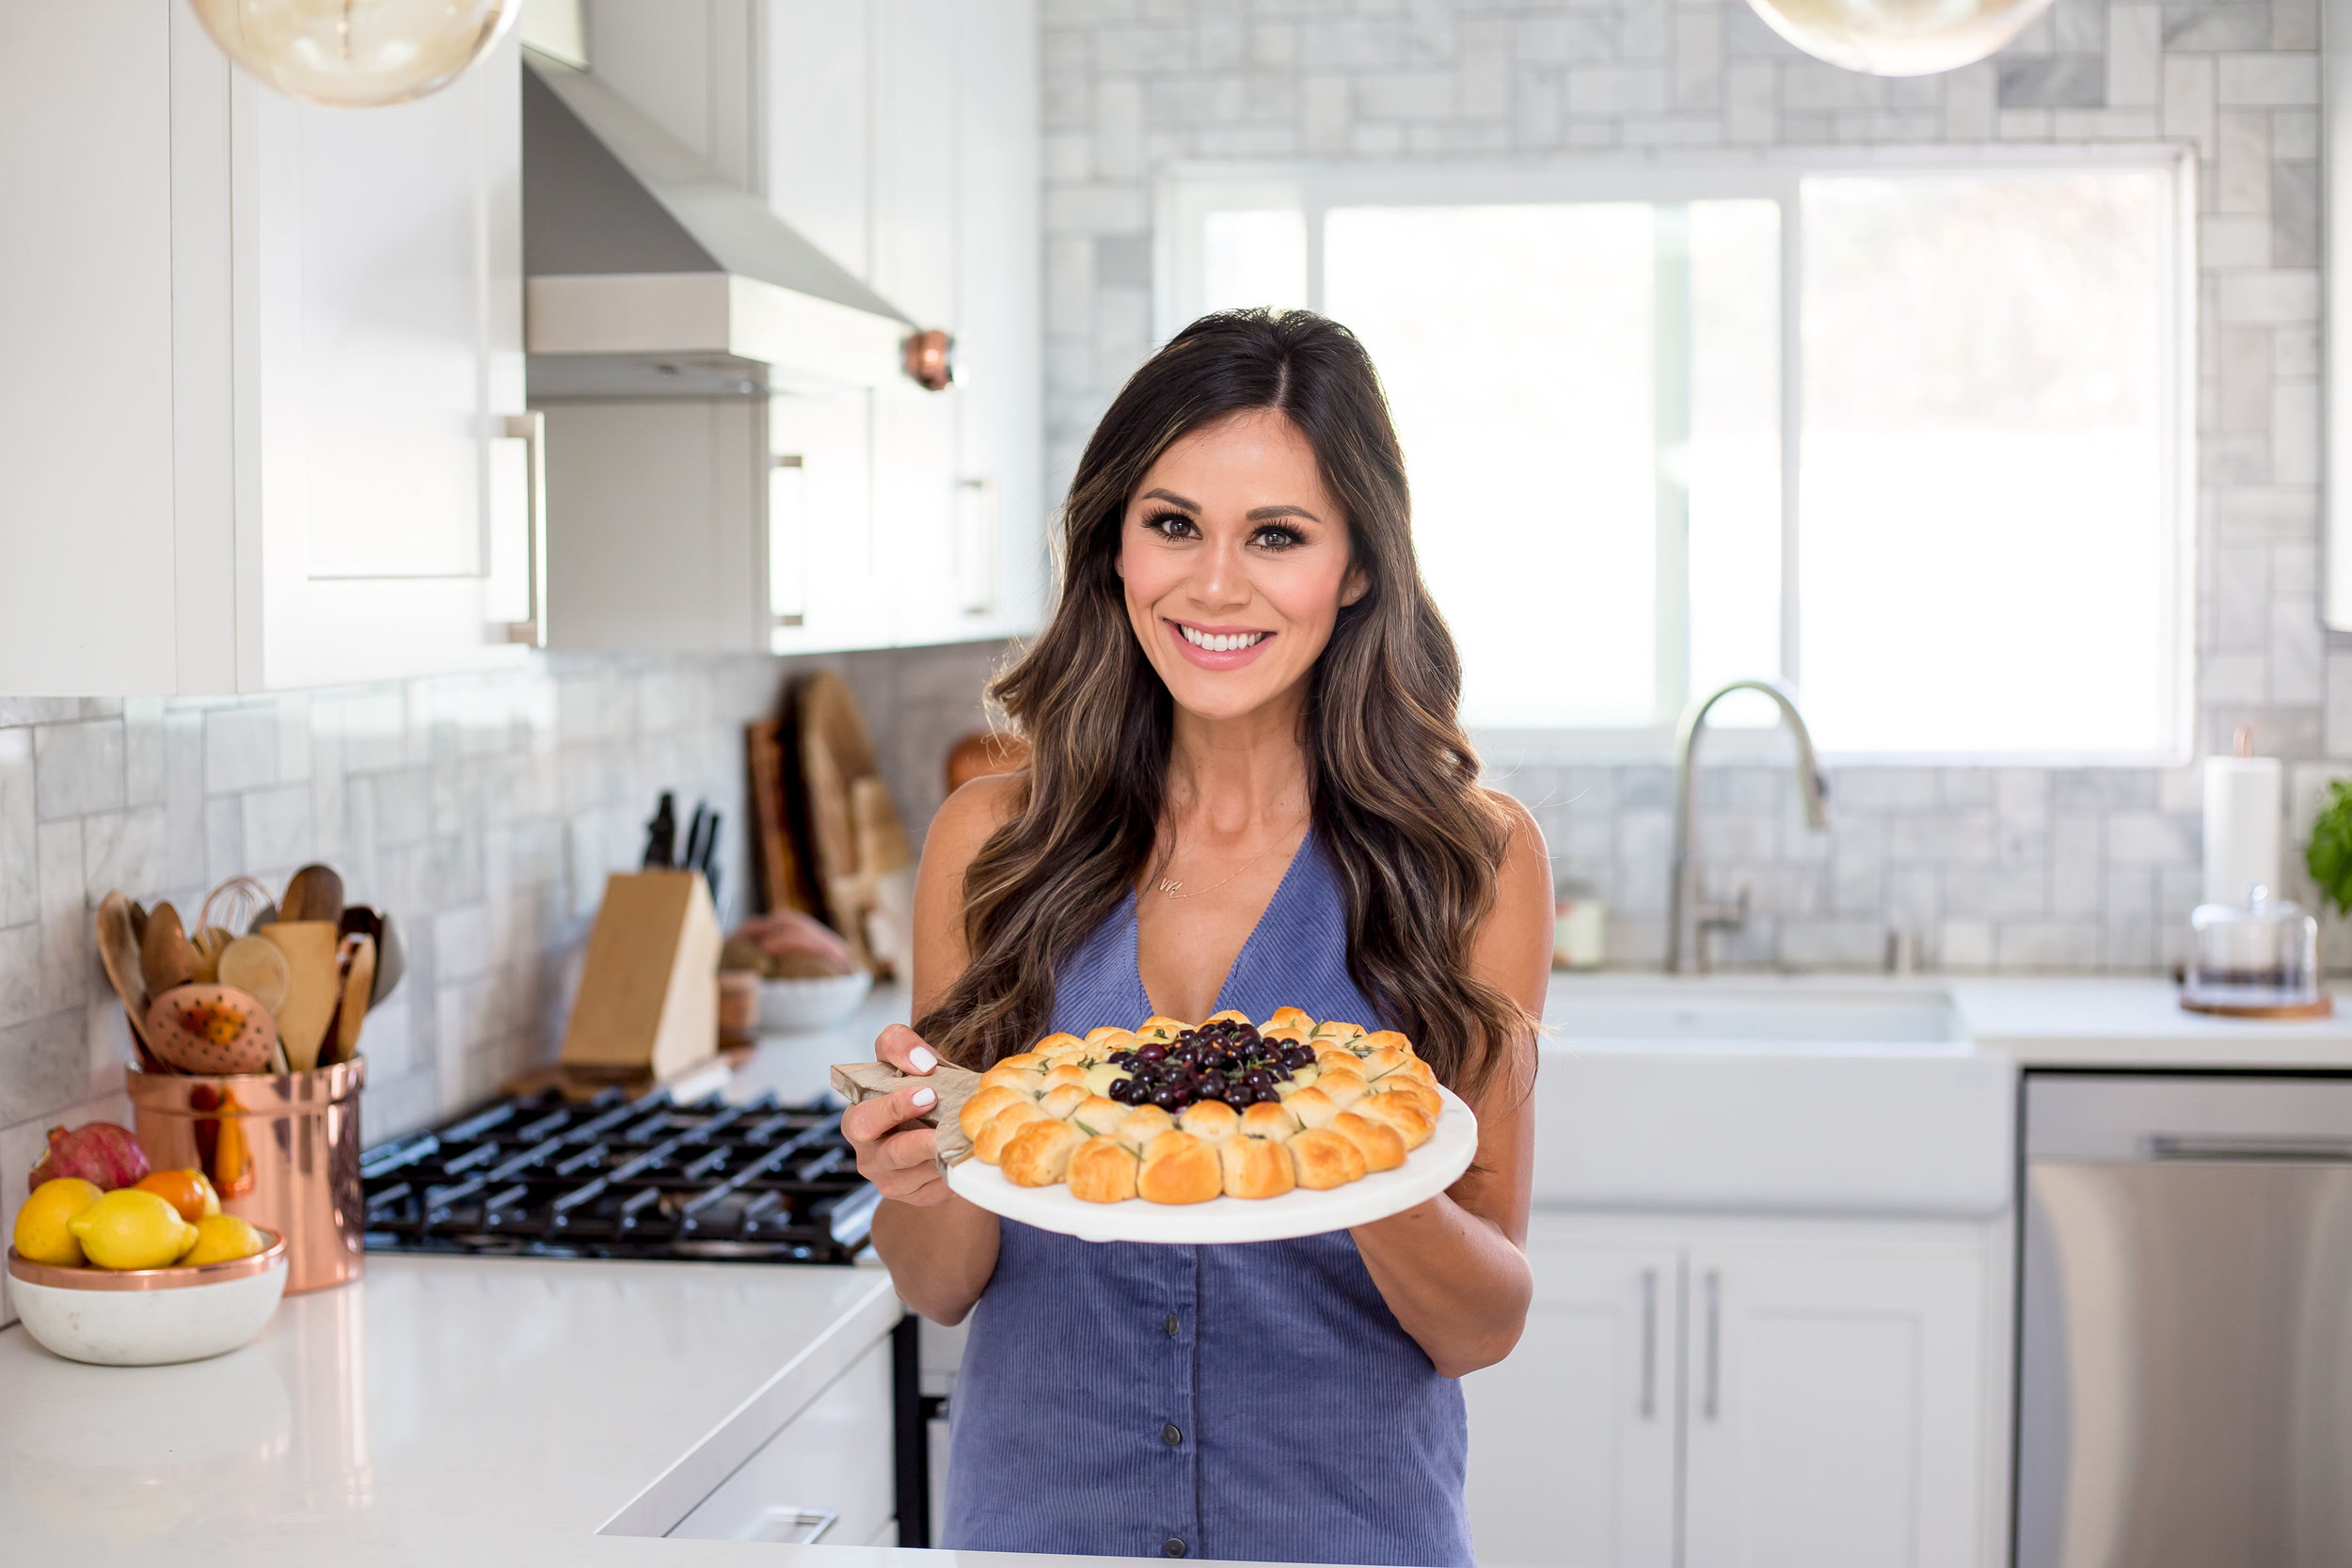
This is one of my go to appetizers anytime of the year but especially around the holidays. Who doesn’t love gooey cheese and warm bread? Topped with blueberries bursting with flavor and seasoned with thyme, rosemary and a little red pepper flakes, it’s the perfect balance of fruit to cheese to bread.
6D4A9843.jpg

I’m telling you right now you should pick up double ingredients and make two of them. They go quick. And if you’re like me you probably have most of the ingredients on hand. I keep blueberries by the boxful around here and always have a can or two of refrigerated biscuit dough.

6D4A9831.jpg

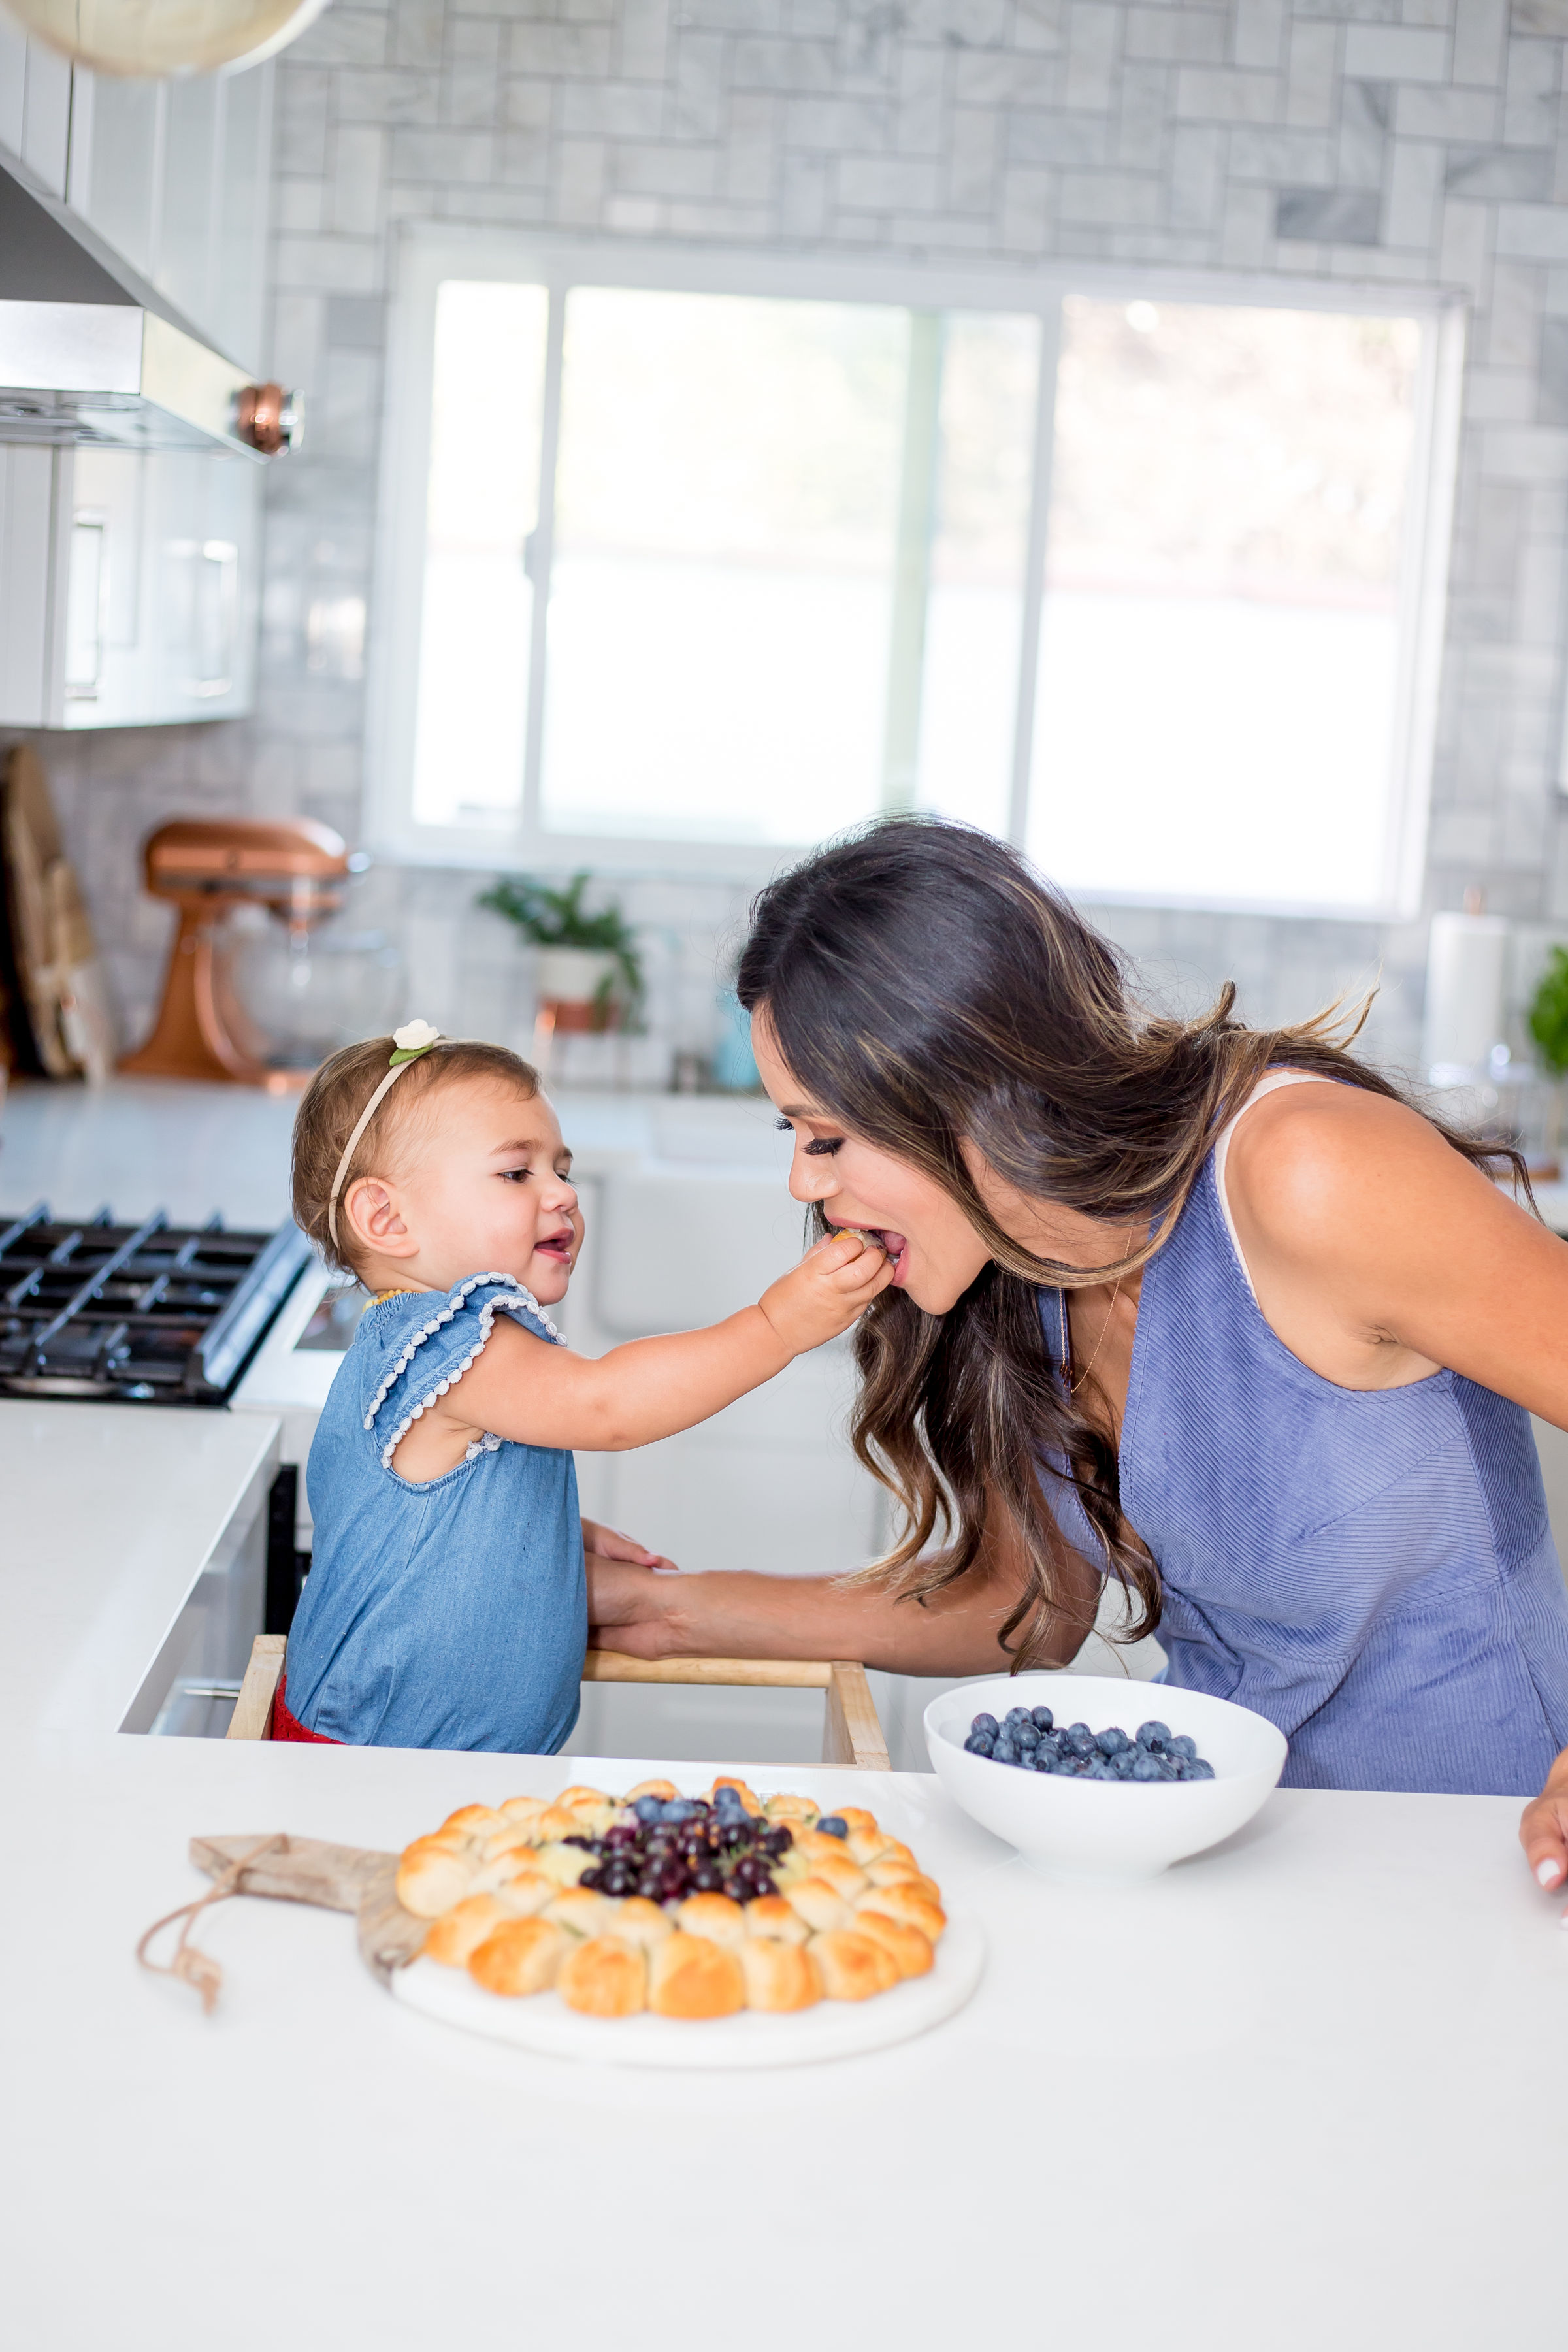
I usually have a bundle of fresh herbs in the fridge (it goes a long way!) or I’ll sometimes forage them around my hood. Ha! This is actually my third attempt at an herb garden but technically it’s not my fault they all died because I was over watering them cause I didn’t know Mr. A was also watering them and then this one time my basil just fried in the sun. It was sad. I don’t know what happened but that’s neither here nor there. And……. I should stop right now because you’re probably not even reading this anymore which is totally fine. Make this right now. You won’t regret it! And if it changes your life like I know it will, send me a shoutout on the gram! I love when you remake my recipes. Means the world. Hope you enjoy! Oh yeah and one more thing. Scroll down for the recipe and pics of Milly helping me with the final touches! She’s the yummiest!
6D4A0023.jpg

Baked Brie & Blueberry Wreath

by Brandi Milloy

  • 1 (8-ounce) round Brie or Camembert cheese

  • 1 (16.3-ounce) tube of biscuit dough like Pillsbury Grands!

  • 3/4 cup frozen blueberries or 1 (6-ounce) basket of blueberries

  • 1/4 teaspoon red chili flakes

  • 1/4 teaspoon rosemary, minced

  • 1/4 teaspoon thyme leaves

  • 1/2 teaspoon flaked sea salt like Fleur de Sel

Directions

  1. Preheat oven to 350°F and cover preferably a pizza stone (because it cooks evenly and provides a crispy bottom) or a baking sheet with parchment paper.

  2. Remove top of cheese round by carefully slicing the top of the rind off. Place cheese round in center of baking sheet with cut side up. Open biscuits and cut into quarters. Roll each piece of dough into a ball and place around cheese round until you have two rows of dough balls around the cheese. Bake for 25-30 minutes or until bread is cook through and golden brown. .

  3. Meanwhile, into a saucepan, add blueberries, red chili flakes, rosemary and thyme. Cook on medium low for 2-3 minutes or until blueberries start to darken and burst. Remove from heat and pour blueberry mixture on top of cheese. Garnish with fluer de sel and herbs as desired!

6D4A0042.jpg
6D4A0037.jpg
6D4A0039.jpg
6D4A0043.jpg
6D4A0048.jpg
Three Ingredient Protein Balls for Little Ones

First of all, the photo above has nothing to do with this recipe except it’s a pic of Milly holding our favorite Momofuku Milk Bar birthday cake truffles from her first birthday. I haven’t had a chance to take pics of these protein balls so there you go! Hope I didn’t trick you.

If you tuned in to my IG LIVE yesterday with Dini Klein of Prep and Rally, you saw we made up a recipe based on our favorite no bake balls. These are super simple snacks we make for our babes (Dini’s daughters are 5 and 3, Milly just turned 16 months). All you need is dates, nuts and fruit (dried or freeze dried fruit). I like to keep these cold in the fridge and then take them out for a snack throughout the day. You can really have fun with what you put in them. Here’s my favorite combo but the sky is the limit. You can swap out the almond butter for peanut butter. I also love adding rolled outs. You can also use different nuts depending on your preference! The key is mixing it in the food processor until it starts to come together. The below is a guide more than a recipe because it just depends on how sticky your fruit is or how many dates you add. I’d love to know what you end up creating and if you make these, take a pic with your little one enjoying them and tag me on instagram @BrandiMilloy

Enjoy!

Protein Balls

By Brandi Milloy

  • 1 cup roasted, unsalted almonds

  • 3/4 cup madjool dates

  • 1/4 cup almond butter

  • 1/3 cup freeze dried strawberries

  • 1/3 cup freeze dried blueberries

Directions

  1. Into a food processor, add nuts, dates and almond butter and process. Add fruit and process some more until mixture comes together enough to form ball. If mixture is too “wet” add more fruit and nuts by the tablespoon. If mixture is too dry, add a tablespoon of almond butter or a few dates until desired consistency.

  2. Roll into balls and place in fridge to firm up and enjoy within 10 days!

Ring POPsicles
Photography Credit: Karen DeGrazio

Photography Credit: Karen DeGrazio

So Milly hates milk and I mean who can blame her when Mama’s milk is so good (breastfeeding joke-haha!) I’ve never been a fan of cows milk but give me all the cheese and ice cream. Love diary but not a cow’s milk drinker. We are basic b’s around here and love our organic almond milk, pea milk and always cereal milk. Ha! But when it comes to Milly’s health and how crucial it is for her to get essential vitamins and minerals (Vitamin D and Calcium) plus dietary fats for brain development (80% of your child’s brain development happens before they are 2 years old-whoa!), proteins plus all the other essential nutrients in whole milk- I had to get creative. Easy. Whole milk yogurt popsicles. This isn’t a new idea. My sister has been making these for my nephews for years and the last time we were in AZ visiting them they made Milly her own and she was all over them (her cousins and the popsicles).

Photography Credit: Karen DeGrazio

Photography Credit: Karen DeGrazio

What I like about having these on hand is they act as a “special treat/dessert” even though they aren’t really a dessert at all. I mean… the way I make them they are pretty straight forward. I like to buy a large tub of organic pasture raised plain whole milk yogurt and flavor it myself but you can also buy the flavored ones. I will add fresh or frozen fruit purees, fresh or frozen fruit and some spices if I’m feeling naughty.

Photography Credit: Karen DeGrazio

Photography Credit: Karen DeGrazio

These are one part organic pumpkn puree, two parts whole milk yogurt and a few sprinkles of cinnamon and nutmeg. Very PSL minus the L and 100% basic b again. Milly loves them! They aren’t sweet at all but super flavorful. A quick hack for making them even easier is just alternate squeezing a pouch of yogurt with your favorite fruit pouch and freeze! No excuses for not making your babes something semi-homemade!

Photography Credit: Karen DeGrazio

Photography Credit: Karen DeGrazio

I love these popsicles so much. Some days they are breakfast pops, other days an afternoon snack, her appetizer for dinner. I just love she’s getting another source of calcium in addition to other calcium rich foods she eats like greens, tempeh, almond butter, broccoli, pinto beans. Plus how freaking cute are these ring pop molds. Don’t think I wasn’t going to gush about how stinkin adorable these are!!!

Photography Credit: Karen DeGrazio

Photography Credit: Karen DeGrazio

Super affordable and didn’t need all 18 so we gave a set to our friends. The molds I got for my sis when her boys were small are these and I think I might like them better but you get half the amount of pops so just depends on what you need.

Photography Credit: Karen DeGrazio

Photography Credit: Karen DeGrazio

I love that they’re the perfect size for little hands and so soothing for swollen gums and teething mouths! Milly has fun trying to get to the frozen blueberries hidden inside so in some ways it’s a bit of an activity her.

Photography Credit: Karen DeGrazio

Photography Credit: Karen DeGrazio

I’d love to know what combinations you come up with. Let me know in the comments below and post your ring pop pics on IG and tag me @BrandiMilloy #BrandisBites.


Pumpkin Spice Blueberry Donuts

Blueberries are an absolute staple in our home so I’m thrilled to partner with the U.S. Highbush Blueberry Council on some fun and easy recipes like these pumpkin spice blueberry donuts. Some might argue these aren’t donuts because they aren’t fried but I promise you they are every bit delicious. These cake donuts are fluffy and tender with juicy blueberries, a creamy frosting and if you like pumpkin spice-they have all those warm comforting flavors that instantly get you in the fall mood.

6D4A1137.jpg

And when I say this recipe is easy, I mean SO simple! All you need is pumpkin bread/muffin mix, oil, eggs, water and blueberries!

6D4A1349.jpg

You basically make the batter, fold in the blueberries and then pour it into your donut pan and bake. That’s it. This is the donut pan I use.

6D4A1436.jpg

If you want to add a simple glaze on top, you need a little bit of powdered sugar, water or milk (I used almond milk cause that’s what we had on hand) and some chopped blueberries. Then just frost them after they’ve cooled.

6D4A1369.jpg

Even my 15 month old daughter, Milly was able to join in on the fun! If you’re like me and your kiddos won’t let you do anything without them, invite them to help you! I love using cooking and baking as a teaching tool. I had Milly help me add the blueberries to the batter. It may have took her a while and she ate about half of the blueberries but she did it and was so proud of herself!

6D4A1208.jpg
6D4A1241.jpg

For a finishing touch, I added a few fresh blueberries on top of each donut while the frosting was still wet and I had Milly help with this too.

6D4A1395.jpg
6D4A1264.jpg

I mean, can you even with those cute chubby baby hands!?

6D4A1274.jpg
6D4A1292.jpg

I just love this recipe and I hope you do too. The flavors of the pumpkin spice and blueberries work so well together and frankly, I think it’s a beautiful treat to show off at any of those holiday parties you have coming up!

6D4A1472.jpg
6D4A1324.jpg
recipe.jpg

Photography Credit: @Ographr

Patriotic Oreo Cheesecake Bars
IMG_8615.JPG
4th of july.jpeg

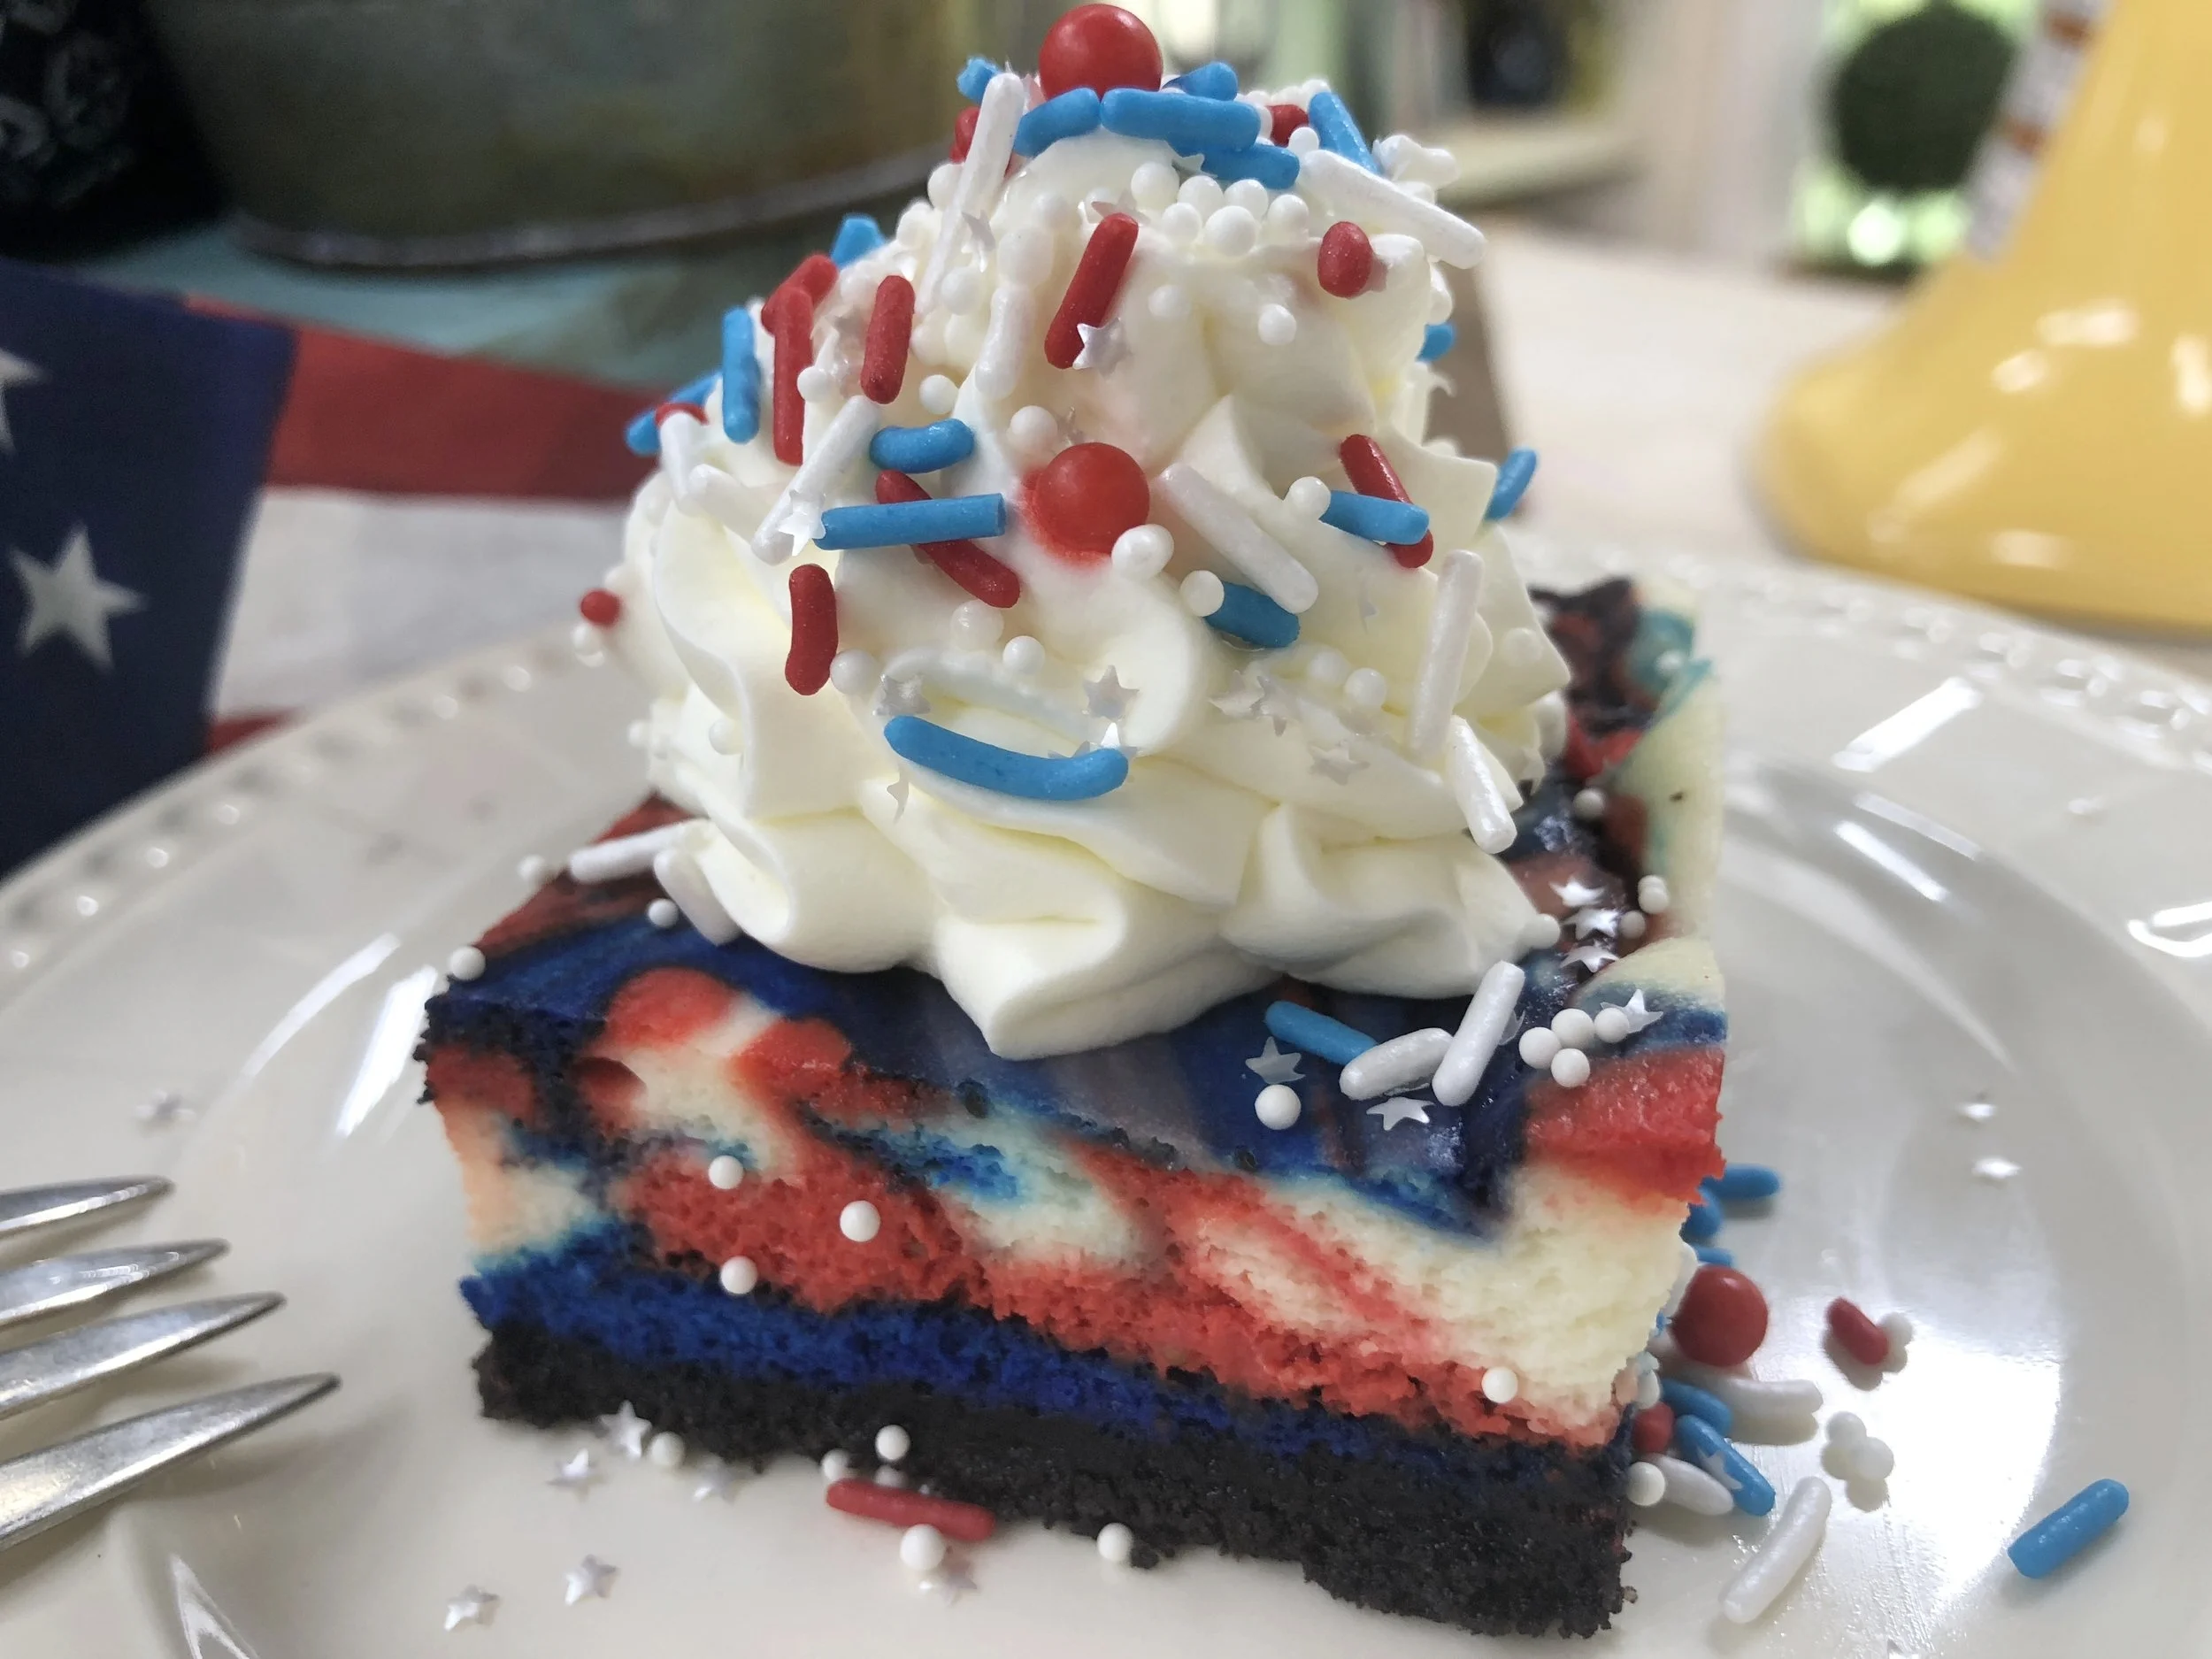
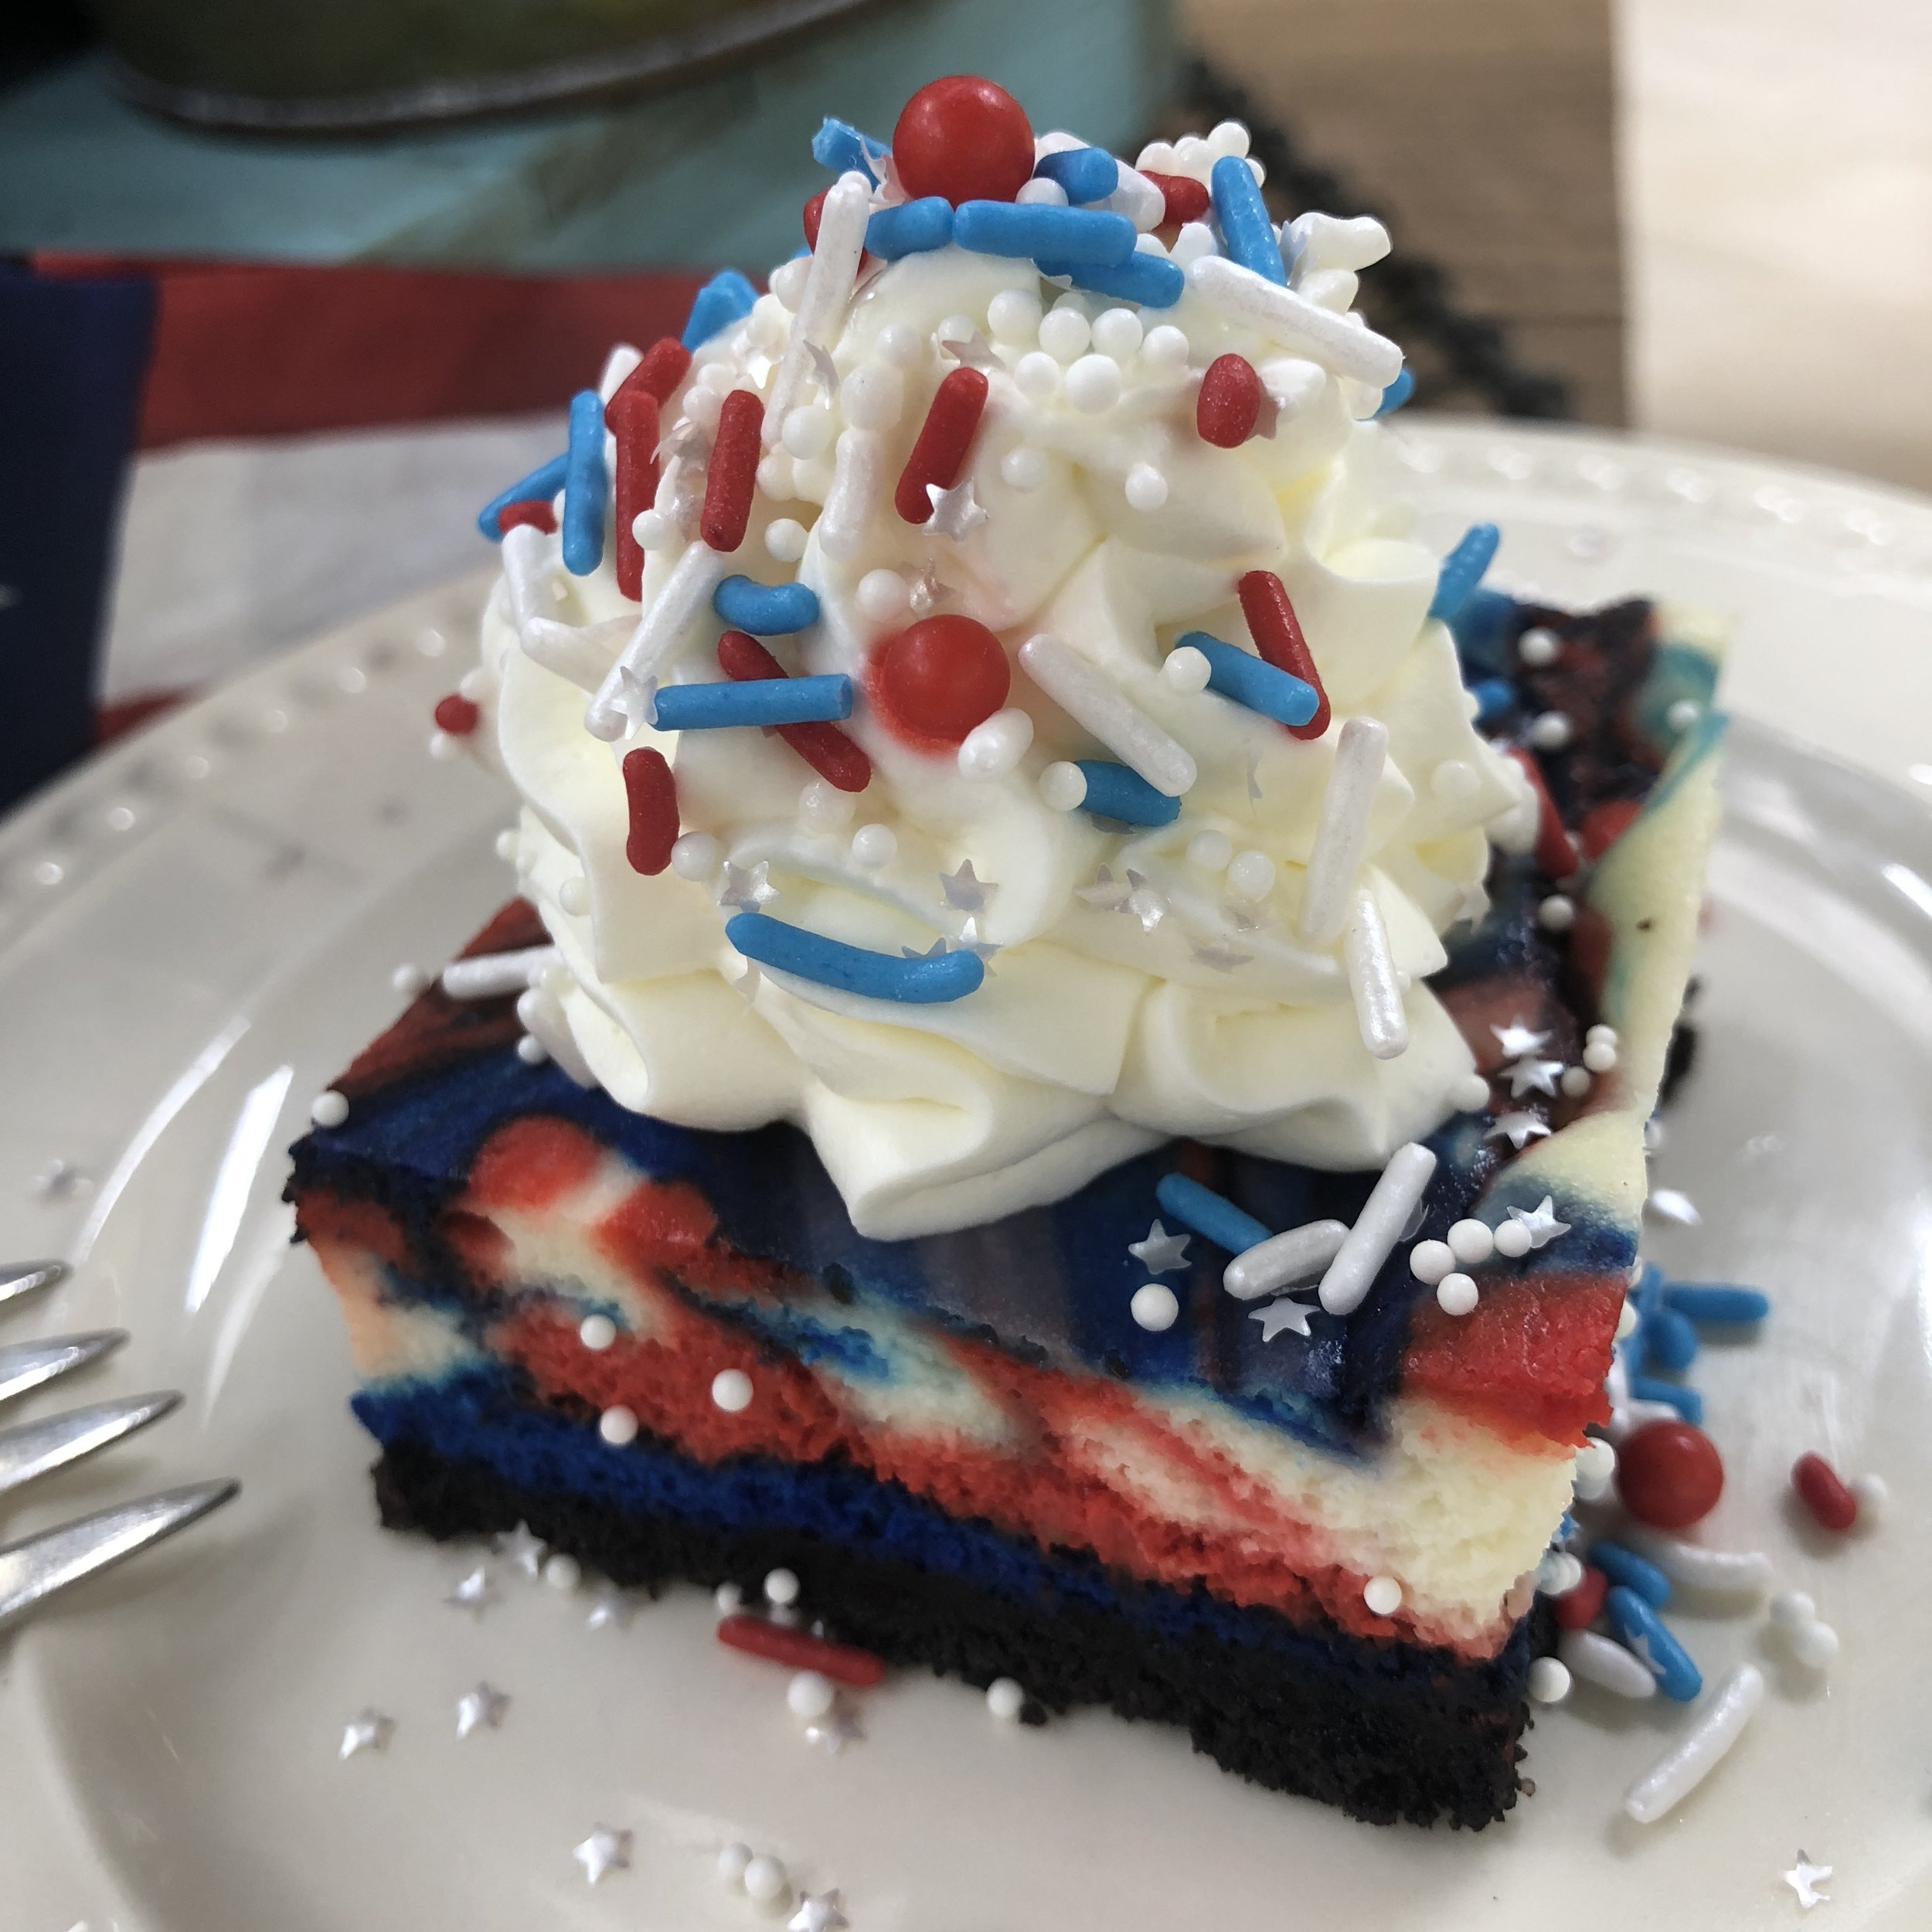
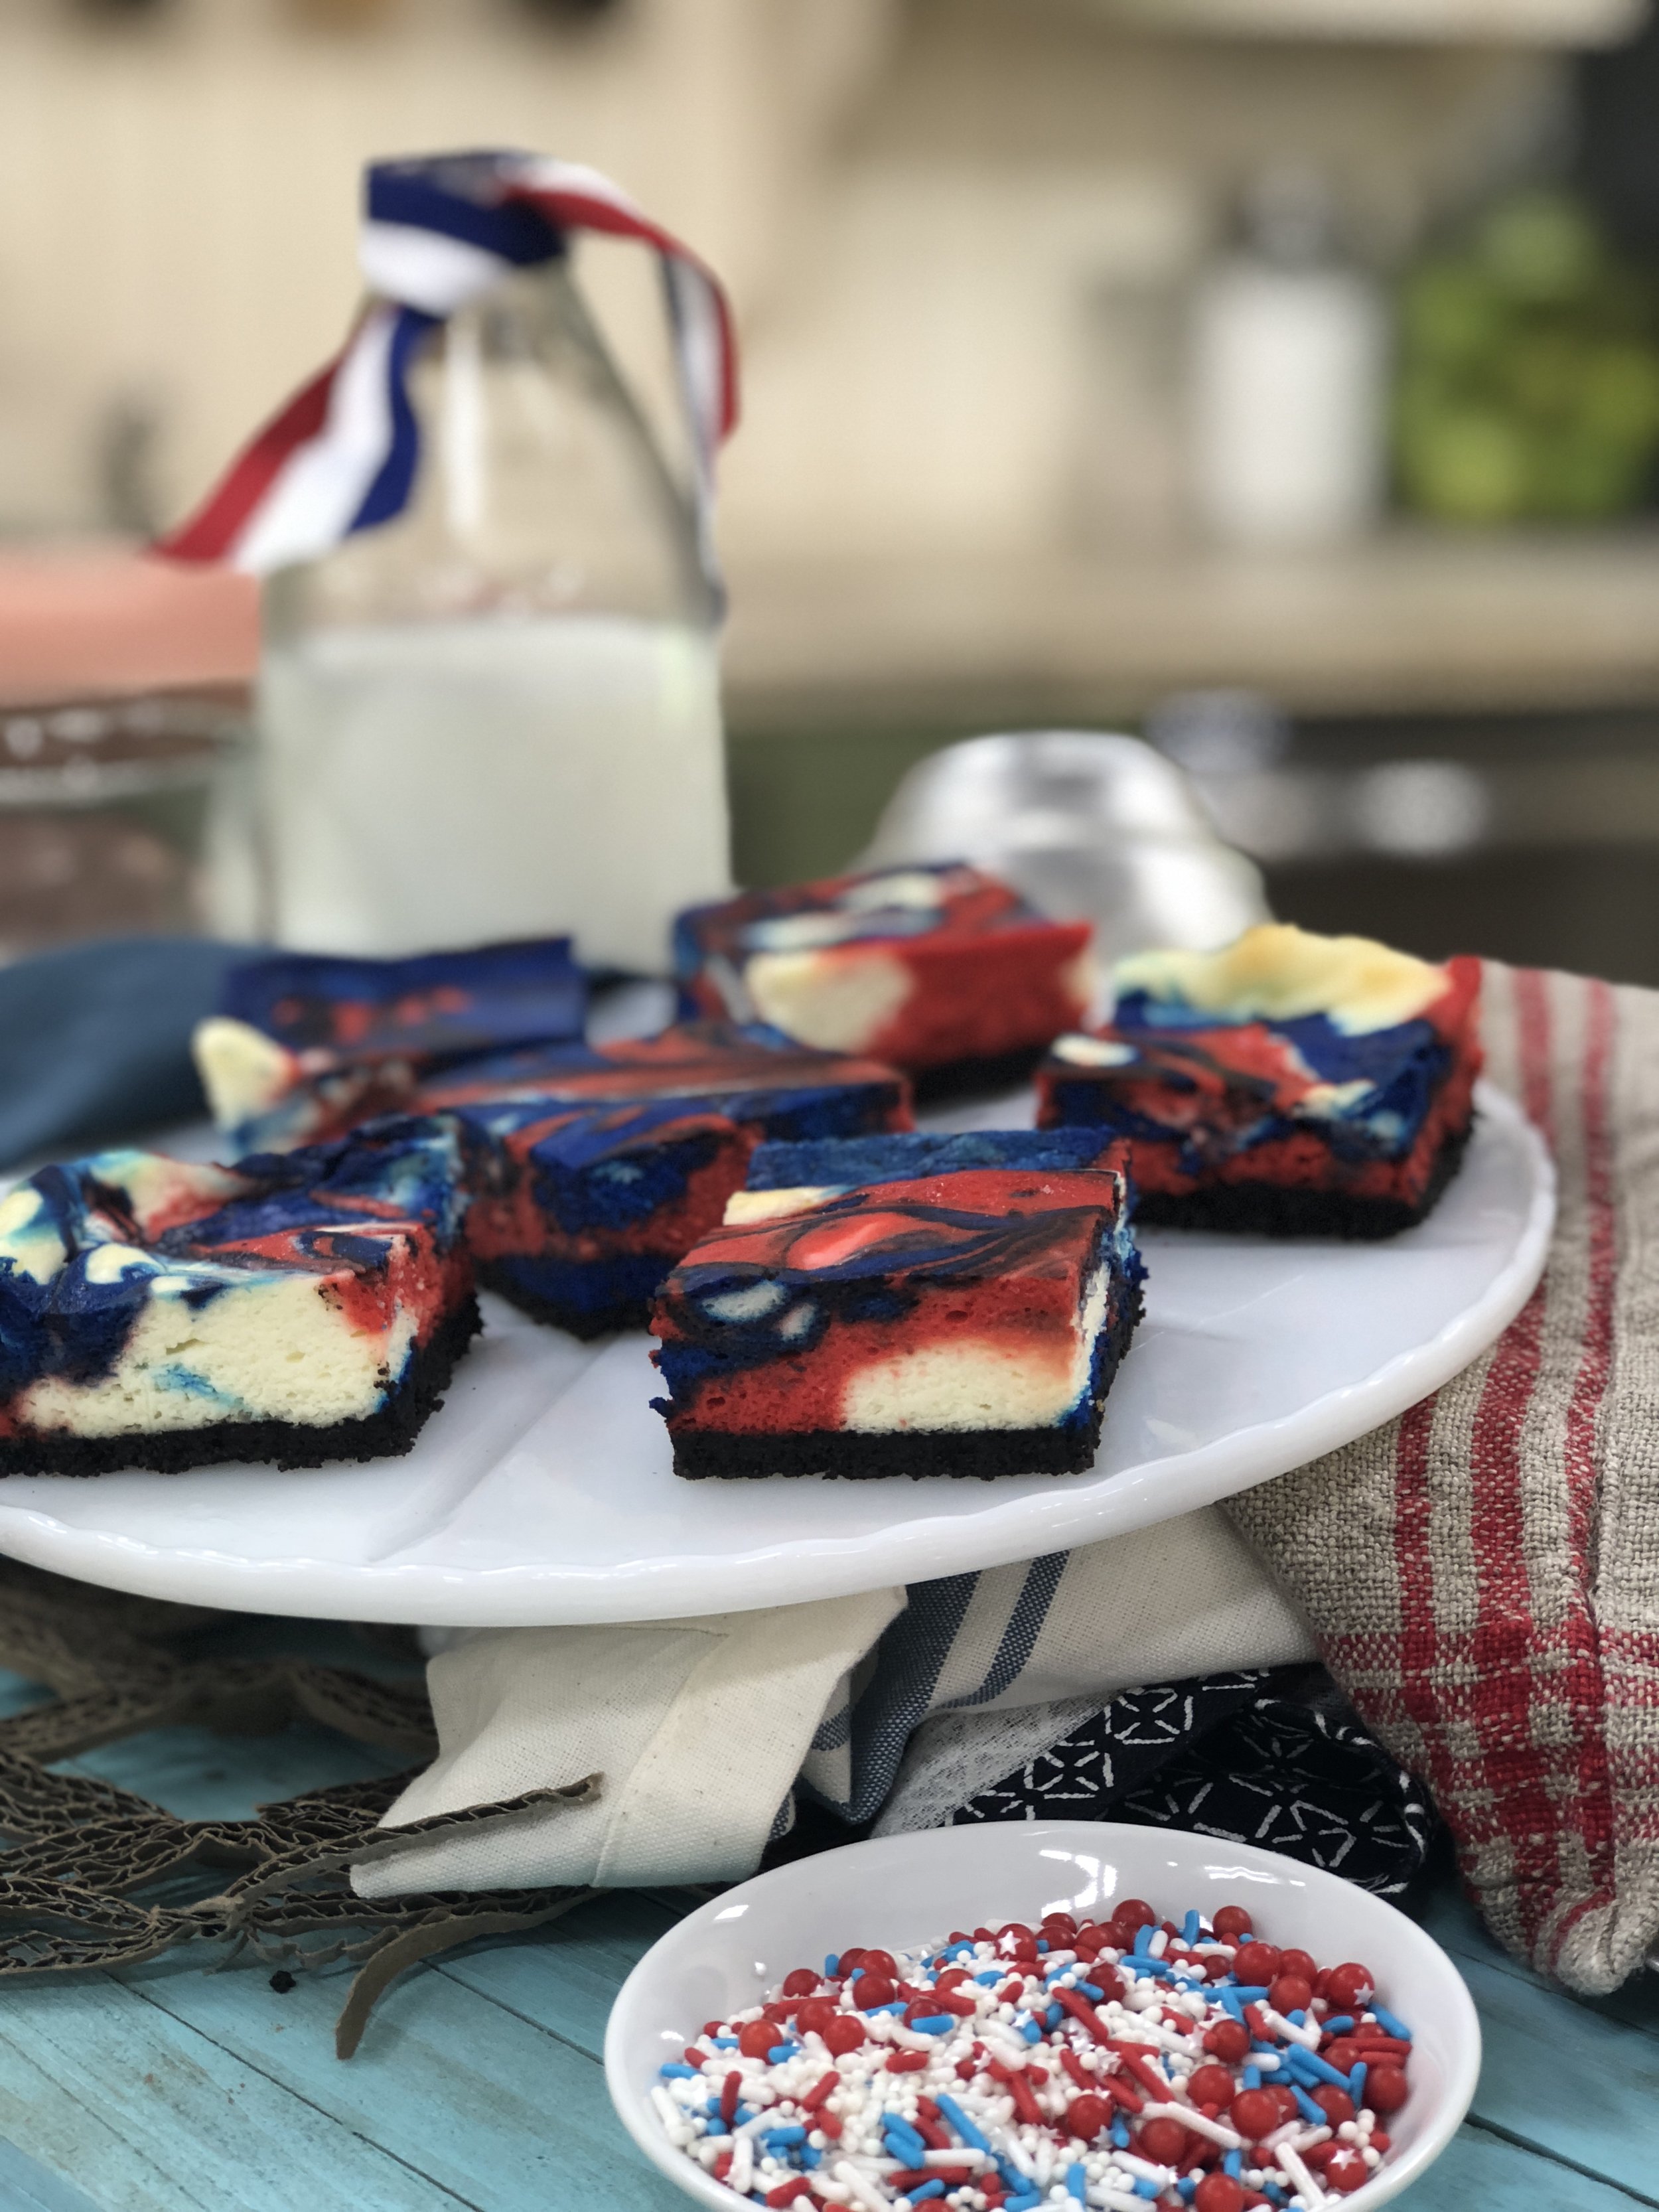
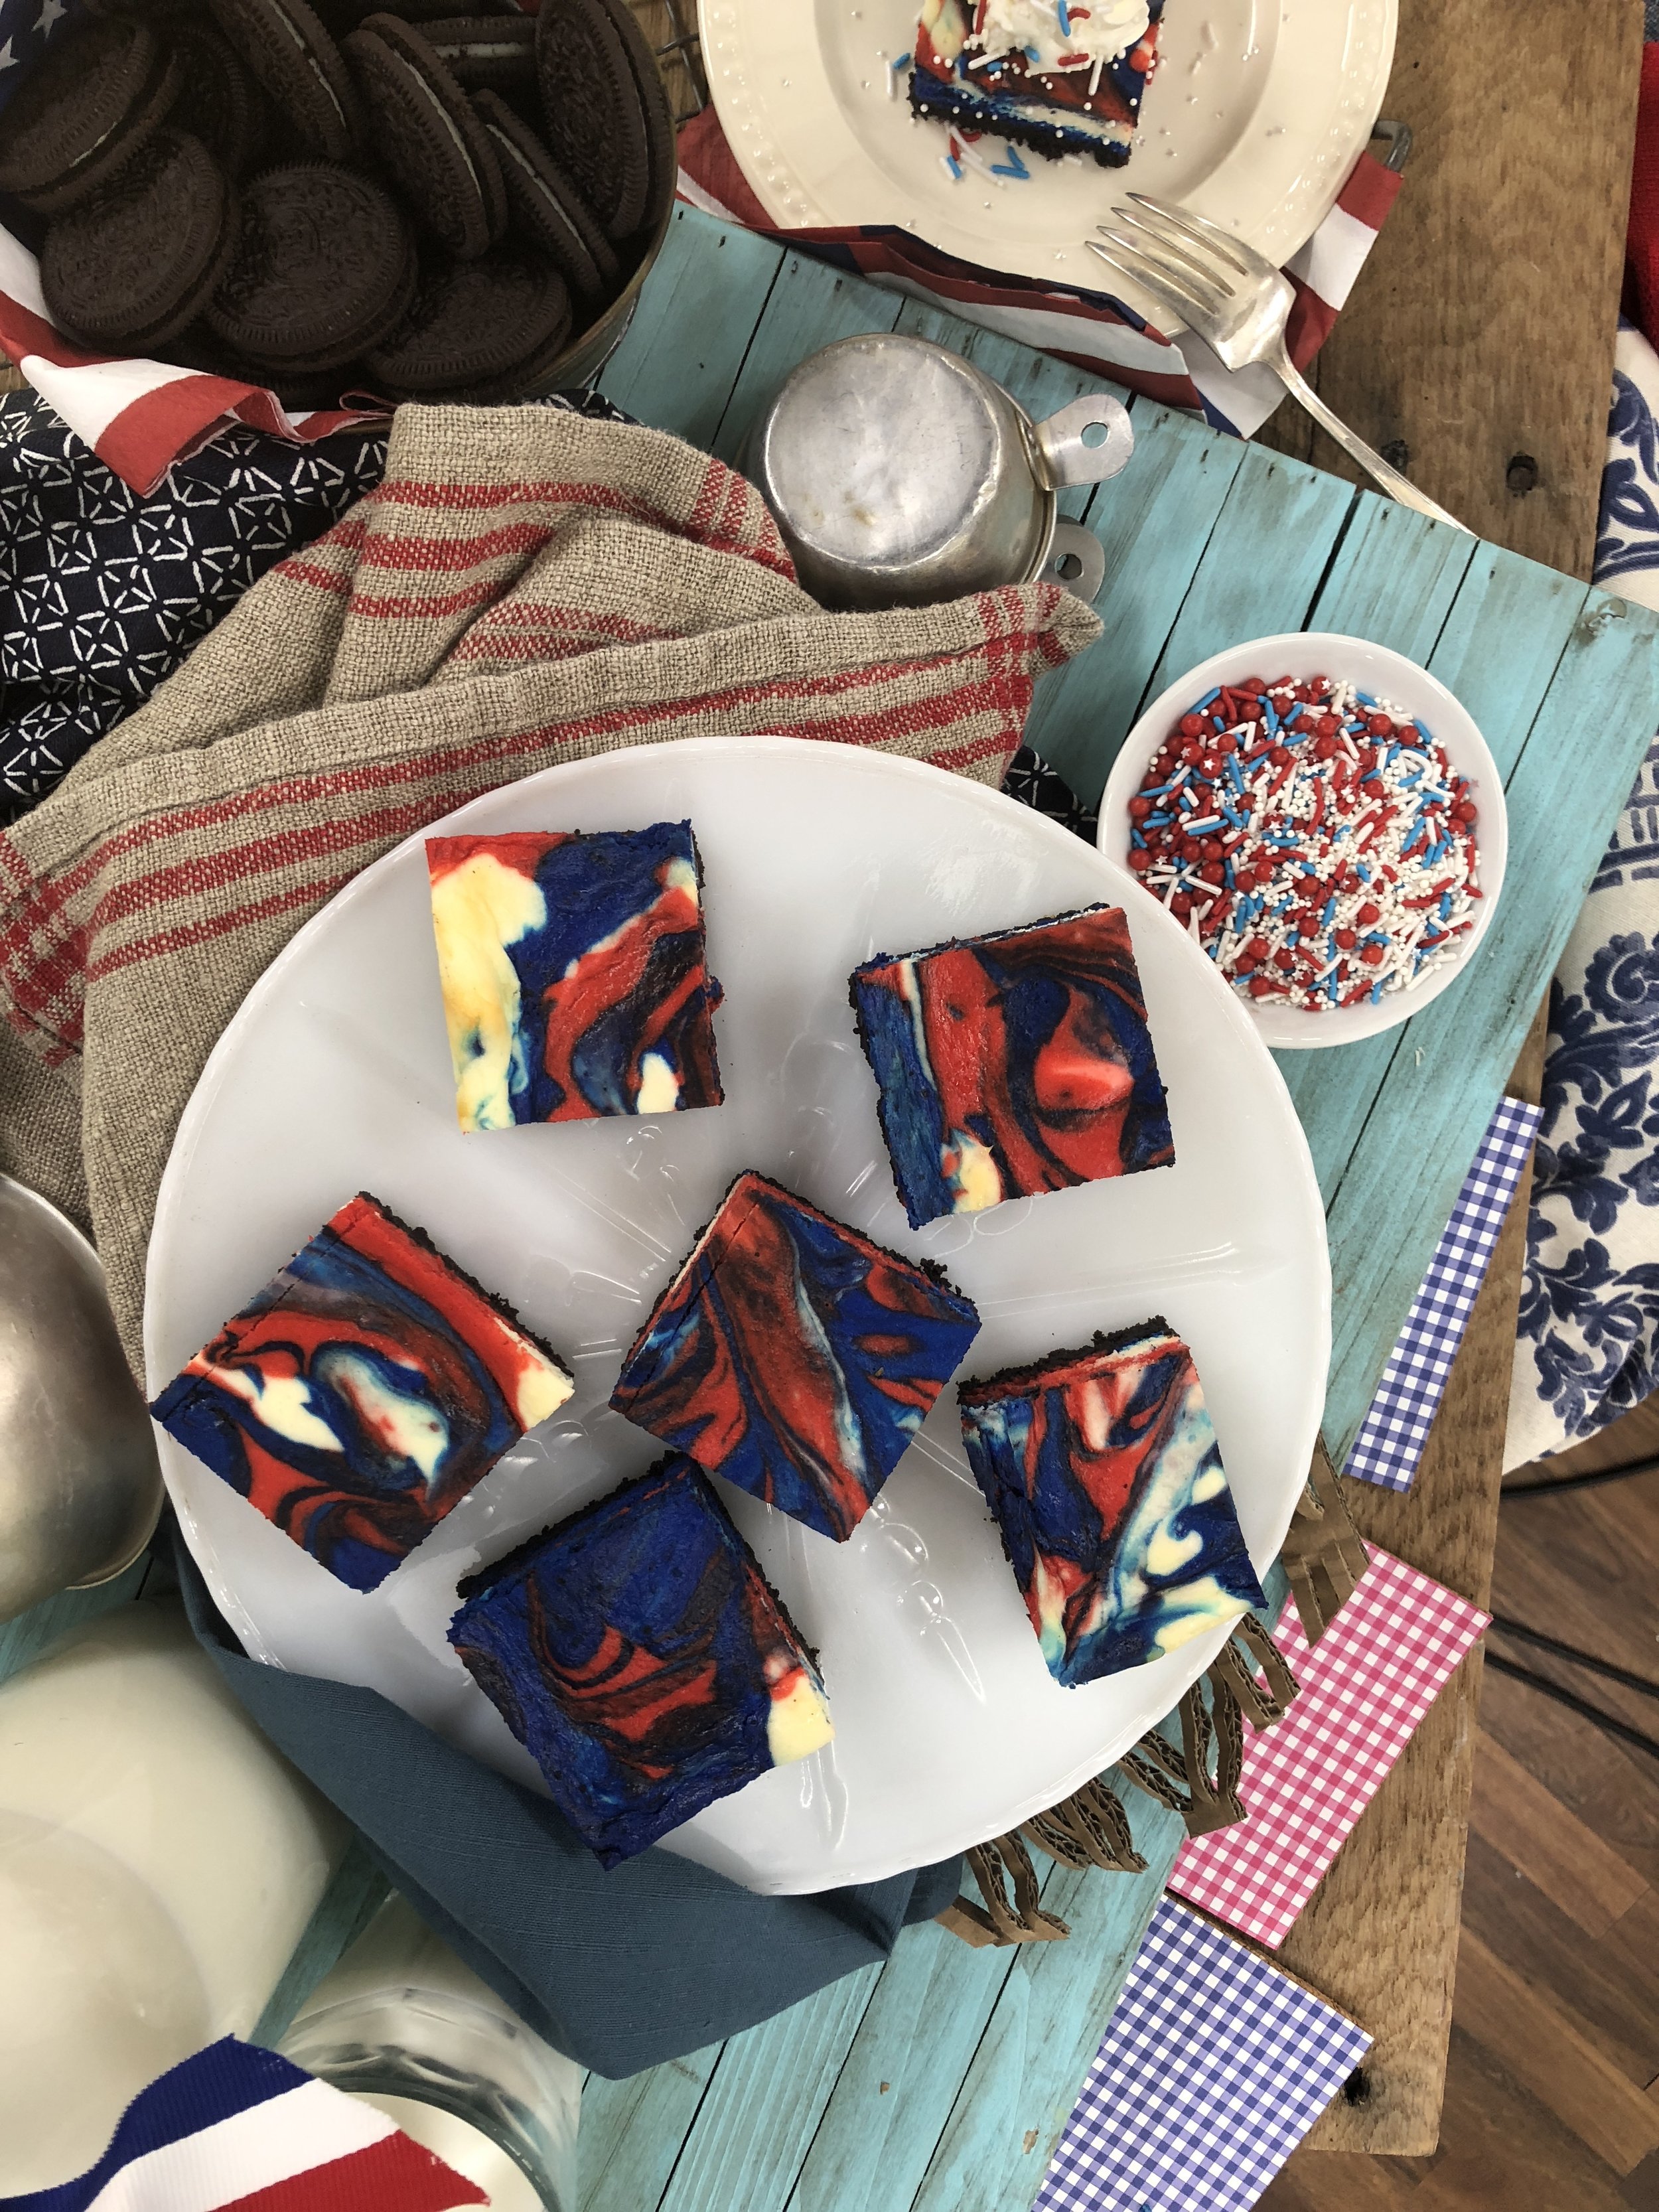
If you're tired of showing up to 4th of July parties with the same berry flag cake (no offense), you've gotta stop what you're doing right now and make my patriotic oreo cheesecake bars.

They are super creamy with a chocolatey oreo crust and the red and blue swirls are actually pureed strawberries and blueberries (with a little gel food coloring for bold color)! These bars are relatively easy to make-the hardest part is waiting for them to set up! If you're short on time, follow the same fruit swirl technique using your favorite no bake cheesecake recipe!

IMG_8872.JPG

I had so much fun making these on Home & Family.You can grab the full recipe here.

American Egg Board Disney•Pixar’s “Incredibles 2” World Premiere
premiere.jpg

This is a sponsored post written by me on behalf of the American Egg Board. The opinions and text are mine.

In case you missed my INCREDIBLE night, which I documented on Instagram stories, I had the opportunity to attend the Disney•Pixar’s “Incredibles 2” World Premiere on behalf of the American Egg Board. I can’t believe it’s been almost 14 years since the first movie premiered so if you’re a Super fan like me, you can agree it’s about time for this sequel to finally happen!

The premiere shut down Hollywood Boulevard, stretching from the Roosevelt Hotel to the El Capitan Theatre. I joined some members from The Incredible Egg and we watched anxiously as the stars arrived.  From the iconic Disney•Pixar’s “Incredibles 2”-themed red carpet, to the décor and activities, the event completely transported us to Metroville. Even the food was on theme! 

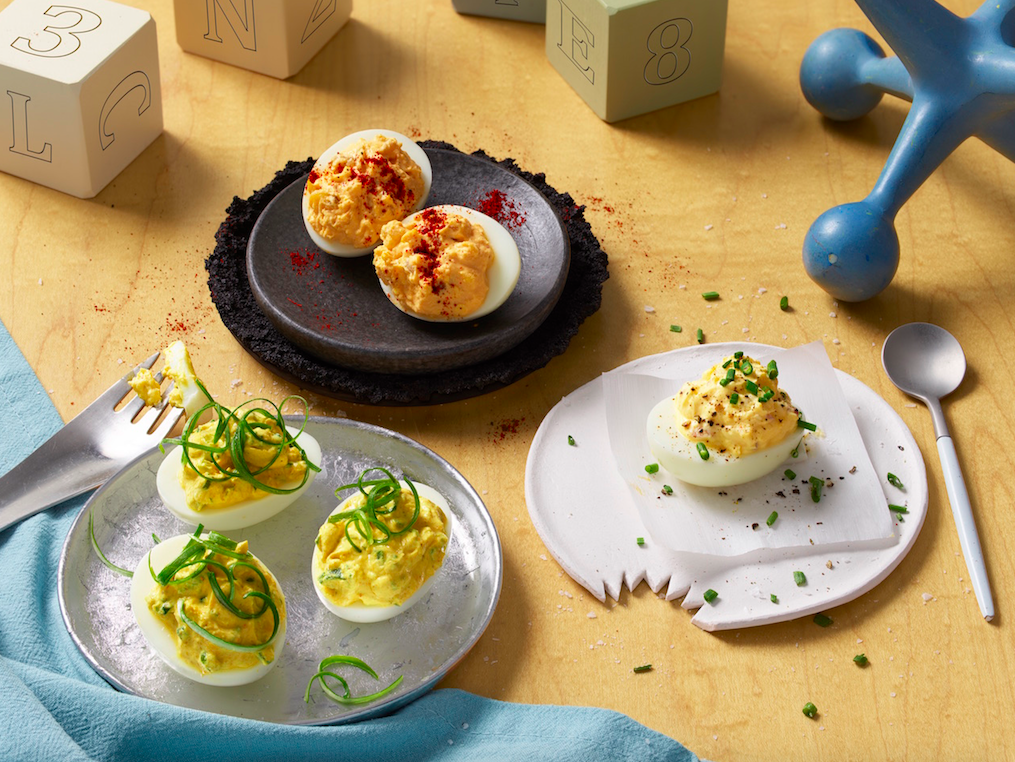
I went straight for the Incredible deviled eggs and sugar cookie masks! Don’t mind if I do. Then I snapped a pic with Edna and did my best Super pose before heading in to watch the movie.  It was fantastic! There is so much to love about this sequel! The humor is fantastic, the family dynamic was spot on, there’s non-stop action and so much love for female heroines!  It’s hard to choose what was my favorite part about the movie. All I kept thinking while watching it was “what would my superpower be if I lived in Metroville?”

incredibles pic.jpg

I love taking personality quizzes, so when I learned that the Incredible Egg had created a quiz to see which Disney•Pixar’s “Incredibles 2” character you are, I had to find out! (If you want to try it yourself, visit The Incredible Egg’s blog!)

Then based on your results, it will tell you how you like your eggs – with recipes paired with each character’s distinct personality. I totally got a kick out of my results because it said I was Jack-Jack. He reminded me of my daughter, Milly, totally stealing the show! His dish is Multiplied Deviled Eggs.

Photo Credit: Incredible Egg

Photo Credit: Incredible Egg

I had so much fun taking the quiz, I tried it out again just to see what my results would be. The second time I got Mr. Incredible, which was even funnier to me because out of all the egg dishes I enjoy, I eat egg avocado toast and deviled eggs on a weekly basis. Try Mr. Incredible’s Clobbered Egg Avocado Toast!  

Photo Credit: Incredible Egg

Photo Credit: Incredible Egg

Can’t choose which recipe to try out? You can find all the customized recipes for each of the leading characters at IncredibleEgg.org/DisneyPixarIncredibles2.

This is making me so excited—I’m contemplating changing Milly’s 1st birthday party theme to Disney•Pixar’s “Incredibles 2” since the menu is already done!

Thank you to the American Egg Board for inviting me to this unforgettable event.