Posts in Lifestyle
A Rainbow & Sprinkles Unicorn Marshmallow Cereal Cake
IMG_4272.JPG

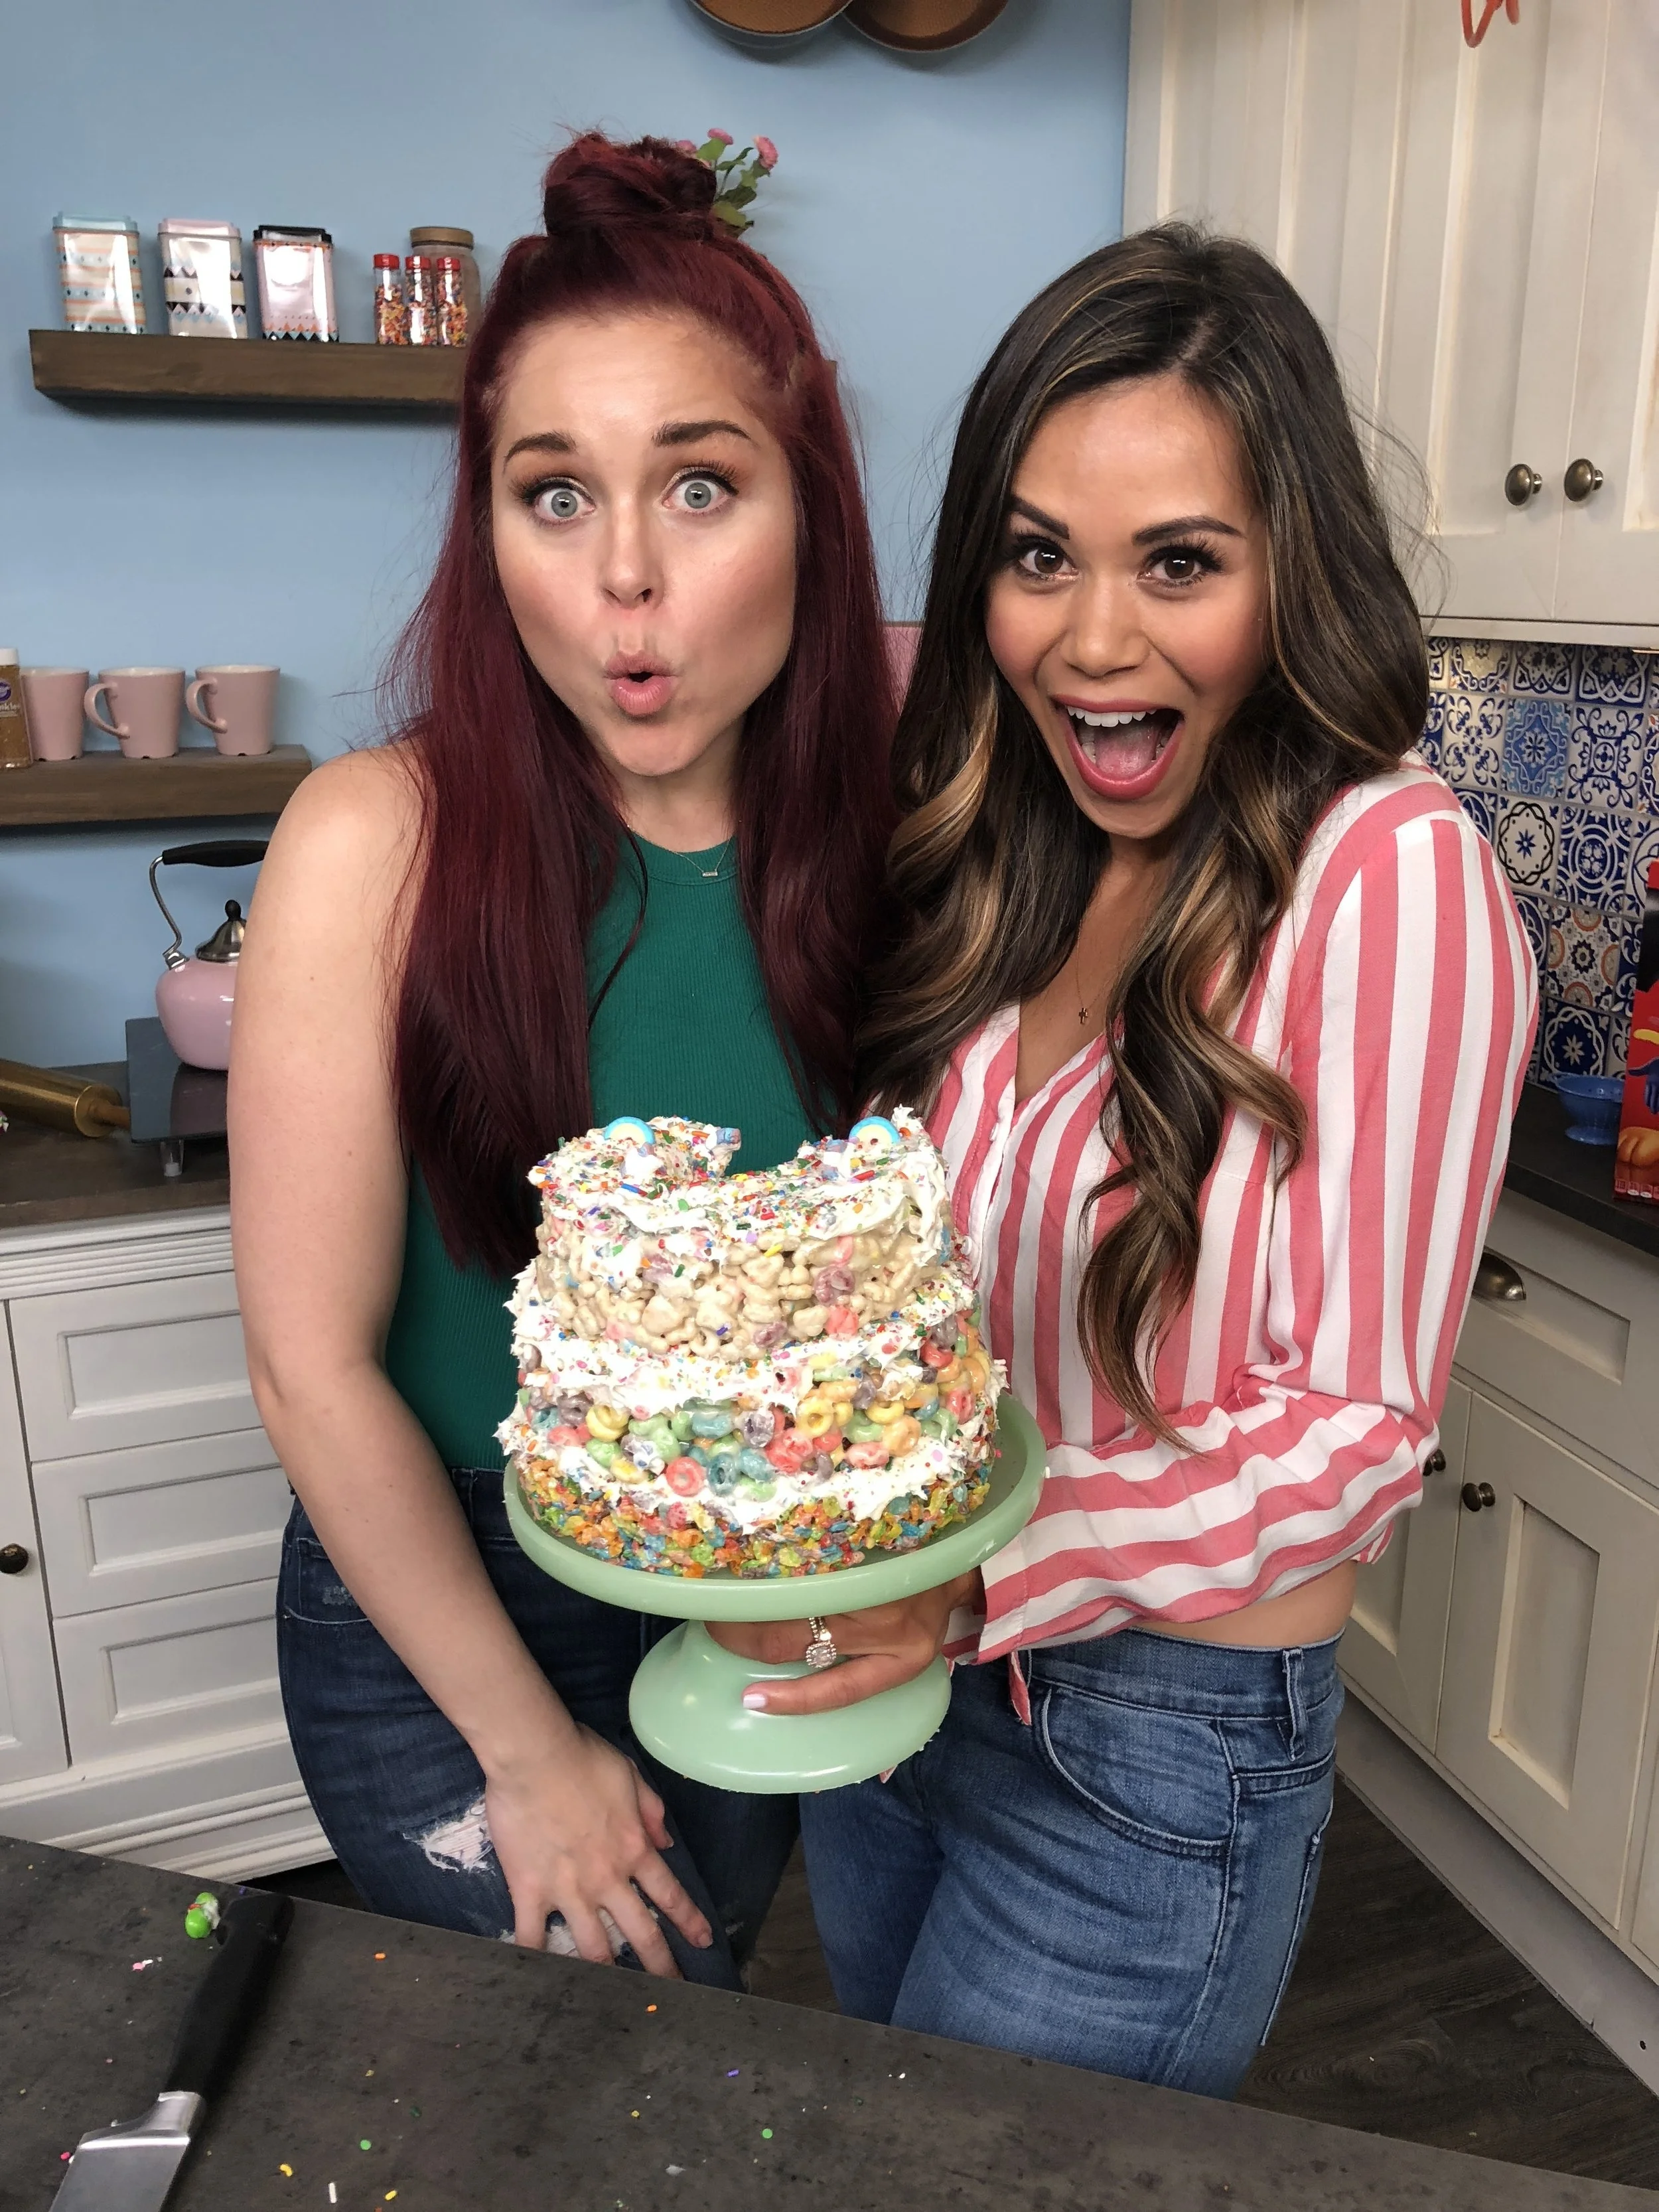
I just loved hanging with Erin Robinson on the set of her new show, What the Flavor on ClevverTV. She is every bit relatable, adorable and so much fun to be around. It didn't even feel like we were working.  I just loved showing her how to make one of my favorite treats in cake form-a ooey gooey marshmallow cereal treat cake featuring the A team or your childhood (Fruit Loops, Fruity Pebbles & Lucky Charms). We made a "cake layer" of each cereal and put yummy frosting in between. Then because we are both living our best lives, decided to hide Skittles and sprinkles in the middle- cause why not. 

IMG_4274.JPG

This cake would be perfect for a party especially one where you want to show off how amazing you are. Who doesn't love rice krispie treats and candy? Hello! No one! Be sure to watch some fun behind the scenes we did together below.

Then check out the episode here and then be sure to make the cake and post all your gorgeous photos on instagram and tag me @BrandiMilloy and @ErinRobinson. 

I promise to remake this and post some better pics! LOL This was after we had eaten half of it. Whoopsie.

I promise to remake this and post some better pics! LOL This was after we had eaten half of it. Whoopsie.

RAINBOW & SPRINKLES UNICORN MARSHMALLOW CEREAL CAKE

By Brandi Milloy

  • 6 tbsp. butter
  • 9 cups marshmallows
  • 12 cups cereal
  • 1-16oz. container frosting
  • 1/2 cup sprinkles plus more for decorating
  • 3/4 cup skittles or candy of choice plus more for decorating
  • cereal marshmallows

Special tools

8" round cake stand

6" round cake tins/pans

Directions

  1. Into a heavy bottom pot, 2 tbsp. butter on medium heat, being careful not to burn. Once melted, add 3 cups of cereal and mix. Allow to cool slightly and then press into 6" round cake pan that's been sprayed with non-stick cooking spray.
  2. Repeat step 1 until you've made all three layers of cereal cake. Allow to cool.
  3. Using a biscuit or cookie cutter, cut out a hole in the center of each cake. Set aside.
  4. To assemble: spread a little frosting onto your cake stand to keep the cake from moving.  Place one cereal layer in the center of your stand and top with frosting and sprinkles. Repeat with the next two layers. 
  5. Once you have three frosted cake layers stacked on each other, pour your skittles into center of cake and top with a piece of excess cereal to close hole. Frost your cake and decorate with candy, sprinkles and marshmallows. Serve immediately and enjoy! 
Made with Love, an Embroidered Pennant
Photography Credit: Another Cup Photography
MDCollab-277.jpg
PS-MDCollab-73.jpg

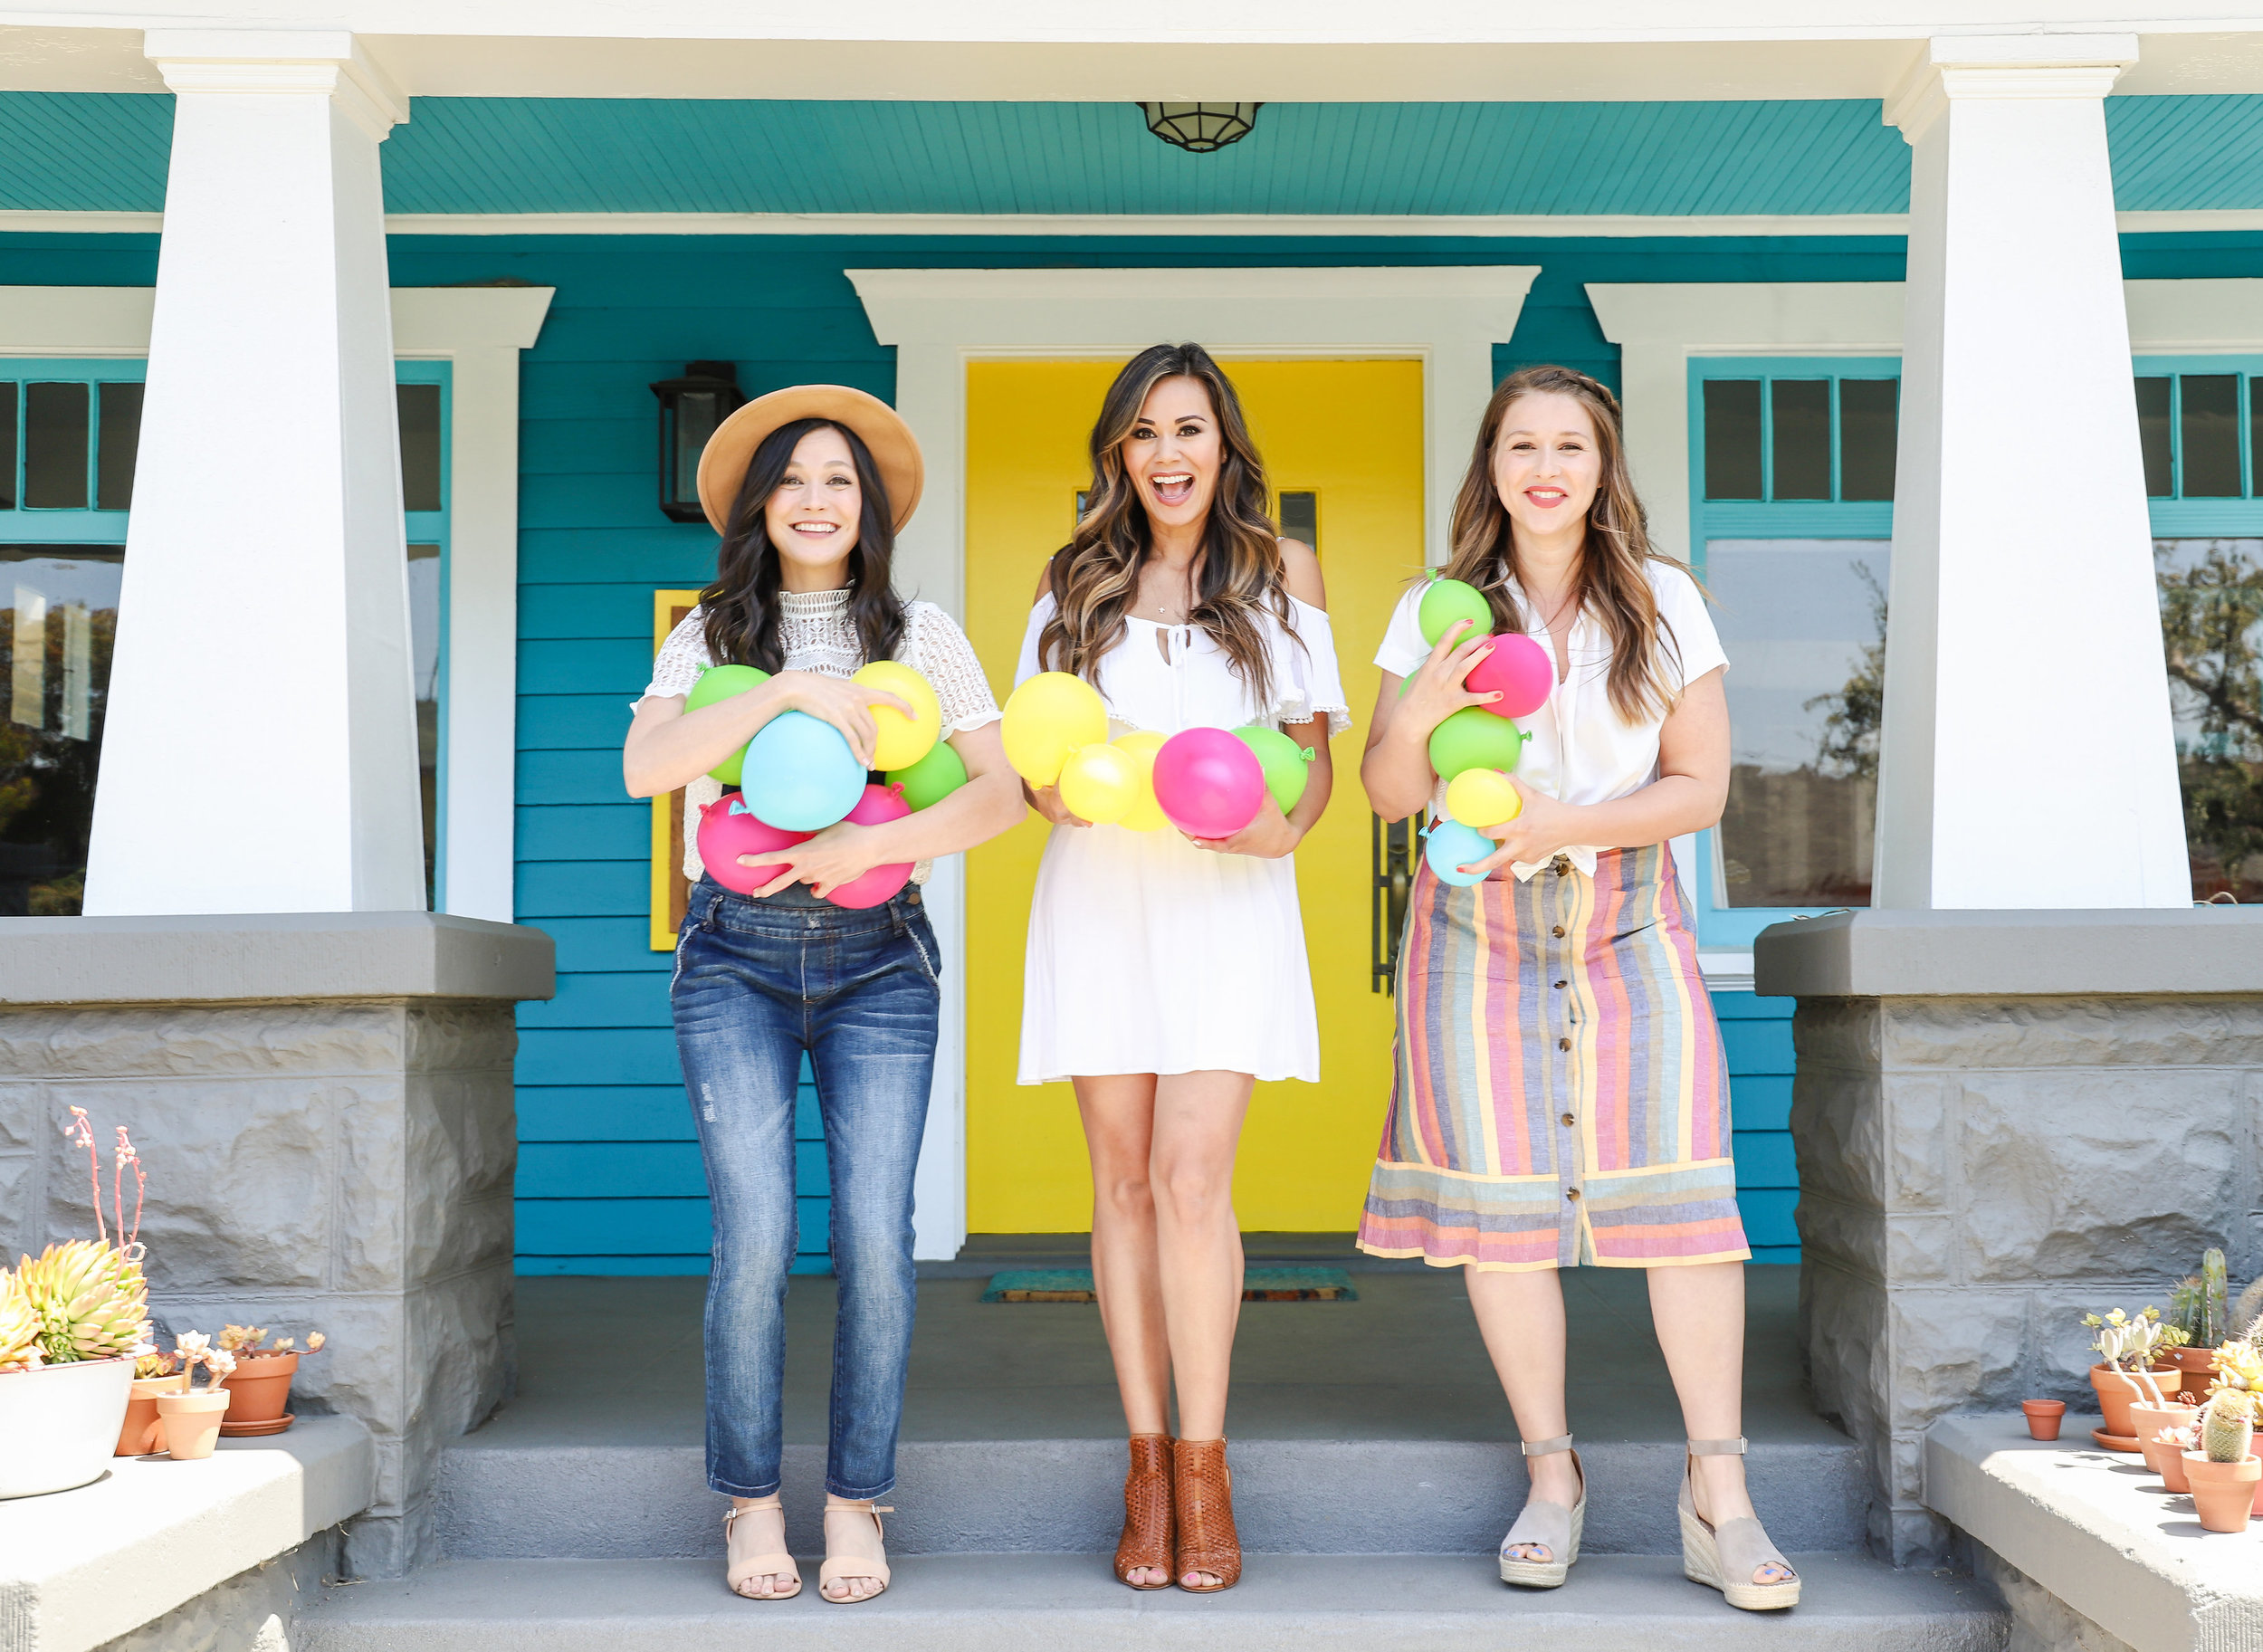
One of my favorite parts about my job is being able to work with people who inspire me.  So I was thrilled to team up with two of my friends, Ashley Adams and Julianna Strickland on the most joyful and colorful shoot to celebrate Mother's Day.  

I can't believe this will be my first Mother's Day with Milly (earthside). I have so many feels about this beautiful gift of being a mother so stay tuned for a full blog post on a Love Letter to Milly on My First Mother's Day. 

MDCollab-50.jpg

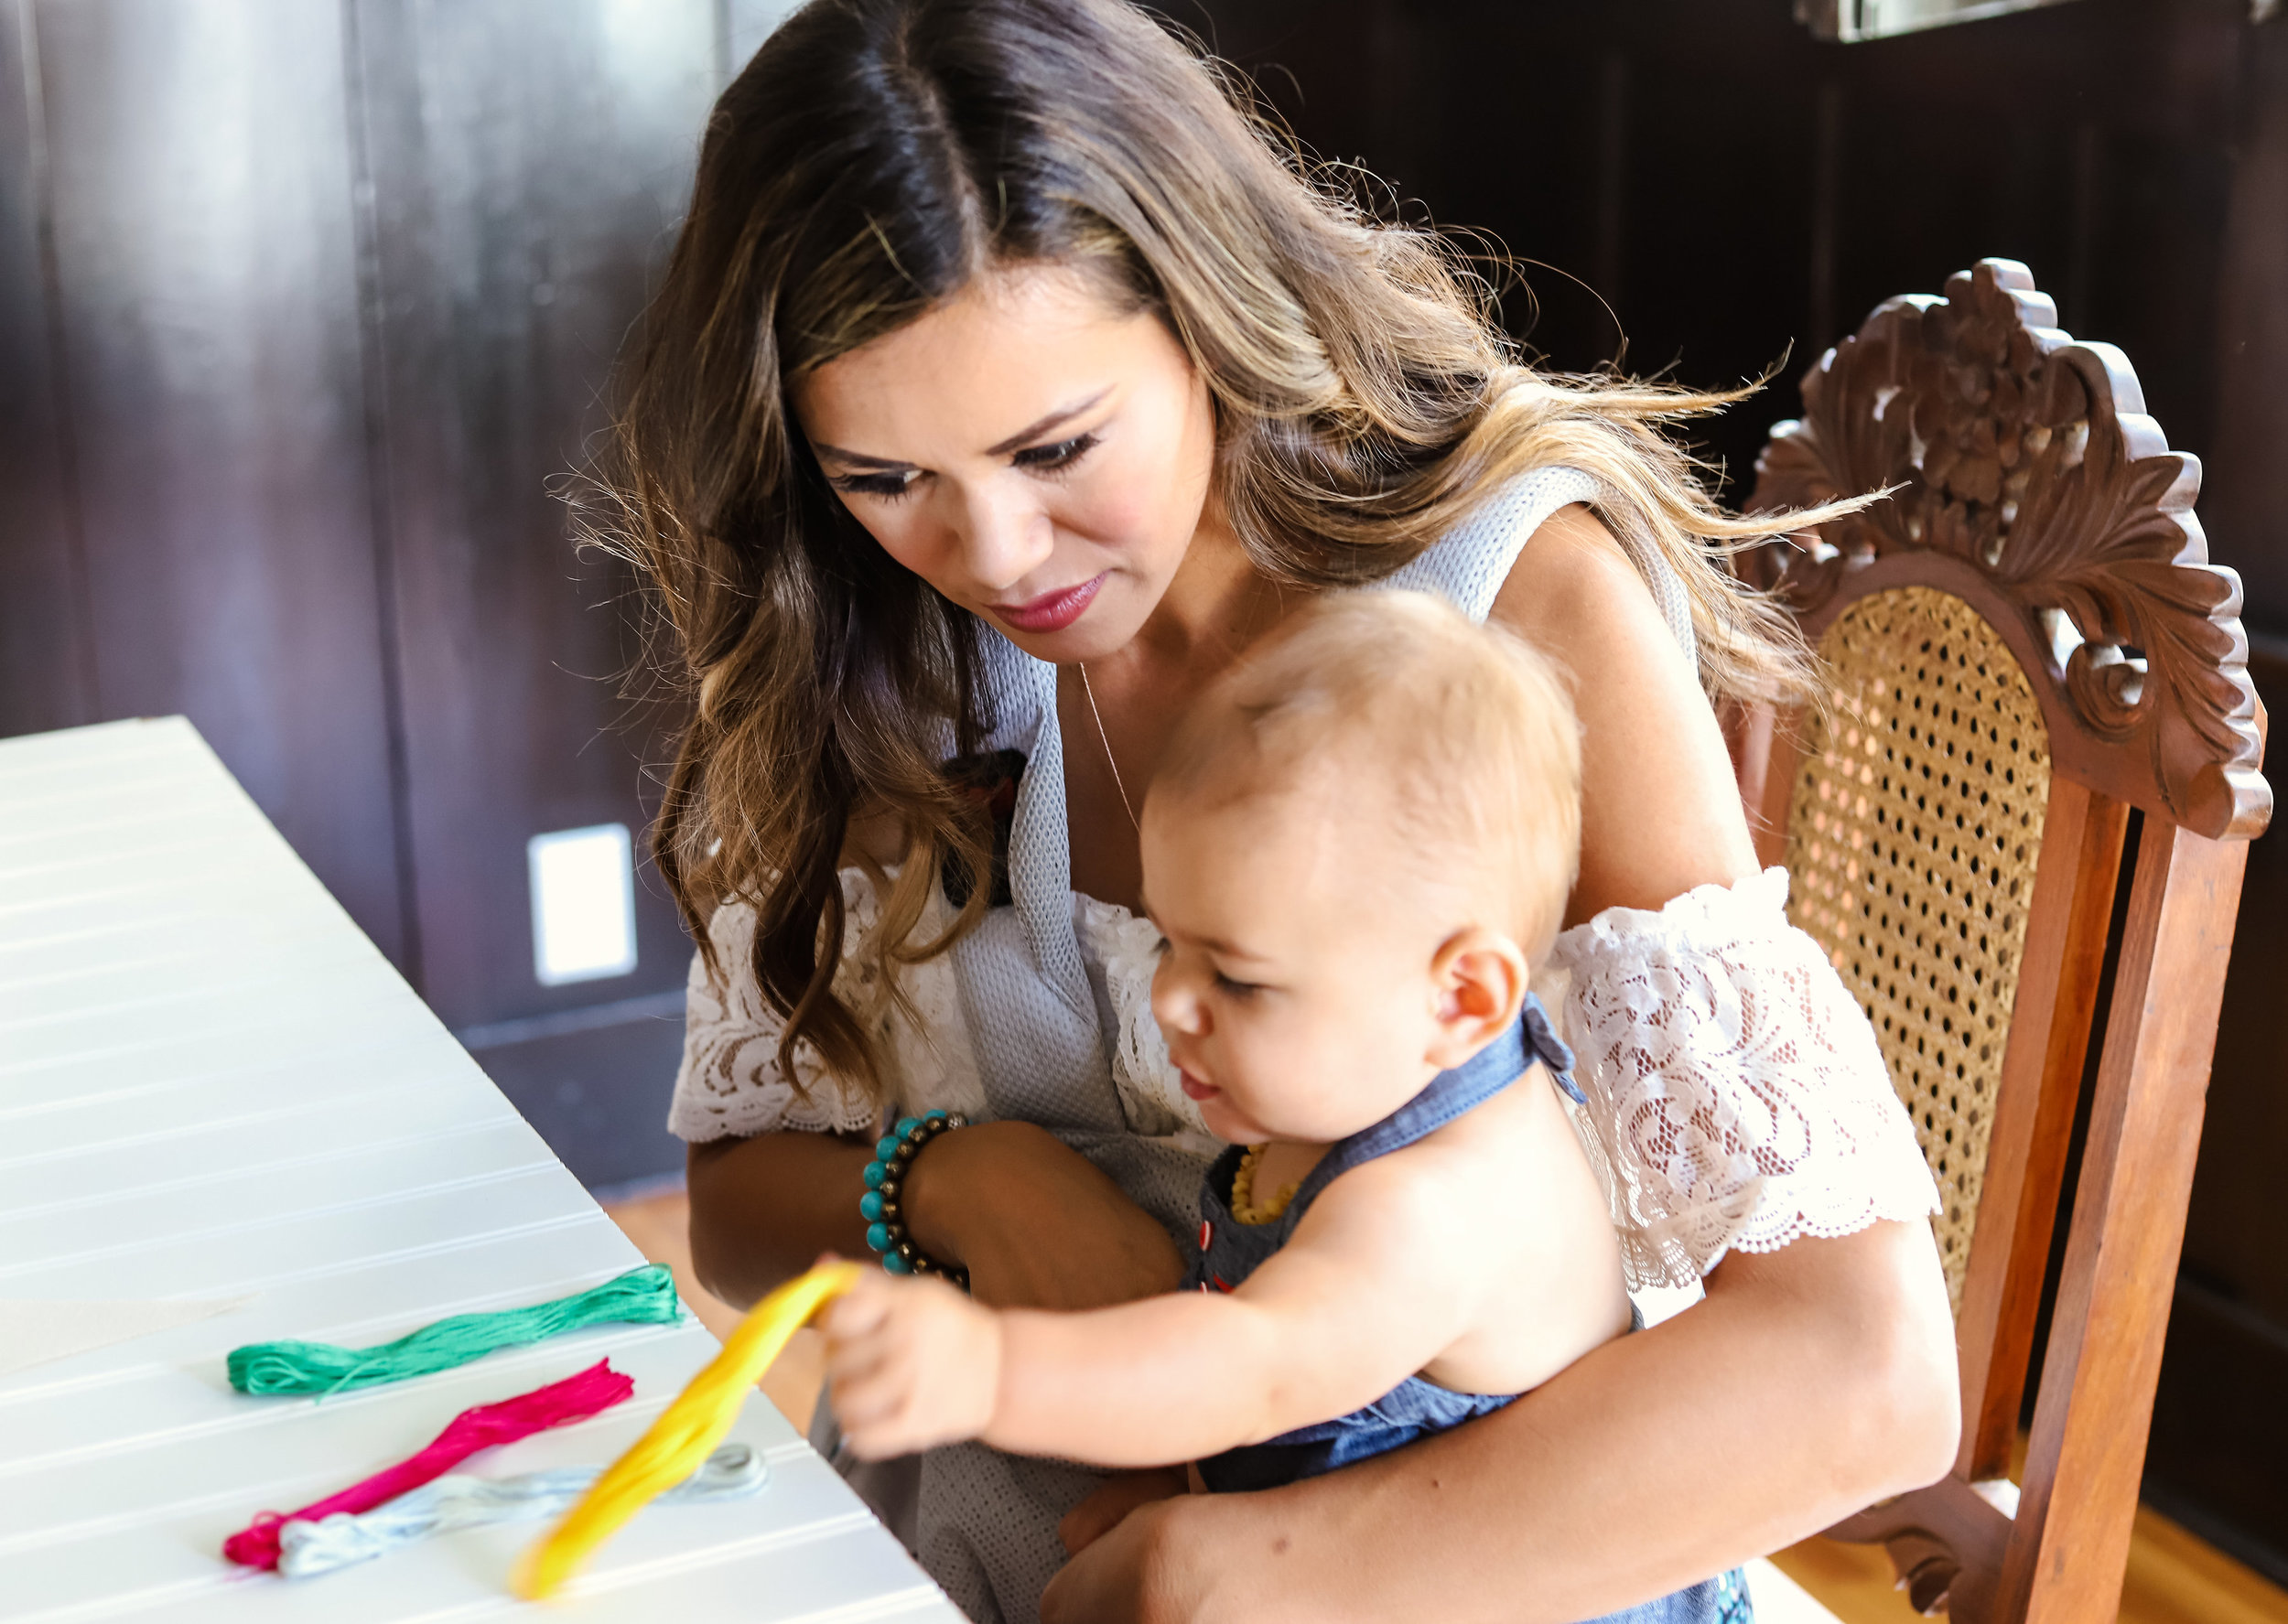
For me, a homemade gift will always mean more ten times over so I'm happy to share an easy embroidered pennant craft idea you can make for your mom or with your daughter for Mother's Day.  It's super simple to make-and like many needle necessary crafts, it's utterly therapeutic.

Photography Credit: Another Cup Photography

Photography Credit: Another Cup Photography

One of my favorite gifts I received when I was pregnant with Milly was a beautiful piece of embroidered hoop art. It's a gift I'll cherish forever that hangs in Milly's bedroom. There's something so personal about handmade art and receiving it ignited this desire in me to learn embroidery. And let's be real-it also could be because this old school craft has been getting some major love over the last few years with faves like Lauren Conrad showing her embroidery talents with her Baby Tell announcement.  Regardless, it's a trade I'd love to learn and get better at.  For years I used to crochet (blankets, scarves, throws-you name it) and when I was a little girl I loved to sew. I remember I made these amazing denim pocket purses from jeans I bought from thrift stores and tried selling them in 6th grade (I was wayyy too ahead of the trend). Then, for several years I made jewelry and sold my pieces on Etsy. I guess I love working with my hands, it's no wonder I work in food. I should open my store back up....

MDCollab-38.jpg
MDCollab-55.jpg

EMBROIDERY SO EASY EVEN A BABY CAN DO IT

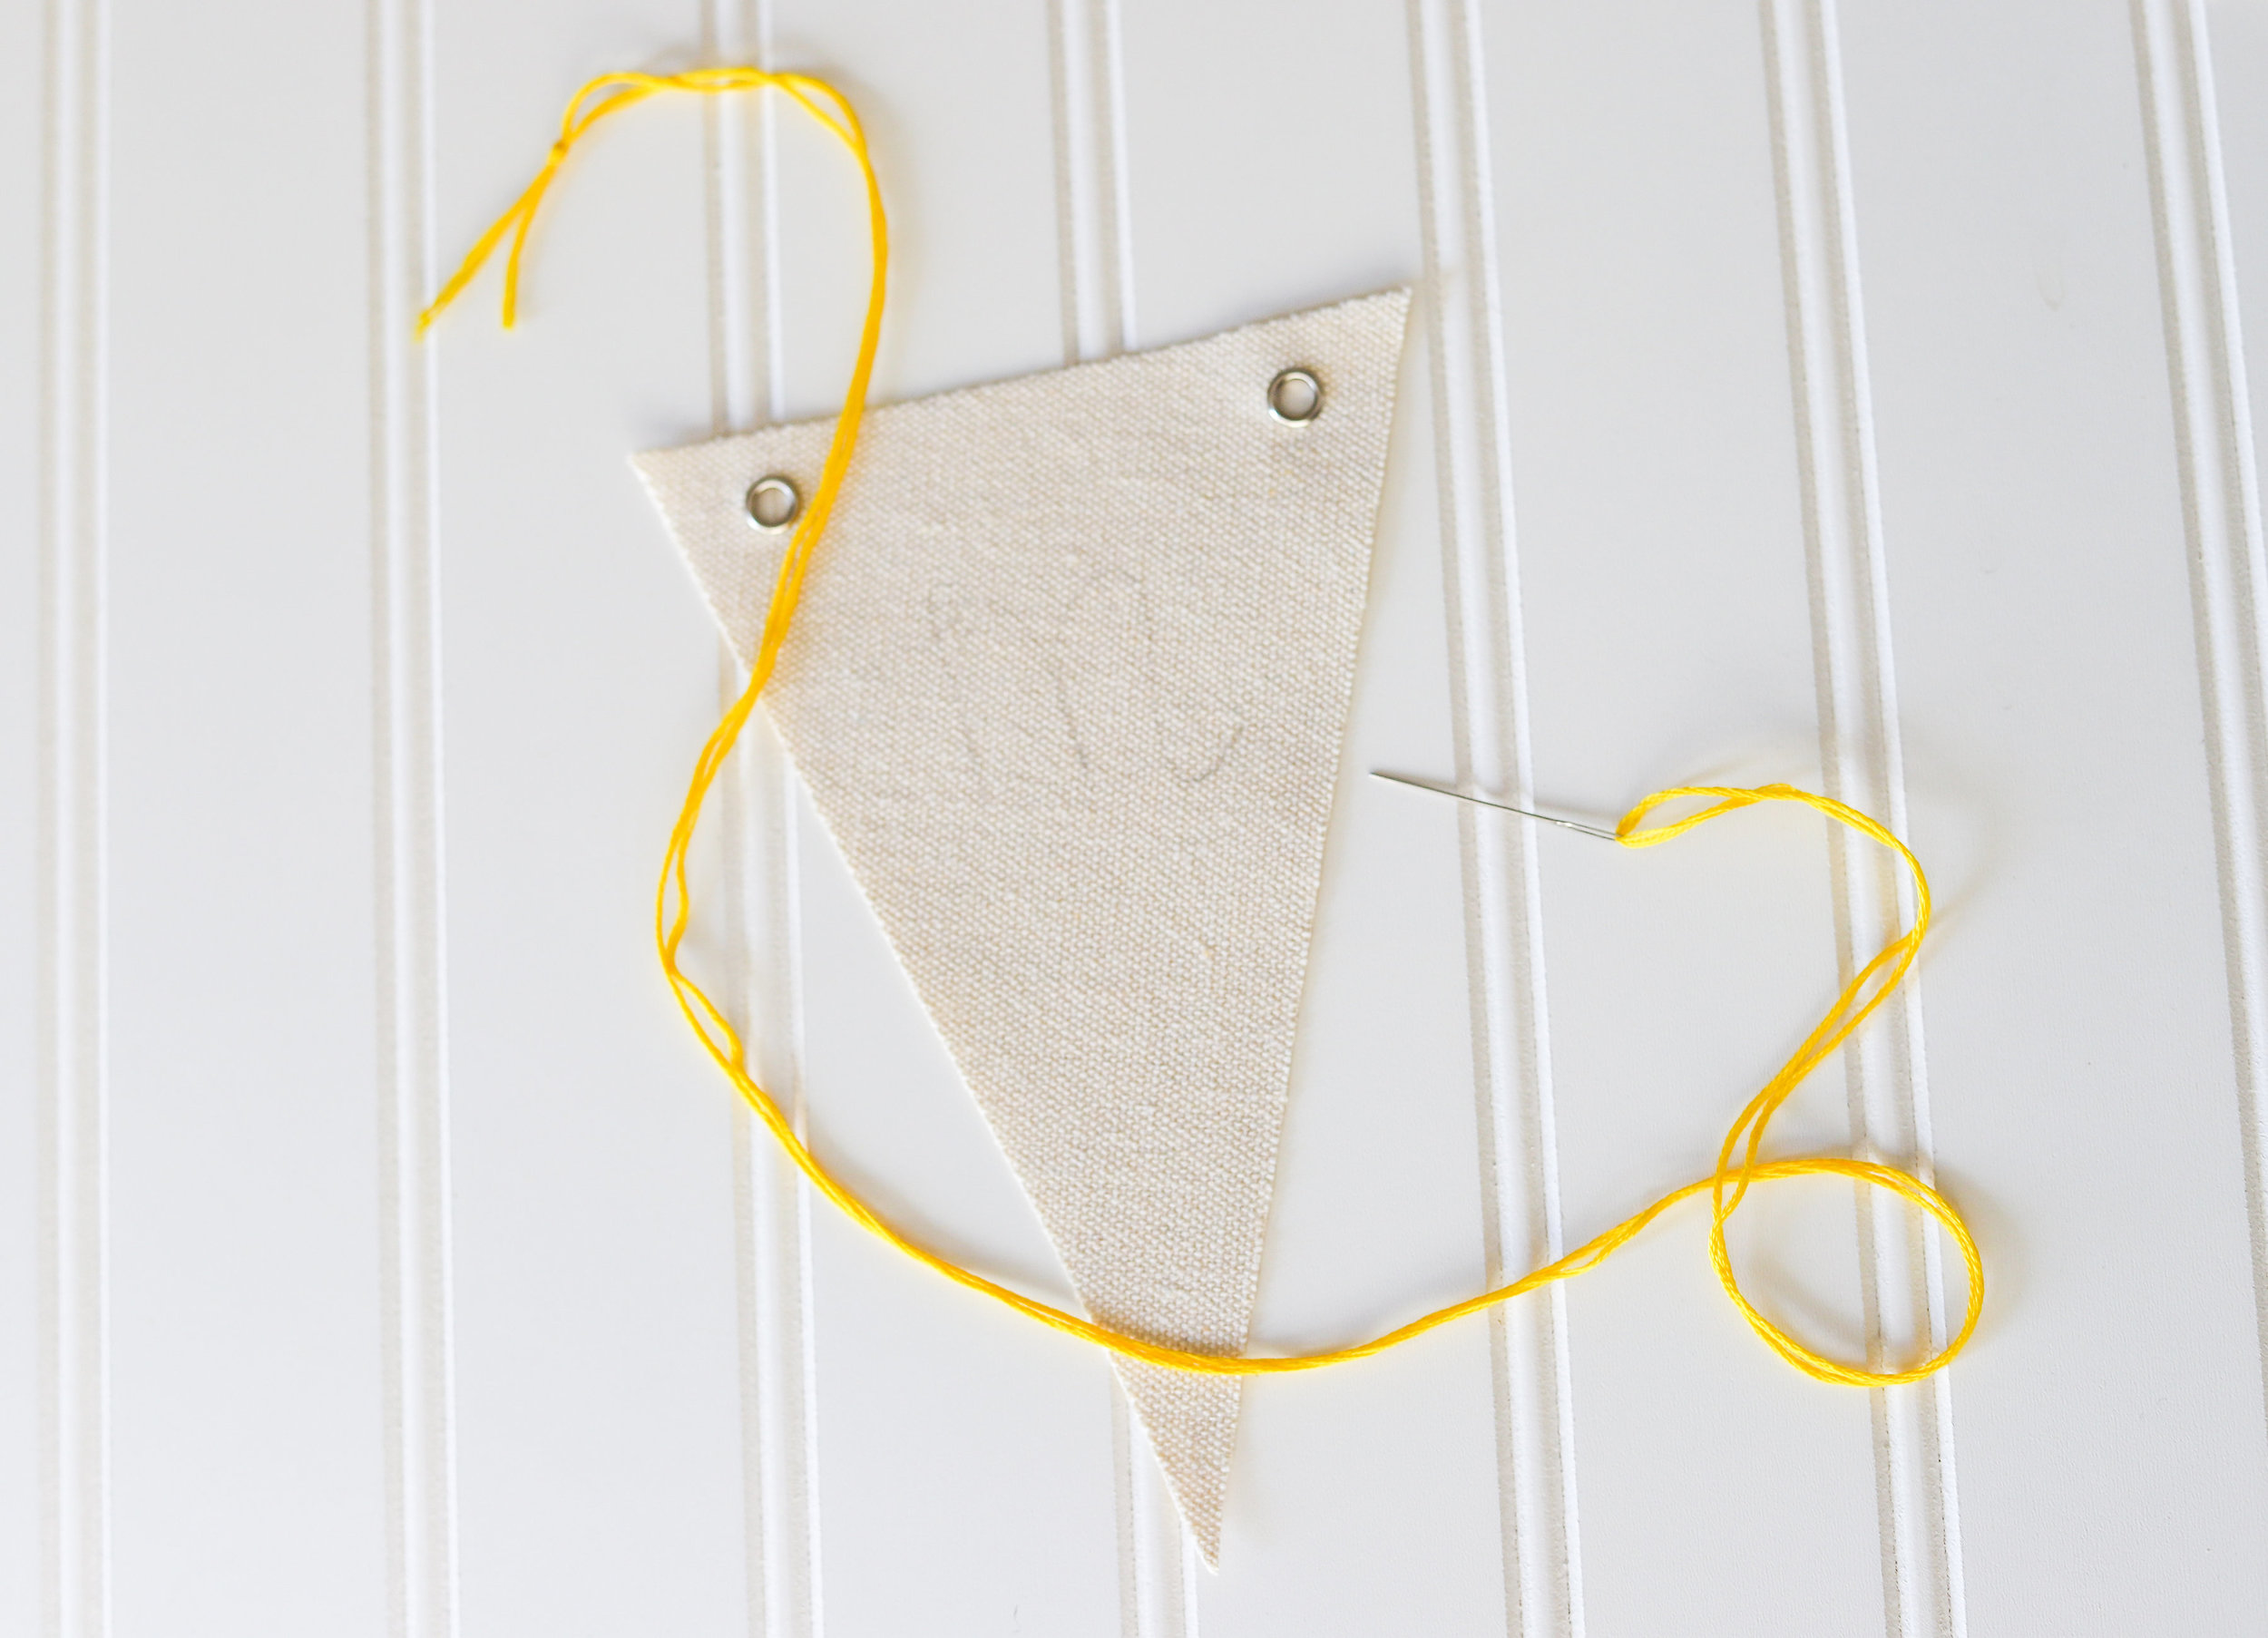
For this pennant, I chose to do the letter, "M" for Milly but a meaningful word like "love" would work too or a positive affirmation would be absolutely dreamy! I'm calling it now: embroidered pennants should replace vision boards!  For this craft you only need a few things: embroidery needle, embroidery floss and fabric (a linen blend banner, burlap flag or any thin fabric will do).

MDCollab-58.jpg

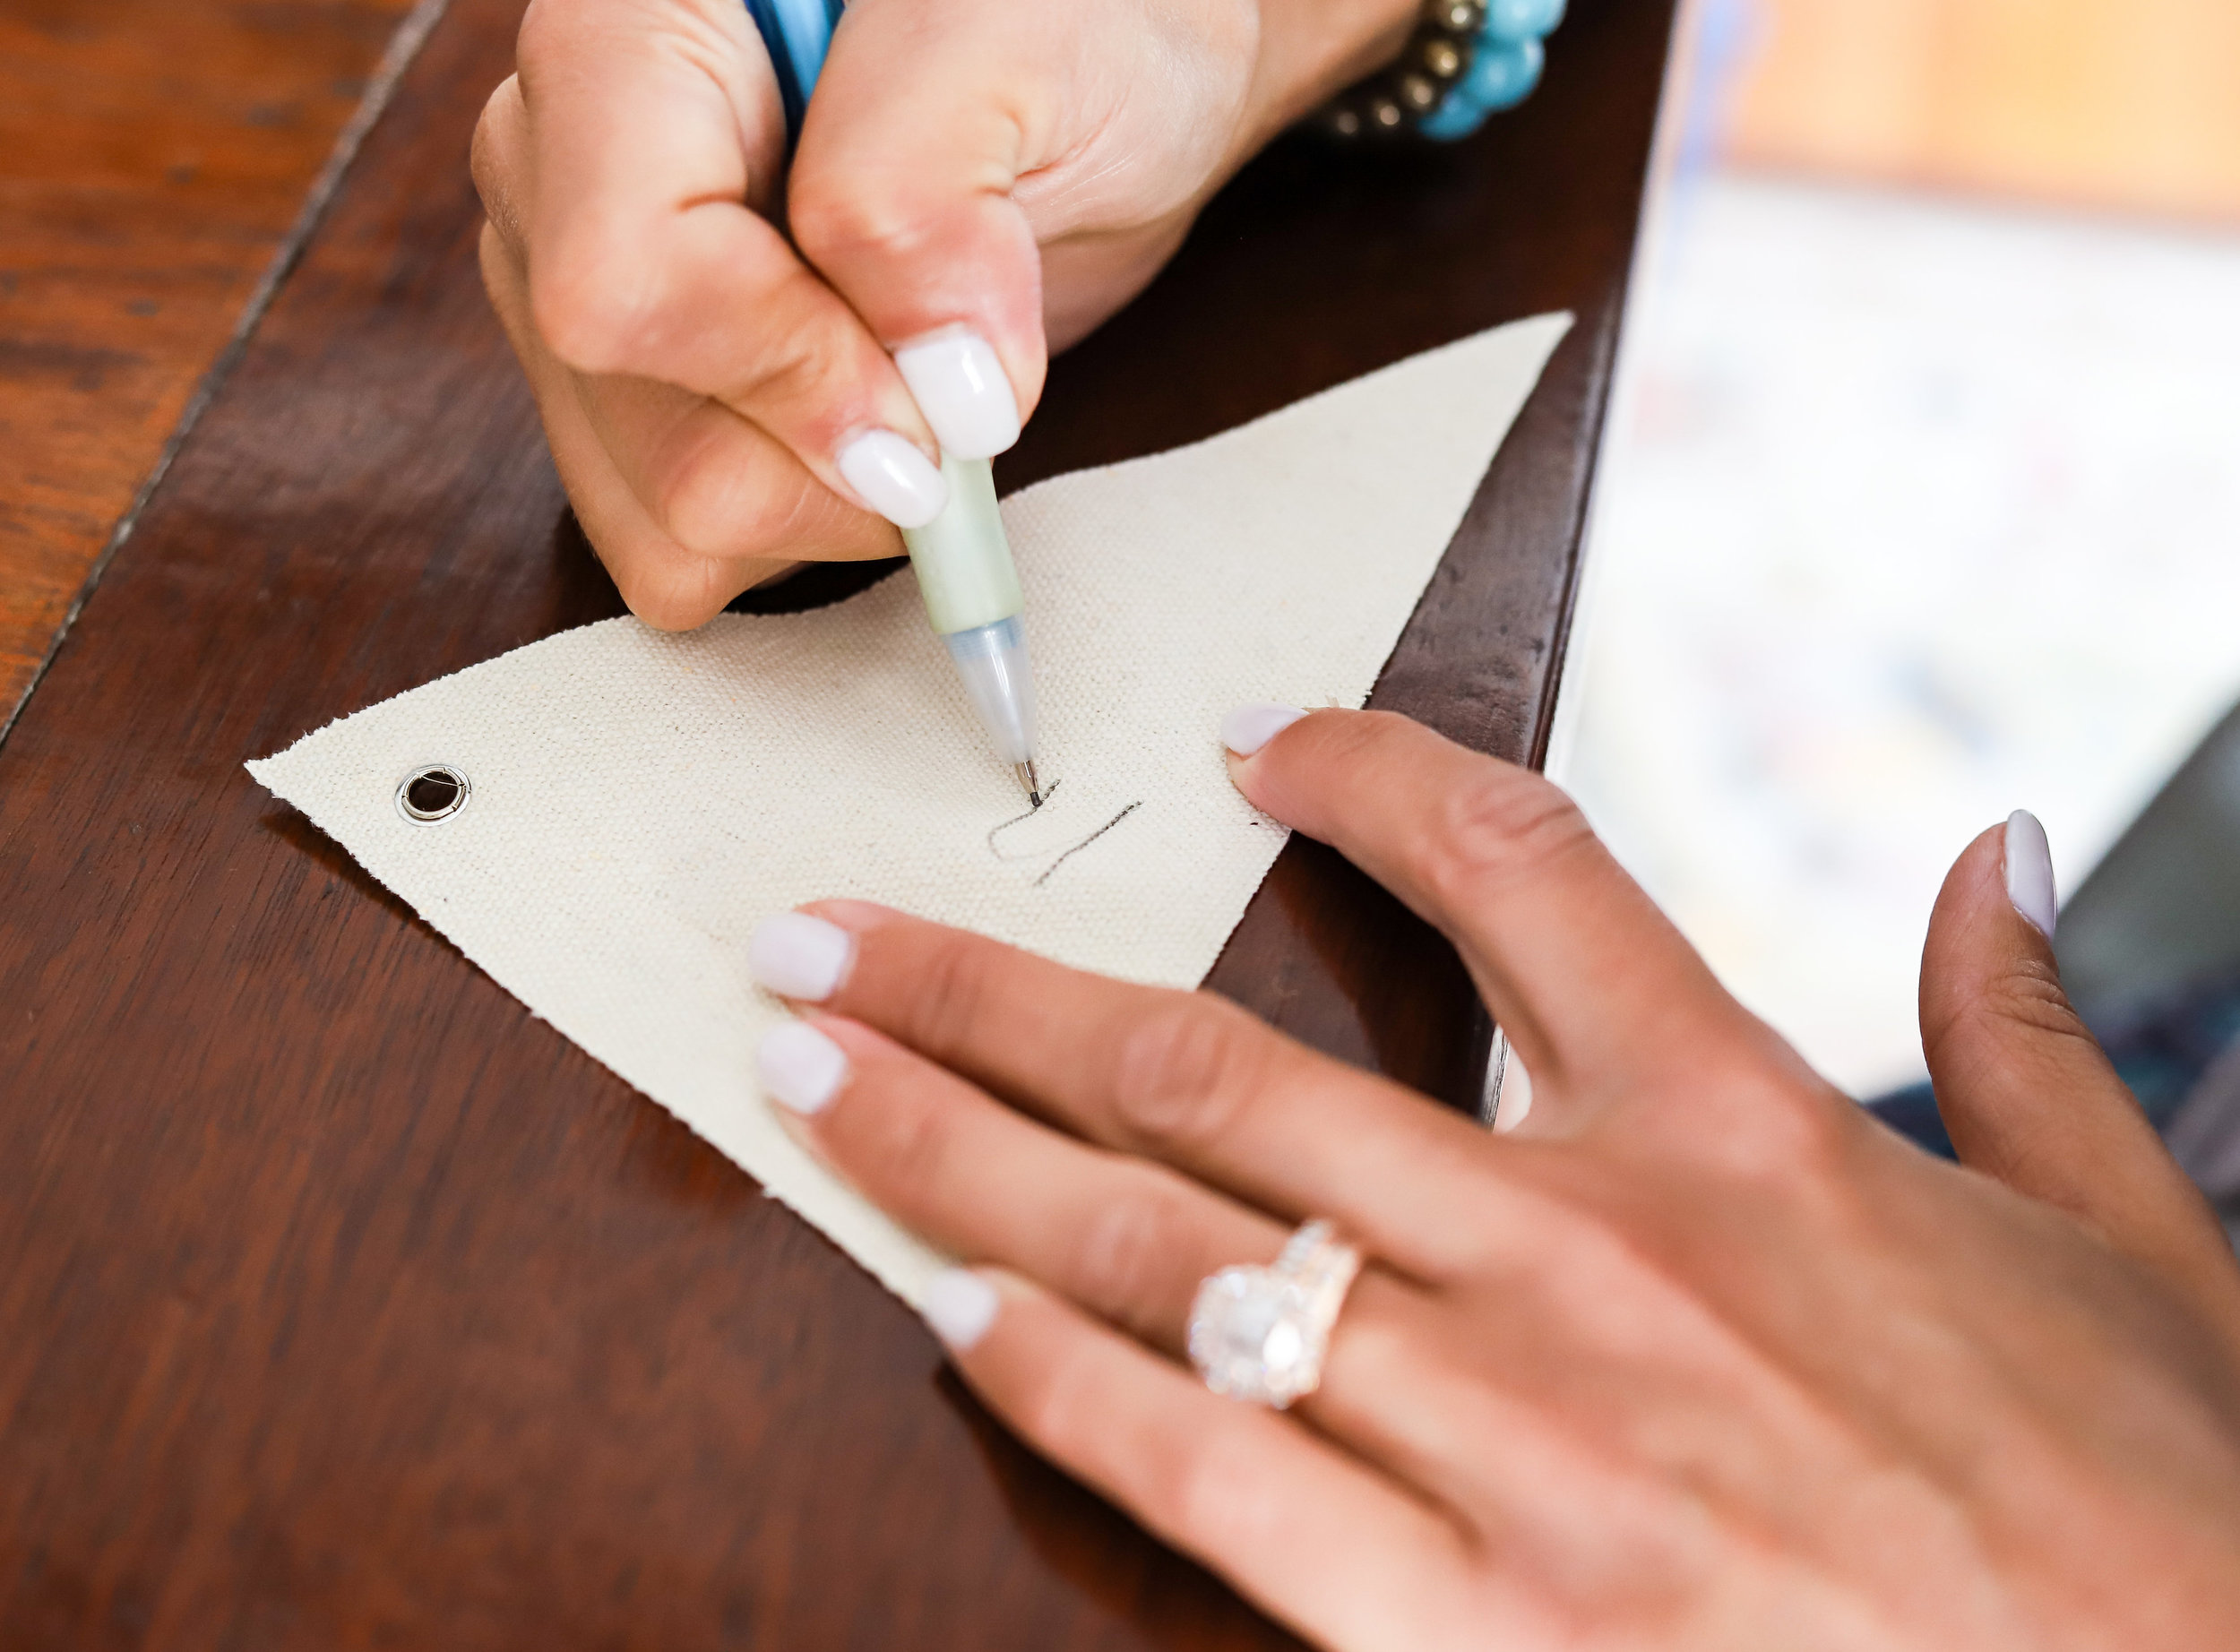
STEP ONE Using a pencil, mark the letter or words you want to embroider on your fabric.

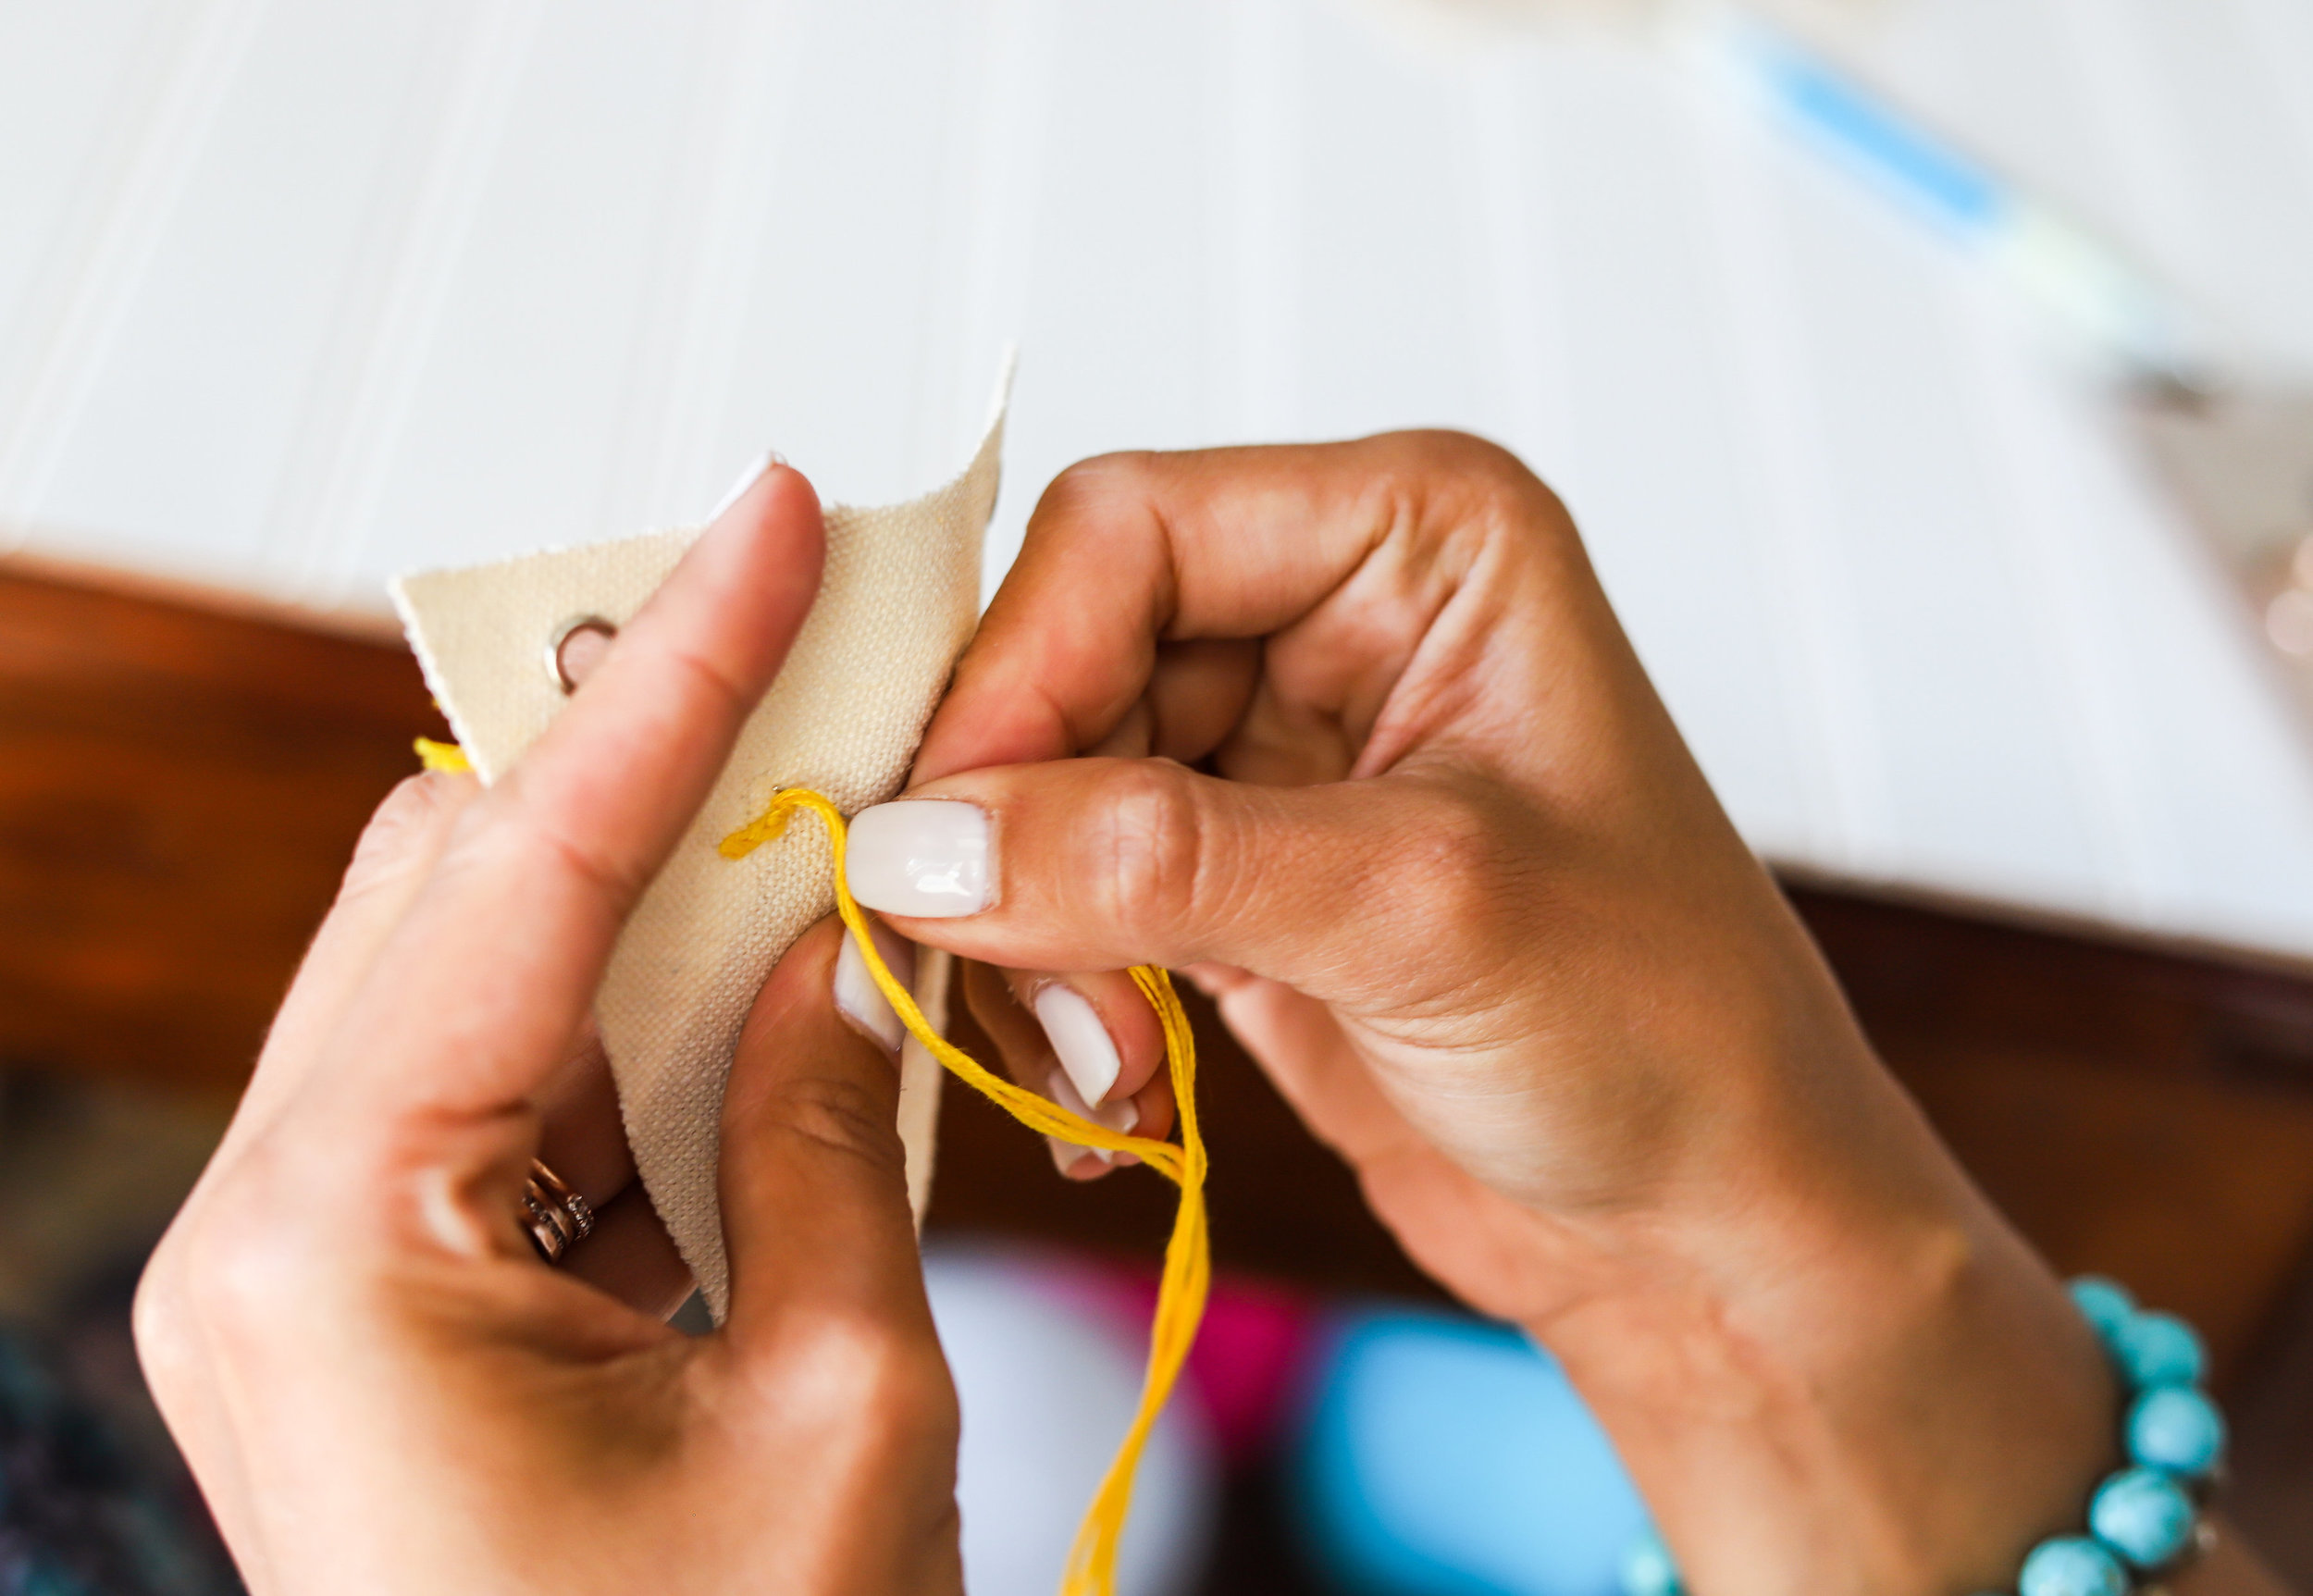
STEP TWO Thread your needle by pulling your floss through the eye only a few inches and then knot the other end. Cut your excess floss.

STEP THREE Get started by choosing your stitch. For text, a back stitch or split stitch is best. You can read and view step by step instructions for each of these here. I love the raised look of a split stitch. You can really see this stitch detail in the pink "love" banner.

STEP FOUR Hang your pennant where it will inspire you or gift to someone special. 

MDCollab-277.jpg

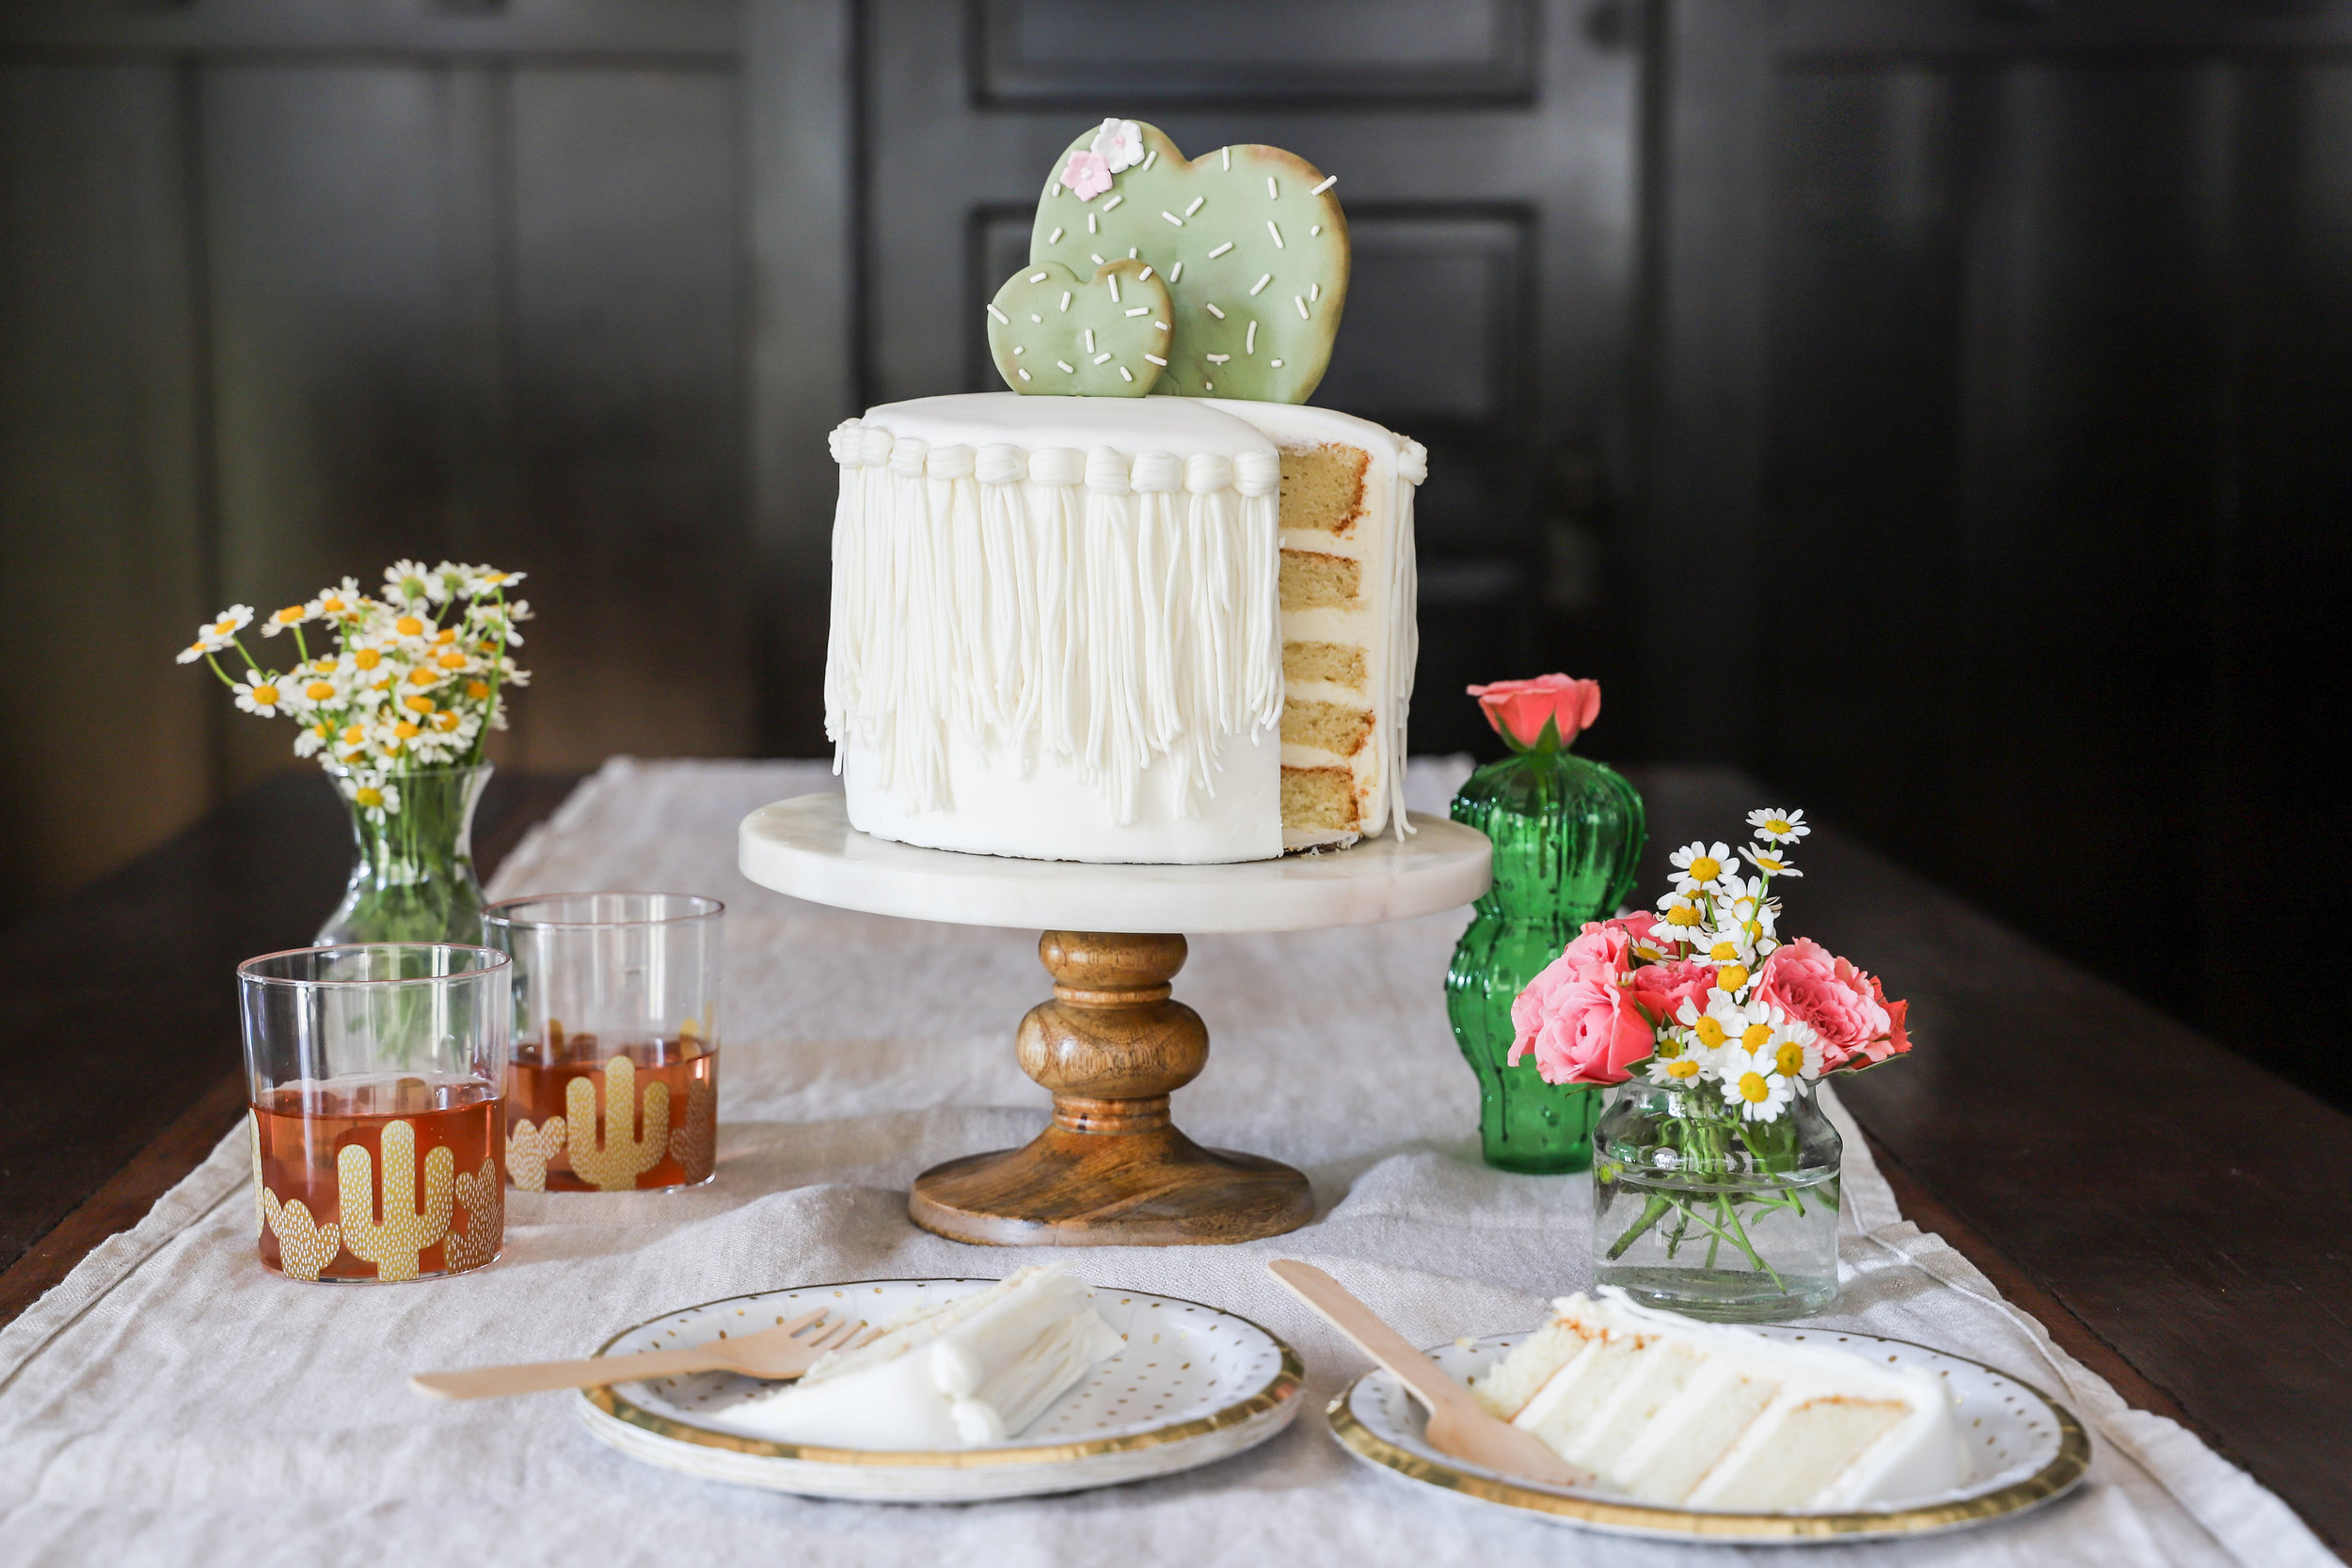
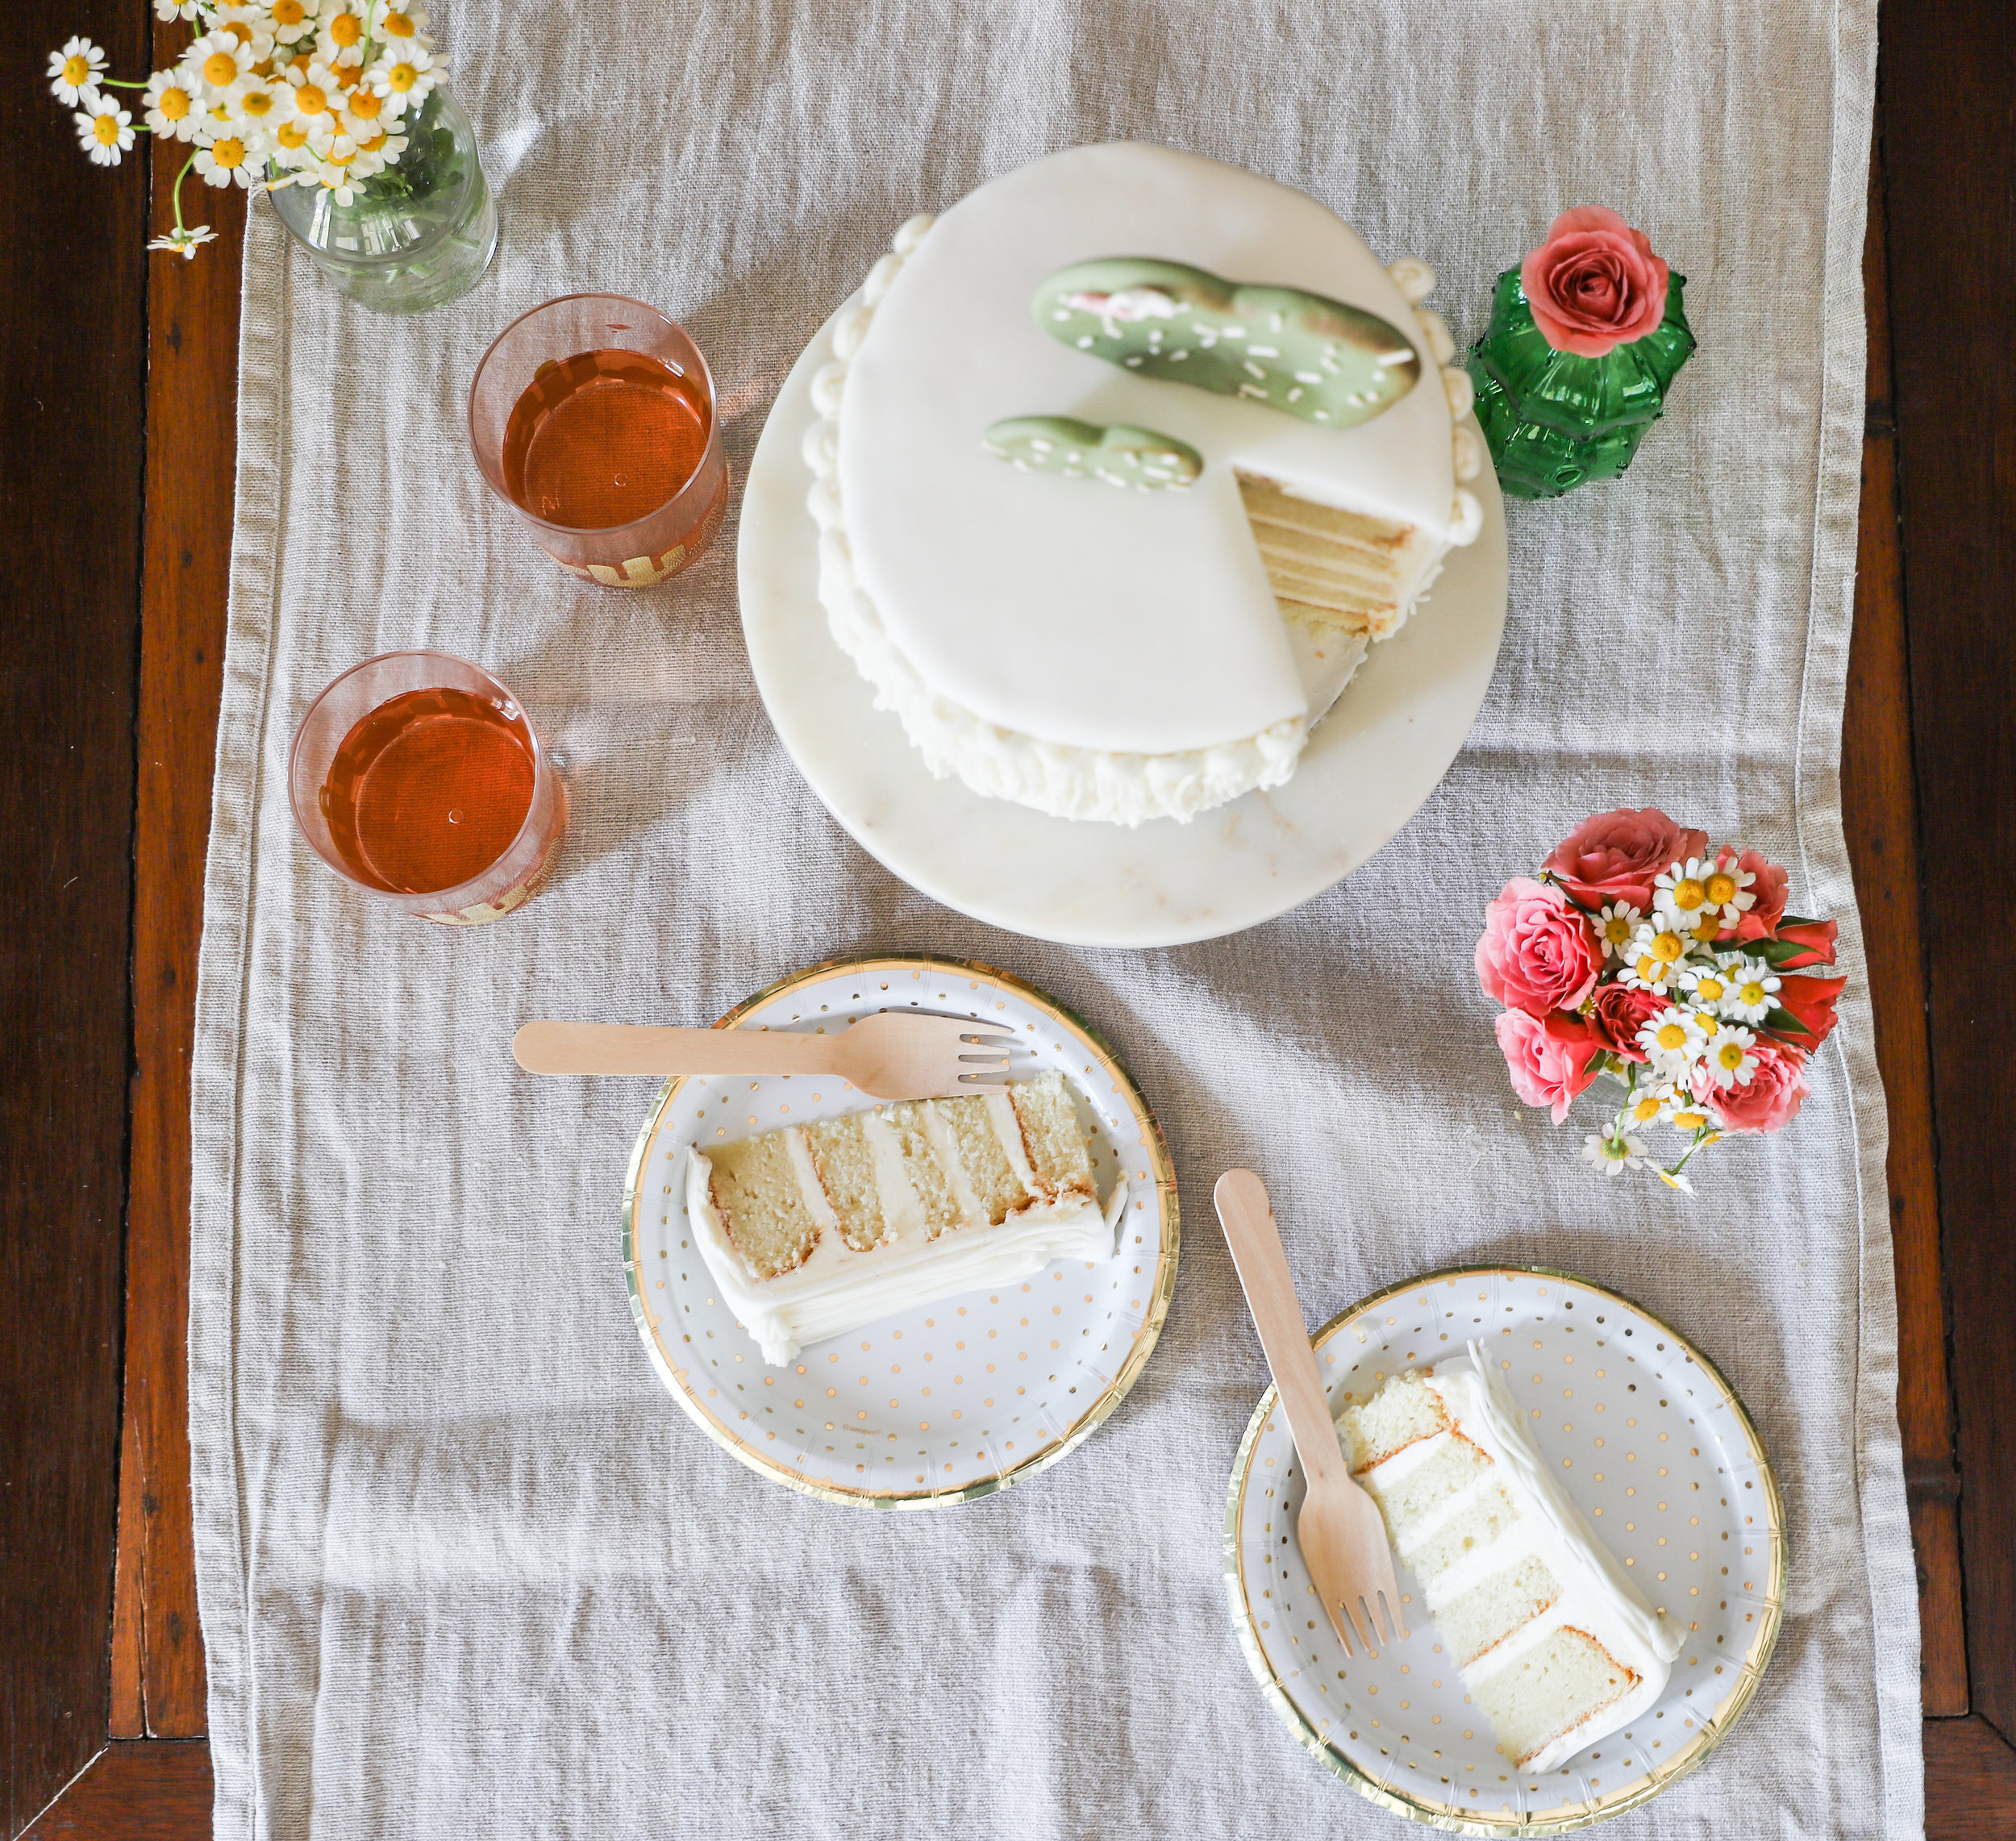
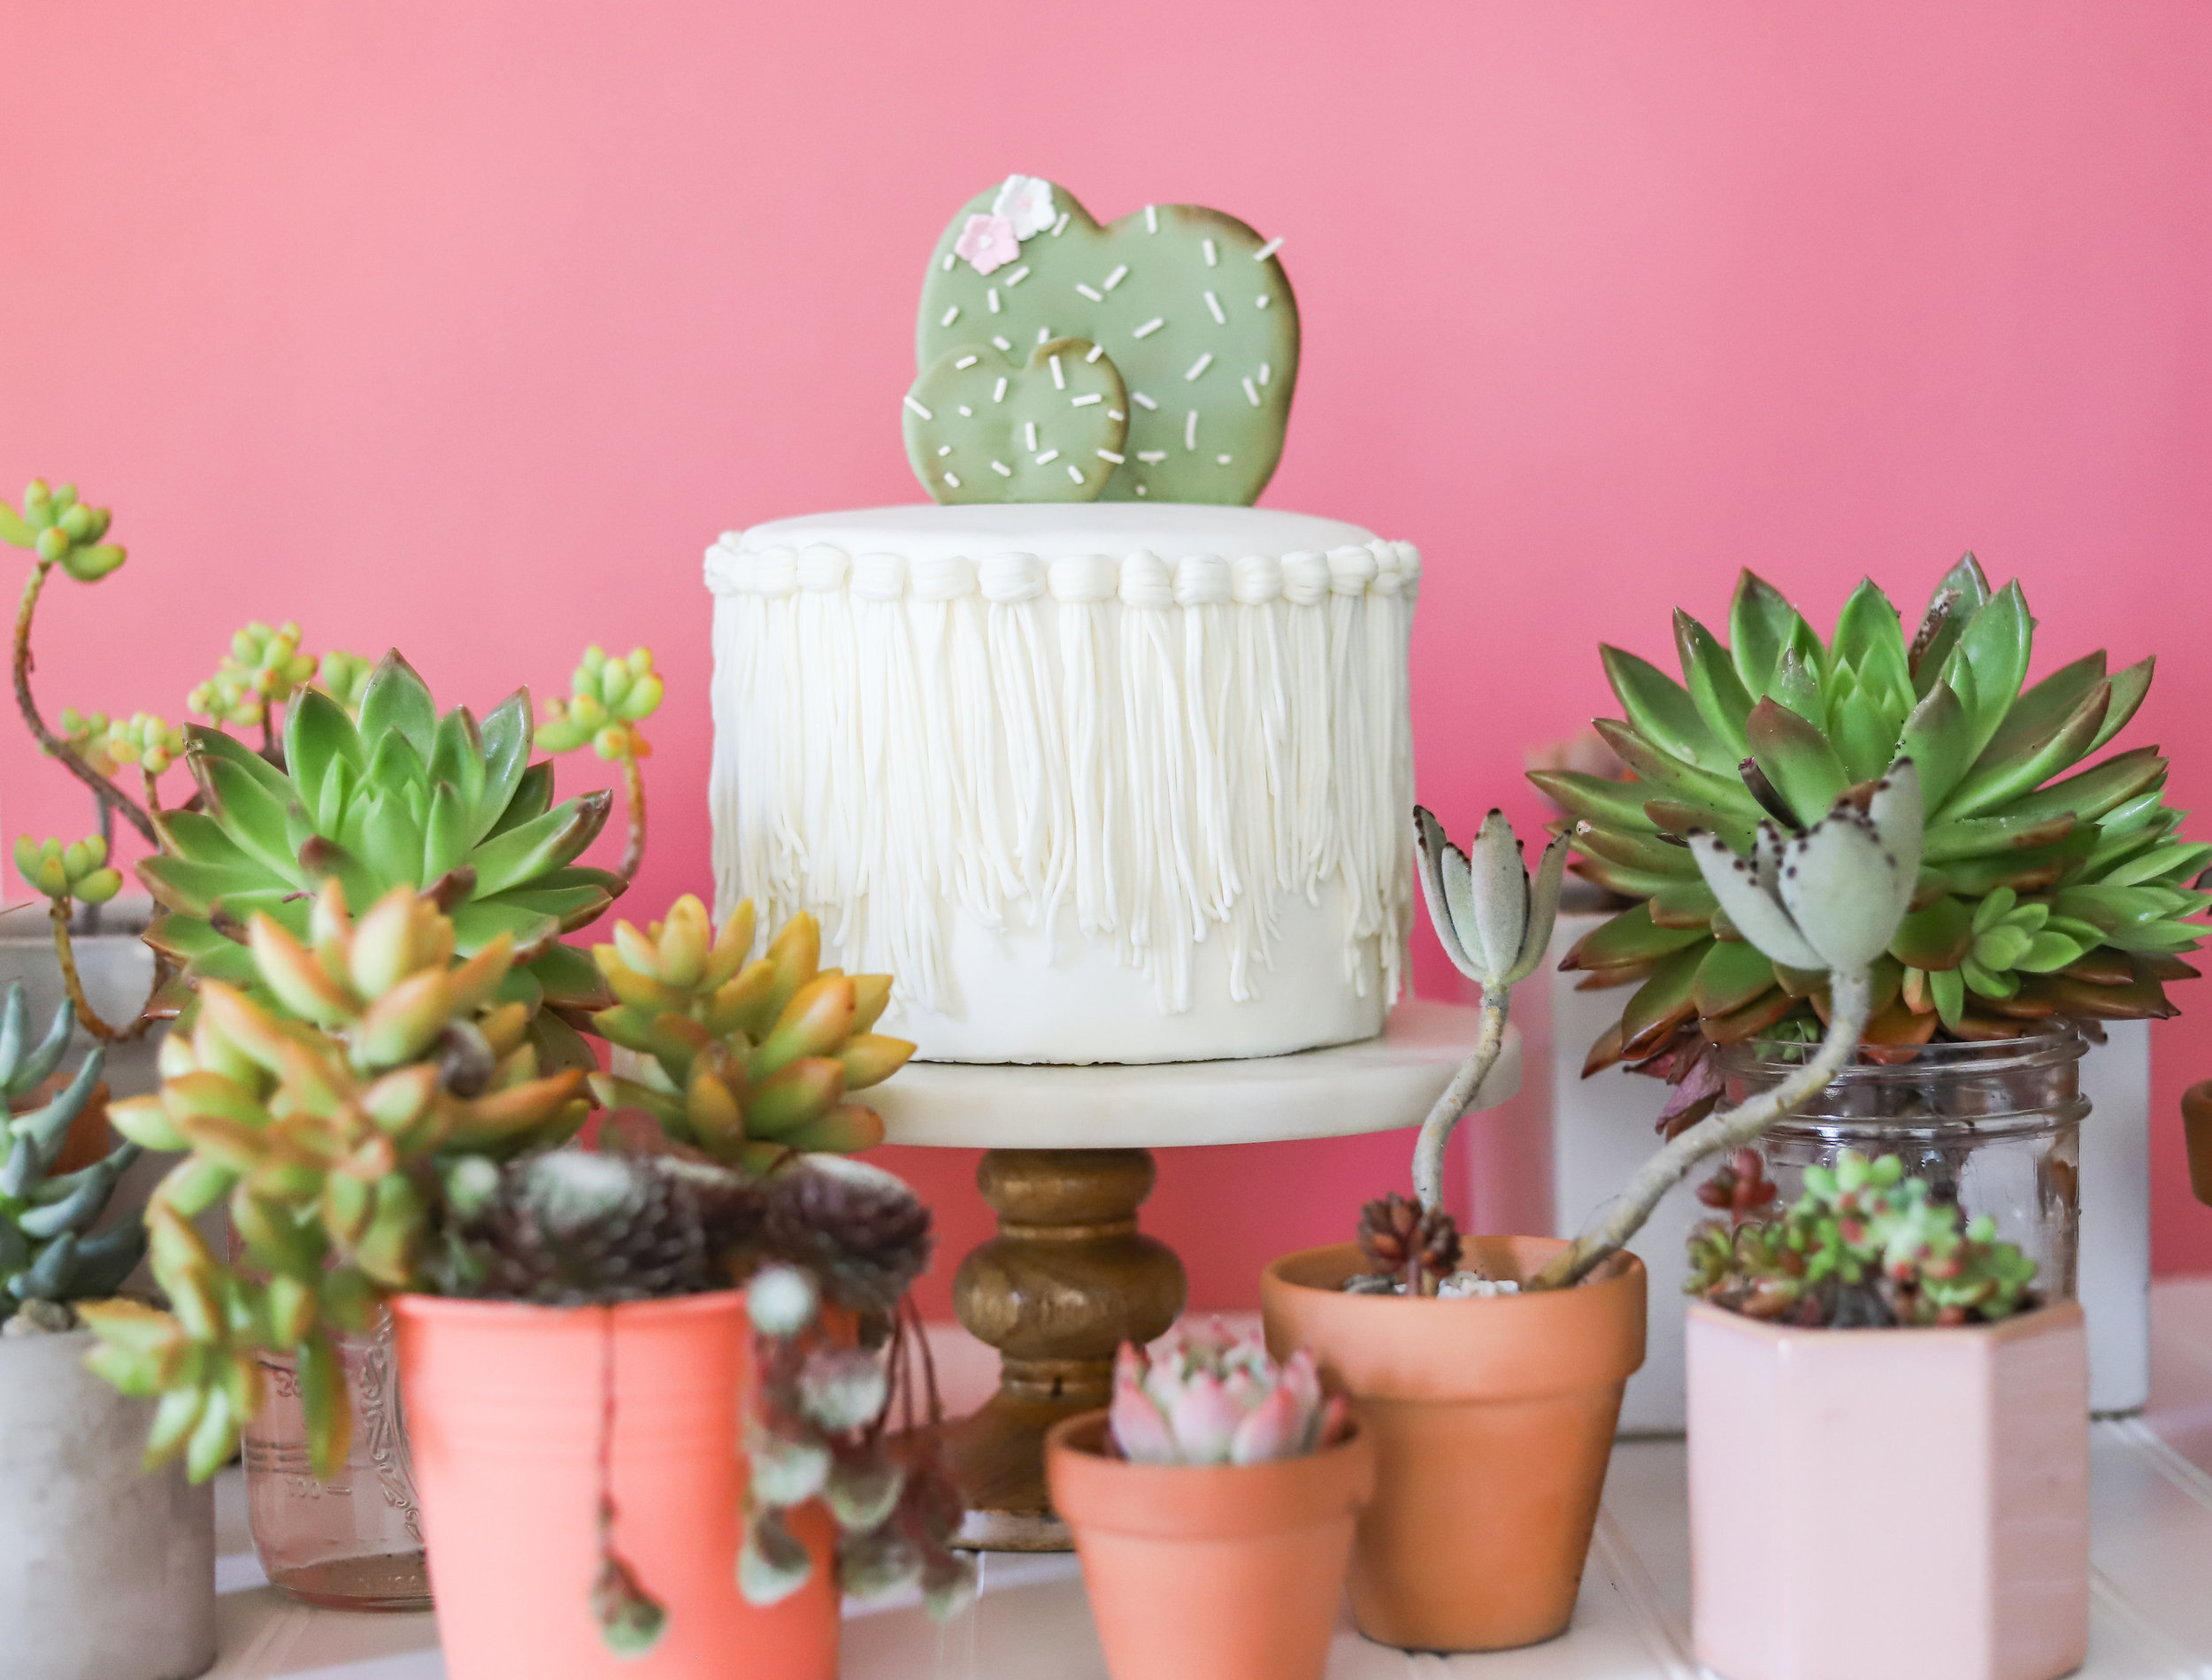
If you want to get even more inspired to create and to see the rest of our fun shoot head over to Julianna's blog to see how to put together the happiest rainbow balloon installation and go to Ashley's blog to learn how to make her boho cactus cake!

Screen Shot 2018-05-08 at 4.49.21 PM.png
Screen Shot 2018-05-08 at 5.11.51 PM.png

This served as the perfect backdrop for photos and totally made me want to recreate it for Milly's first birthday (but please don't quote me on that). 

I'm also majorly crushing on the boho cactus cake Ashley made and decorated. Swoon! 

Screen Shot 2018-05-08 at 8.43.29 PM.png

I'm trying to figure out an occasion I can make it (this would be perfect for a boho bride wedding cake or birthday party, bridal shower, etc OMG!)...but really- I'm an Zona girl-do I actually need any excuse to make something that pays homage to my homestate?! I'm already dreaming about how I would decorate mine with fuschia prickly pear!

MDCollab-223.jpg

Special thanks to Juliana of Another Cup Photography for capturing this special day for us. I just melt over the moments she captured of Milly & I.  You can follow her on Instagram @JulianasCup 

MDCollab-64.jpg

Which idea is your favorite? Let me know in the comments below and be sure to tag us on social if you recreate any of these joyful DIY ideas! @BrandiMilloy @ashrachelle @Julianna_Strickland

The Breast Pumps that suck the BEST

I was happy to guest host on What's Up Moms new show, GEAR alongside Lizzy Mathis! We tested a few breast pumps from classic favorites to modern high tech and even my go to hand pump.  You can watch the episode below and scroll down to learn more about each one. Also,  let me know what your favorite pump is and if you have any tips for pumping I'd love to hear those too! 

Featured BREAST PUMPS

Medela Freestyle 

Medela Freestyle 

My 5 Minute Mindful Breathing Exercise

Sit in a comfortable position with your spine elongated.

Gently close your eyes, relax your body, relax your mind.

Feel the weight of your head, your body sink into your seat.

I want everyone to take a deep breath in through your nose and as you inhale, fill your belly with air, expanding your ribs and allowing your chest to rise.

And then as you exhale, feel your chest sinking down, your abdomen flattening and releasing any tension or tightness you have in your body.

Continue to take these deep breaths, breathing in through your nose and out through your nose.

Listen to the sound of your breathing and once you start to feel that rhythm, starting at the top of your head, relax the weight of your head, let go of any tightness you have in your eyes, between your eyes at your third eye, relaxing your cheekbones, your jaw, your neck, shoulders, your back, your chest, down to your lower back, hips, thighs, knees, legs, calves, ankles, feet, toes.

And as you breathe, calm your mind. If your thoughts start to wonder or you get distracted, bring it back to your breath.

As you continue your deep breathing imagine a calm place and the sound of your your calm place (for me, it is the ocean) and as you breathe in imagine you are breathing in peace. And as you exhale, imagine you are breathing out stress, tension and any tightness you have in your body.

Continue visualizing your calming place, focusing on the sounds you are hearing and every time you hear that sound, let it relax you more and more and more.

And as you continue breathing think about all of that beautiful oxygen filling your body with goodness and light, every time you inhale, fill your lungs, surrounding your heart with all of that goodness and warm light.

Continue your deep breathing and allow your body to embrace this time you’re giving it.

When you start to feel ready you can gently reawaken your body and mind.

Keeping your eyes closed, notice the sounds around you. Feel the floor beneath you. Feel your clothes against your body.

Wiggle your fingers and toes.

Shrug your shoulders.

Open your eyes, straighten out your legs, stretch your arms, enjoy how relaxed you feel, feeling re-energized for the rest of your day.

Now quietly thank your body and yourself for allowing you this moment.

Five Simple Ways to Self Care

By definition self care is activities and/or practices we engage in on a regular basis to reduce stress and enhance our well-being. It's things we do to feed our soul and nourish our heart. It's essential for all of us to live, thrive and succeed!

Self care is extremely important to me and absolutely the reason I live each day with a peaceful heart.  Giving myself time to feed my soul allows me to be a present wife, mom, friend, sister, daughter, business owner, etc. Prioritizing myself and making my mental, physical and soulful health a priority has impacted my life and those around me in magnificent ways.  When I feel good I am able to be better.  But unfortunately for many of us it’s one of those things that we put off and put off and sometimes it takes a life changing moment or worse-a wake up call until we understand the power of loving ourselves and making time for you. Here are my five simple ways to self care.

DEEP BREATHING

This is a powerful self-care tool we all have. Each of us has this in us already-this natural superpower-but so many of us don’t utilize or embrace it.  The power of deep breathing and using your breath to direct your energy and your focus, allows you to be present and to calm your mind and body.  You can do the following mindful breathing exercise anywhere. It's a great way to begin your morning but is a lifesaver in the afternoon when daily stresses. To experience my five minute mindful breathing exercise, go here

 THE POWER OF "NO"

This was a hard one to embrace because if you're like me, you like to please and never want to let others down. But sometimes it's not about everyone else. It's about you putting yourself first and prioritizing what fulfills you. Would it really be the end of the world if you skipped a pointless/spontaneous happy hour with your coworkers? Or said no to doing mindless activities? And instead said YES to trying a new workout class or yes to cooking a healthy dinner at home for yourself (with Andrea Bocelli playing in the background in your favorite comfy yoga pants....I digress). Too often we allow our guilt to drive our decision making when in fact we should make decisions with a clear mind and a sincere heart. 

GIVE THANKS

Keeping a gratitude journal is an easy way to clear your mind and focus on what you are thankful for. Even when everything seems to be spiraling out of control and your to do lists get longer and longer, and it feels like nothing is going your way-writing down what you are thankful for is an easy way to put things in perspective. This is something you can do every day before you go to bed. It doesn't need to be fancy-you can just jot it down in a notebook. If you enjoy writing, I would suggest writing letters to yourself-this can be very therapeutic and a deeply emotional way to move past personal obstacles you might be facing.

Since becoming a Mama I've started writing letters to Milly. The first letter I wrote her was right after she was born and then I wrote another when turned four months old.  My goal is to continue writing her letters at least every quarter or whenever I feel compelled to. It's amazing how powerful putting your thoughts to paper can be.

DISCONNECT

Unplugging from electronics, taking a social media fast or even setting technology boundaries are powerful ways to reconnect with yourself and those around you.  As much as I love social media I rarely post on my social channels while I'm actually experiencing whatever "thing" I'm doing. I typically will take the photos, videos, etc and post later. This allows me to be present and live in the moment.  In our home we rarely have the television on. Instead, we enjoy playing music and save media time for designated times in the day. 

QUALITY, NOT QUANTITY

I think it's important for each of us to identify the activities that fulfill you and in the same token, identify the people that also do so. A huge component of self care is the influence of others and understanding positive relationships. Having even just a few select people in your life that support your commitment to self-care is imperative-seeking only those people that you can learn from, lean on and laugh with.

Keep reading for some of my favorite ways to practice self care. I invite you to try some of them yourself and when you do, I'd love for you to share your experience with my on instagram @BrandiMilloy or down below in the comments. 

Some of My Favorite Ways to Practice Self Care

  1. Write affirmations and post them somewhere you see everyday.
  2. Wake up early and go for a walk.
  3. Go to the beach to meditate or pray.
  4. Have a homemade picnic in the park.
  5. Take a long bubble bath.
  6. Buy a new feel good book or swap one with a friend.
  7. Listen to an inspirational story/podcast/speech/lecture.
  8. Declutter a drawer. Keep decluttering and keep things that only "spark joy" via the Kon Mari method.
  9. Volunteer or give back. Do something good and pay it forward.
  10. Surprise a friend with a card of small gift.


Delicious Vegan Queso For Folks Who Aren't Even Vegan
7718092528_IMG_5290.JPG

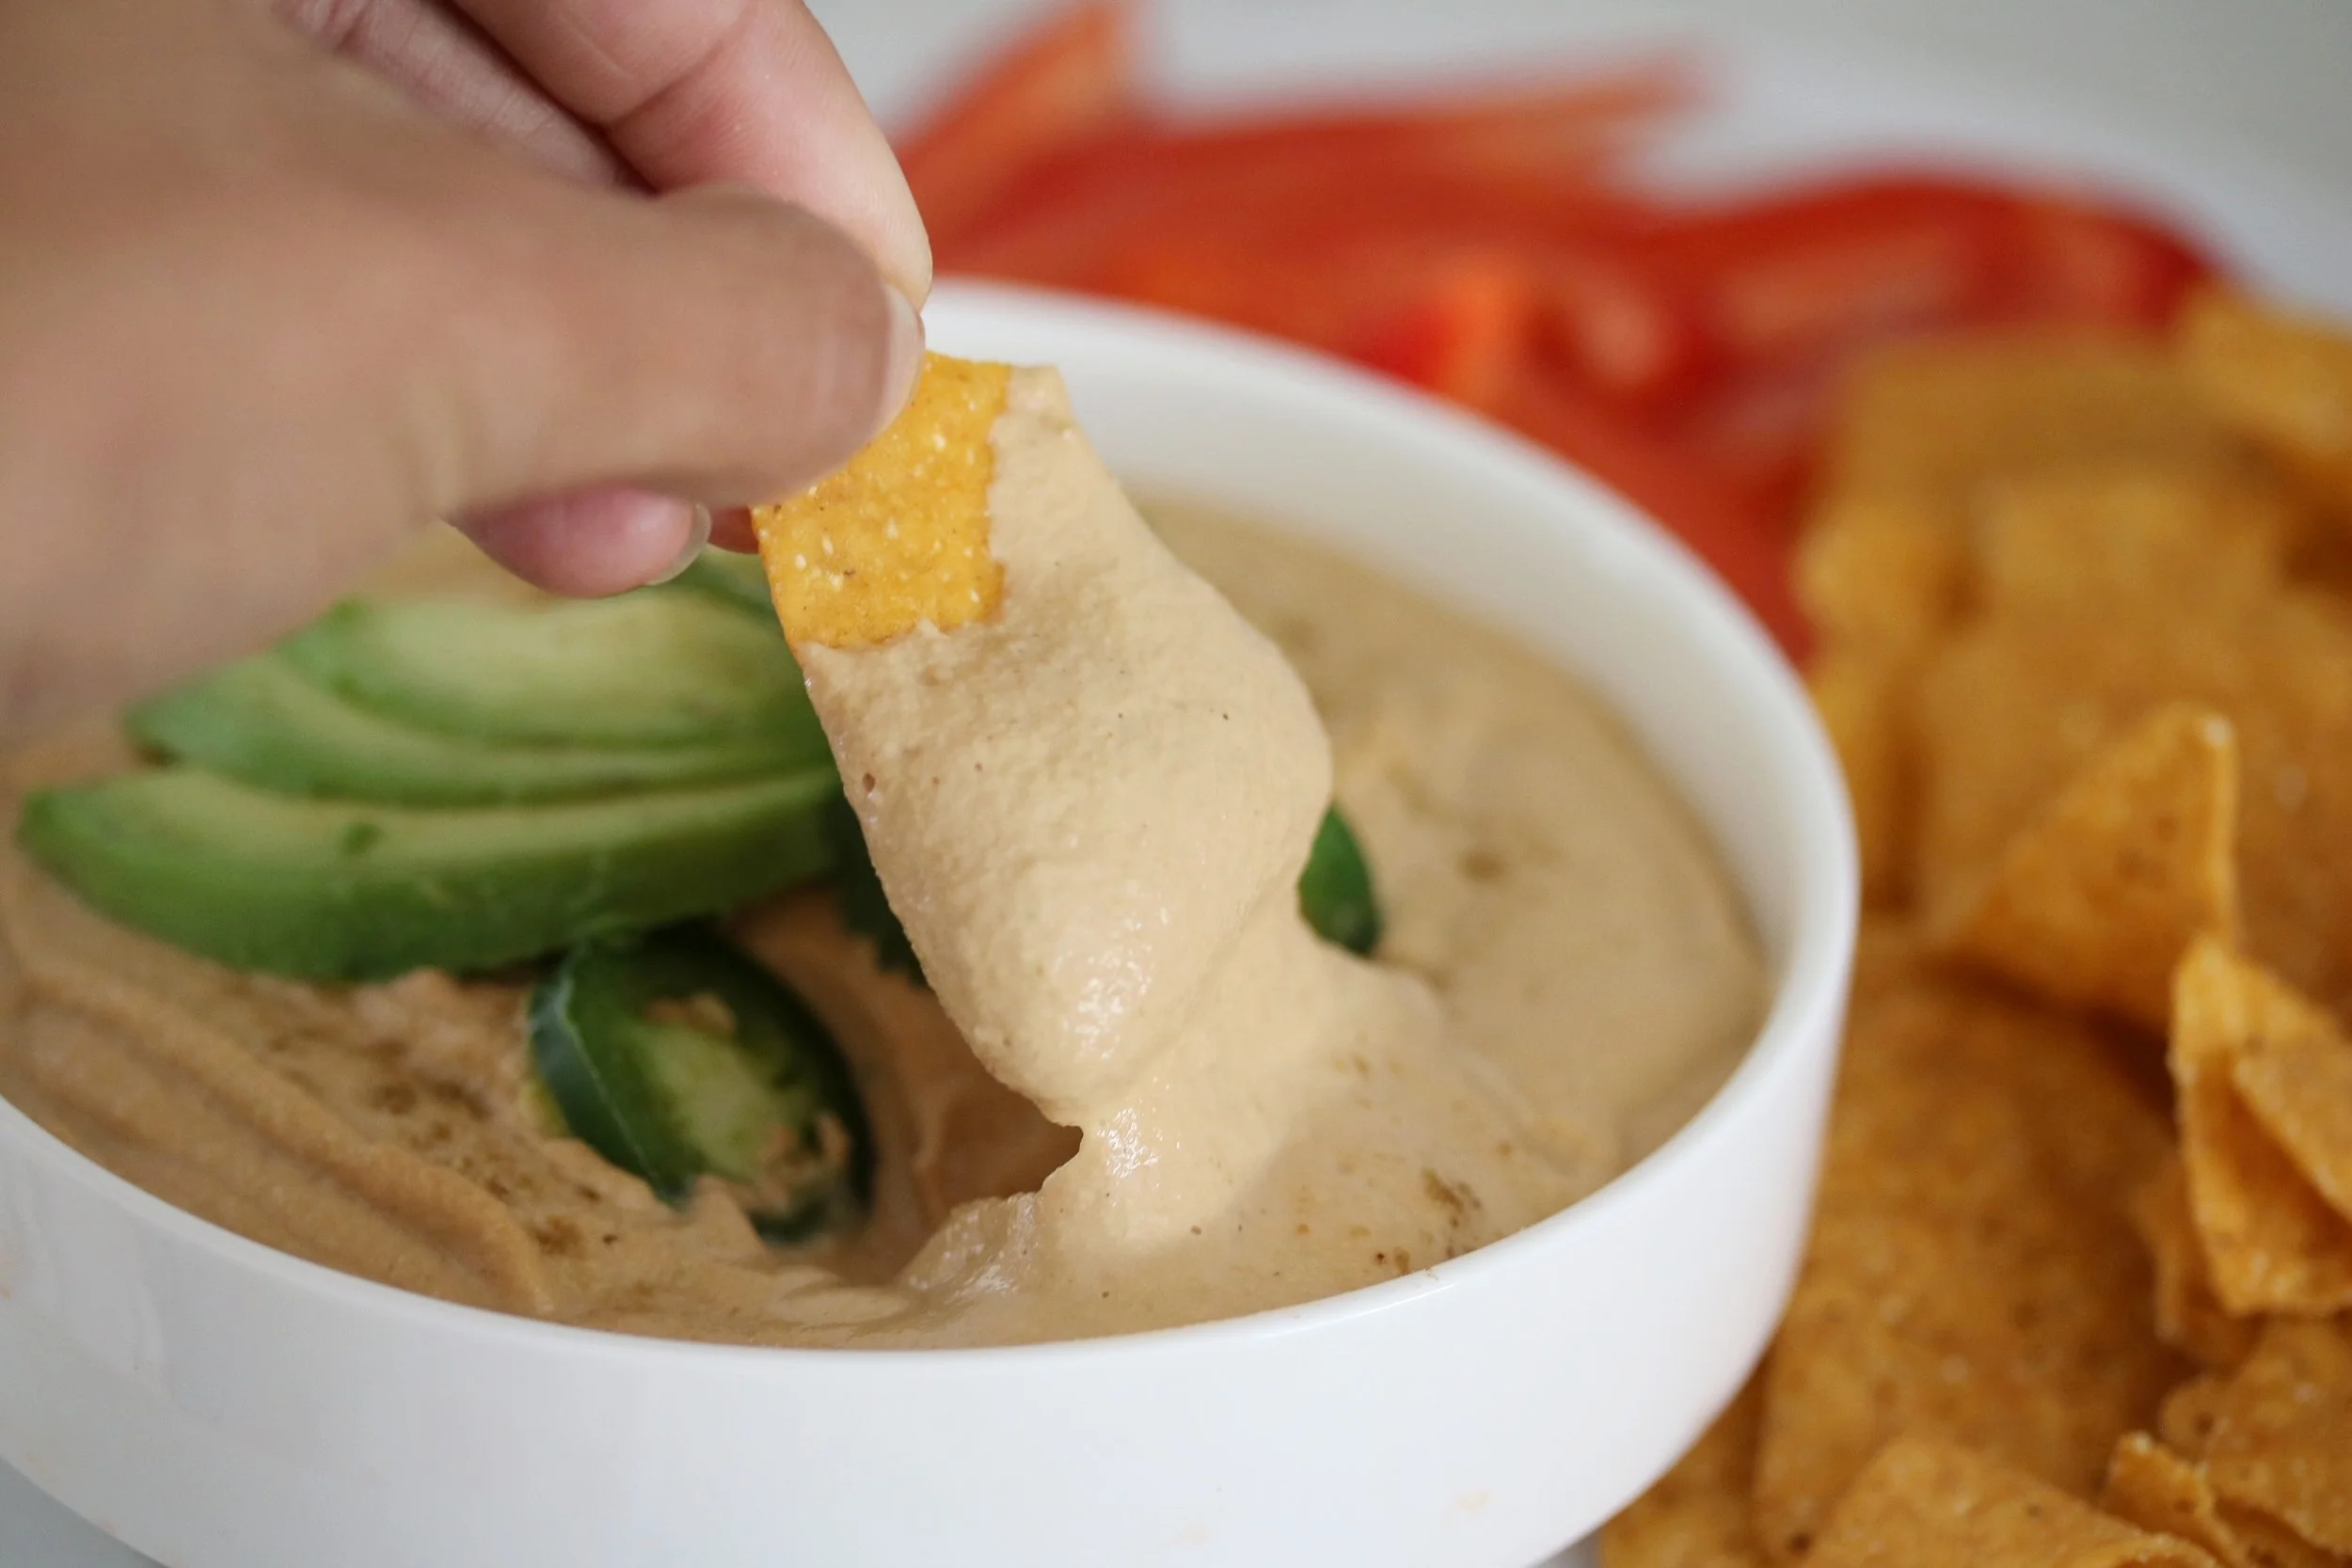
You don't even know how proud I am of this recipe. I consider myself the queen of dips, the master of appetizers and love greeting my guests with a snack as soon as they arrive. So when we invited our friends over who are vegan, I was met with a bit of a challenge.  I couldn't make my go to buffalo chicken dip or my massive cheese & meat boards. So....instead of serving veggie sticks I decided to attempt my own homemade vegan queso. I've had cashew cheeses before and always liked the flavor and texture so I decided to start there.

7718092528_IMG_5284.JPG

This "queso" has everything its traditional counterpart has including heat, gooey goodness and flavor. I served it with all the fixins for nachos:  homemade salsa (recipe to come!), homemade guacamole (I'll write that one up too!), roasted corn, black beans and jalapeños. For my meat substitute I chopped sweet potato and mushroom and sauteed it in homemade taco seasoning until soft. The entire meal was delish!

If you want more cheesy flavor & color (none of my photos are ever photoshopped cause I don't know how (insert laughing emoji) just add a bit more nutritional yeast.

If you want more cheesy flavor & color (none of my photos are ever photoshopped cause I don't know how (insert laughing emoji) just add a bit more nutritional yeast.

I hope you enjoy this as much as we did and I dare you to make it for your next party and we can keep the vegan part our little secret and watch as it gets devoured in minutes! Don't forget to post your photos on IG and tag me @BrandiMilloy and let me know if you're going to try this in the comments below OR if you have a recipe you'd like to see me make! xo

Vegan Queso 

by Brandi Milloy

  • 1 heaping cup of raw unsalted cashews
  • 1/2 cup nutritional yeast (I found mine at Trader Joe's-this adds cheesy flavor & color)
  • 2 tbsp. tomato paste
  • 1 tsp cumin
  • 1 tsp garlic powder
  • 1/2 tsp seasoning salt
  • 1/2 tbsp. hot sauce like El Pato (you could also seedless jalapeño as desired for heat)
  • 3/4 cup-1 1/2 cups of filtered water (start with 3/4 cup and add as needed for desired consistency)

Directions

  1. Soak cashews in cold water overnight or in hot water for a few hours before making recipe. Drain before using.
  2. Into a high powered blender (like a Vitamix), add soaked & drained cashews, tomato paste, cumin, garlic powder, seasoning salt, hot sauce and 3/4 cup water. Blend until smooth scraping down the sides as needed.  Add water in 1/2 cup increments until desired consistency. Add salt and other seasoning as needed.  I served my queso with salty sweet potato chips so I didn't need to add more salt. 
Sweet Laurel Classic Vanilla Cake
7583899840_IMG_5115.JPG

Over the weekend we had the opportunity to celebrate the first cookbook behind the the whole foods baking company, Sweet Laurel and what a sweet treat it was!

Milly LOVED the Lemon Cake.

Milly LOVED the Lemon Cake.

All of their recipes are grain free, dairy free, refined sugar free, paleo and many are also gluten free, vegan and raw. If your eyes are glazed over simply by reading those words and you're tempted to exit out of this post, stop! The cake you clicked on is most of those things AND delicious. 

7583899840_IMG_5116.JPG

That wasn't just click bait. Would the queen of sweets every steer you wrong? When done well, none of those things have to be bland and flavorless. In fact, when done right, it can be absolutely divine. That's what's so amazing about cooking and baking and the power of creativity when combined with fresh ingredients. 

7583899840_IMG_5169.JPG

The story behind Sweet Laurel is one of necessity. When baker, Laurel Gallucci was diagnosed with an aggressive auto-immune disorder and put on a strict elimination diet, she started experimenting with ingredients she could eat so she could still enjoy the sweets she loved without having to sacrifice flavor.  Because just like most of us, usually gluten free desserts are bland and better used as paper weights.  Using simple, whole ingredients Laurel was able to create baked goods that are tender, moist and full of flavor. Some of them are so simple, they're only five ingredients or less. From there, she partnered with friend Claire Thomas of Kitchy Kitchen and created the Sweet Laurel brand. 

I've already flagged plenty of the recipes in their new cookbook, Sweet Laurel including Summer Strawberry Tart, Vanilla Bean Peach Cobbler and Double Dark Chocolate Cookies. With summer right around the corner, I can't wait to try them. Congrats girls! For the recipe to Sweet Laurel's Classic Vanilla Cake go here. 

With Sweet Laurel's Laura Gallucci and Claire Thomas

With Sweet Laurel's Laura Gallucci and Claire Thomas

Spring Cookie Dough Cones
haf3.jpg

Anytime I'm invited on Home & Family (H&F), I get so excited because everyone there is so friendly and really makes you feel like family. The culinary team is absolutely amazing and every producer I've worked with is super organized, enthusiastic and professional.  I was especially happy to meet Ali Fedotowsky, who was guest hosting that day. I love reading her blog and following her journey to becoming a Mama of two. Hopefully you'll see a collab with her very soon. 

For this appearance on H&F I wanted to create a playful dessert for Spring.  We came up with a sprinkled loaded cookie dough...that you eat in a cone (or on a spoon or out of the bowl-no judgement here!).  This raw cookie dough recipe is safe to eat because it features no raw egg and instead using applesauce for a little sweetness and for the right consistency.  Start with the cookie dough base and have fun adding your own mix ins and toppings. Mr. A's favorite is loaded with Reese's Pieces and chopped Reese's Cups with salted almonds. You get the picture. The possibilities are endless.

Go here to watch the video and for the full recipe.

haf2.jpg
New Mommy Must Haves

These are products I swear by especially if you're a new Mom! Keep in mind that just like how every baby is different, every mommy's needs are different too! I also think having my Mommy friends help create my registry prevented me from ending up with random things I didn't use. I love swapping products with friends so you can try and test things before you decide to purchase them. We borrowed a swing for the first three months that our friend's daughter didn't really use but Milly enjoyed! I encourage you to share all your must haves with other mamas and then let me know in the comments below what your New Mama must have is! Scroll down to learn more and shop each item and then don't forget to click the bell on my YouTube channel so you get a notification every time I post a video (2-4 times a month if I can!)

Beauty Advice for Moms with Susan Yara and Sharzad Kiadeh

When you're a mom sometimes it's a miracle if you find time to shower but on most days I try to pull myself together even if it's just for me.  I loved interviewing Susan Yara & Sharzad Kiadeh of FAM: For All Moms on my YouTube Channel about their beauty advice for Moms. And then after you watch this video, head over to their channel to watch me share my natural birth story with them on their show. 

My Mother's Filipino Adobo Recipe

Adobo was one of my favorite recipes growing up as a kid. It's flavorful, comforting and so delicious. It's also one of those recipes that tastes like it's been cooking all day but it only takes about 15 minutes to prepare and about 45 minutes to cook. So if you stop what you're doing right now and make this, you could be eating the most iconic Filipino dishes in about an hour. Scroll down for my Mom's recipe and watch the video here.

adobo2.jpg

Filipino Adobo 

By Carol Arzaga Milloy

Ingredients

  • 3 tbsp. olive oil
  • 1 large onion, diced
  • 3 cloves garlic, crushed
  • 3 lb. skinless chicken
  • 3 large potatoes, peeled and quartered
  • 1/2 cup vinegar
  • 1/4 cup soy sauce
  • 1 1/2 cups water
  • 3 bay leafs, crushed
  • 1 tsp. smoked or regular paprika
  • 1/4 tsp. salt
  • 1/4 tsp. peppercorns, crushed

Directions

  1. Into a pot set on medium heat, add your oil and onions and saute until translucent. Add garlic and cook for a few minutes.  Add in the all of the remaining ingredients and bring to a medium high heat and cover. Leave cooking and covered for 45 minutes. Do not remove cover. Serve with white rice and more soy sauce.
Ooey Gooey Marshmallow Cereal Treats
IMG_0505.JPG

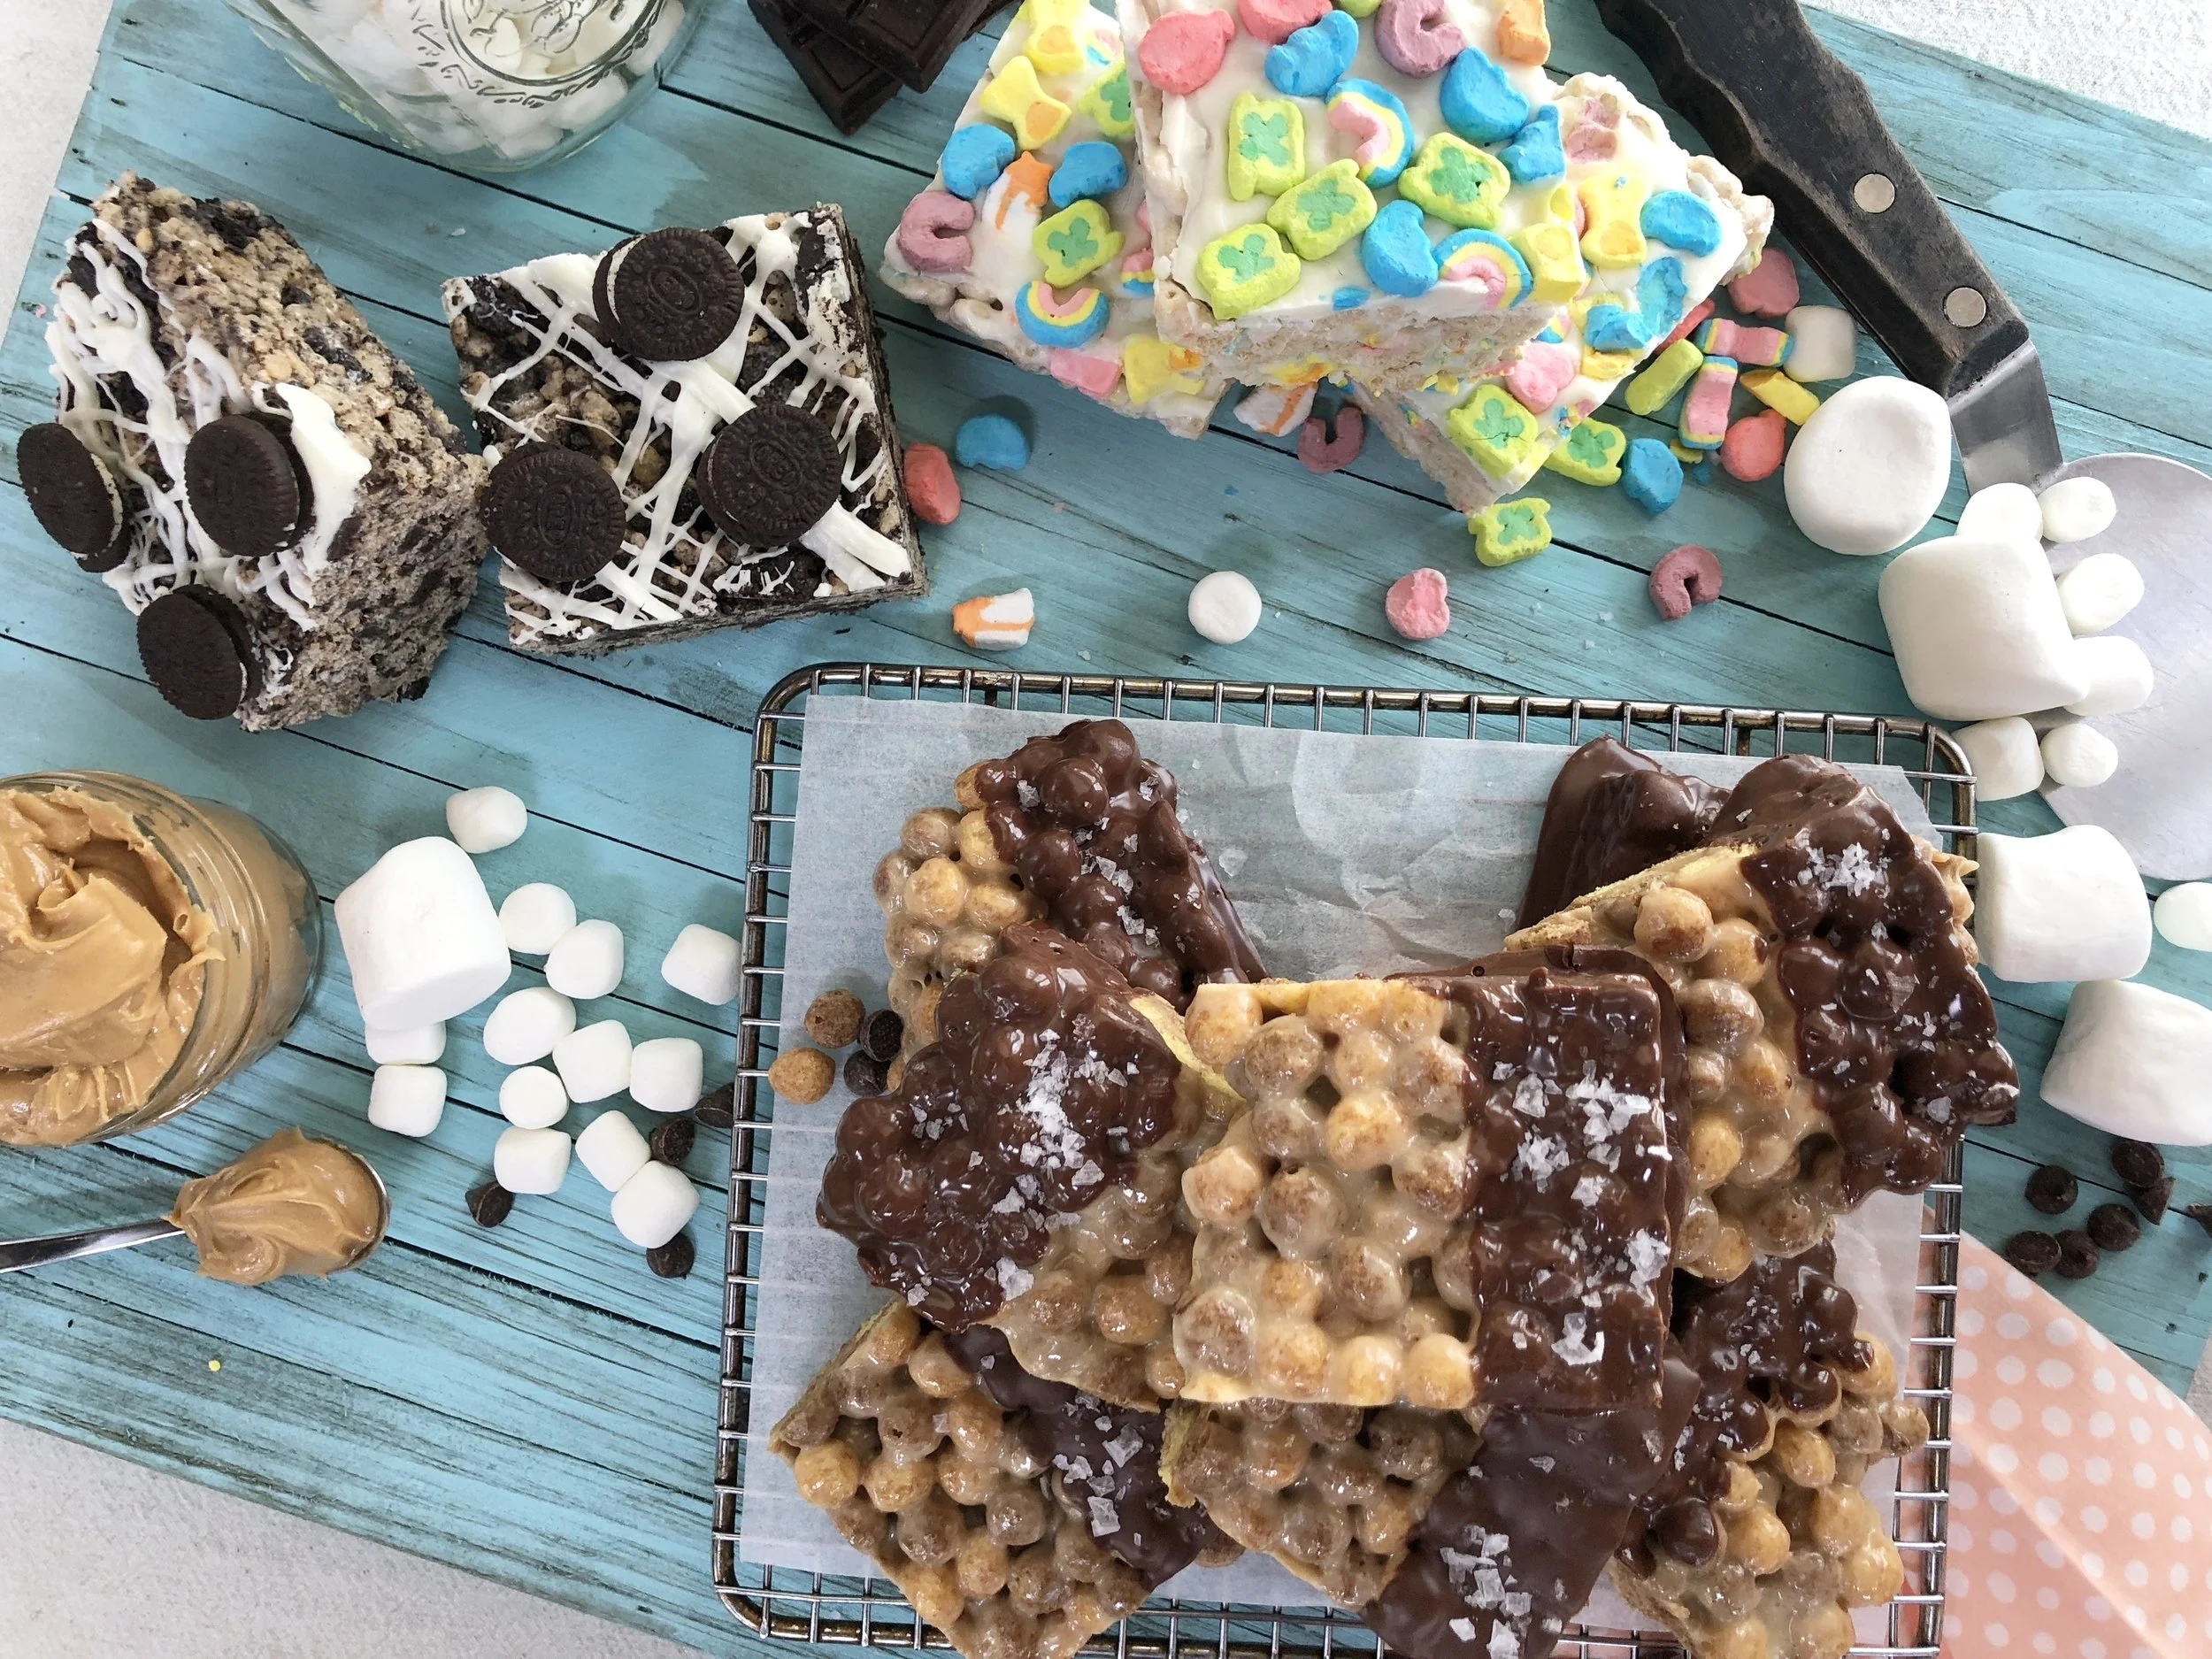
Recently I was invited to Home & Family on The Hallmark Channel to make my Ooey Gooey Marshmallow Cereal Treats. I had so much fun cooking in the kitchen with Mark Steines. From his adorable (but questionable) dance moves to talking about our daughters (his daughter, Parker is about the same age as Milly), it was the most I've laughed while working in a long time! You can watch the full segment here. Then scroll down for the most delicious cereal bar recipes you've ever had. I've made sure to pack them with plenty of marshmallow and loads of flavor. You can have fun making them your own by customizing them with different cereals, add ins and toppings! Enjoy!

IMG_0499.JPG

Ooey Gooey Peanut Butter & Chocolate Cereal Treats

By Brandi Milloy

INGREDIENTS

  • Cooking spray
  • 4 tablespoons butter
  • 1 (10-ounce) bag Jet-Puffed mini marshmallows
  • 1/4 cup creamy peanut butter
  • 5 cups Reese’s Puffs Cereal
  • 1 cup semi sweet chocolate, melted
  • Fleur de Sel, for garnish

DIRECTIONS

1.     Lightly grease a spatula and a 9 x 9” casserole dish.

2.     In large nonstick saucepan, melt butter over low heat. Add marshmallows, and stir occasionally until just melted. Fold in peanut butter. Remove from heat.

3.     Add cereal and quickly stir until cereal is well coated.

4.     Pour and press into casserole dish until evenly distributed. Cool before cutting into squares.

5.     Dip each square halfway into chocolate and sprinkle with fleur de sel. Place on baking sheet lined with parchment paper to set chocolate.

6.     Best if served the same day. Otherwise, store in an airtight container or plastic wrap for up to two days. 

IMG_0501.JPG

Ooey Gooey Lucky Charms Marshmallow Treats

By Brandi Milloy

INGREDIENTS

  • Cooking spray
  • 4 tablespoons butter
  • 1 (10-ounce) bag Jet-Puffed mini marshmallows
  • 5 cups Lucky Charms Cereal
  • 1/3 cup white chocolate, melted
  • Lucky Charms Marshmallows (marshmallows only), for garnish

DIRECTIONS

1.     Lightly grease a spatula and a 9 x 9” casserole dish.

2.     In large nonstick saucepan, melt butter over low heat. Add marshmallows, and stir occasionally until just melted. Remove from heat.

3.     Add cereal. Quickly stir until cereal is well coated.

4.     Pour and press into casserole dish until evenly distributed. Using a spatual, spread chocolate on top and garnish with marshmallows. 

5.     Cool before cutting into squares. Best if served the same day. Otherwise, store in an airtight container or plastic wrap for up to two days.

IMG_0500.JPG

Ooey Gooey Marshmallow Cookies & Cream Treats

By Brandi Milloy

  • INGREDIENTS
  • Cooking spray
  • 4 tablespoons butter
  • 1 (10-ounce) bag Jet-Puffed mini marshmallows
  • 4 cups rice krispie cereal
  • 1 package or about 25 Oreo cookies, crushed
  • 1/4 tsp. coarse sea salt
  • White chocolate, melted
  • Mini Oreo Cookies, for garnish

DIRECTIONS

1.     Lightly grease a spatula and a 9 x 9” casserole dish.

2.     In large nonstick saucepan, melt butter over low heat. Add marshmallows, and stir occasionally until just melted. Remove from heat.

3.     Add cereal, crushed cookies and salt and mix until everything is combined.

4.     Pour and press into casserole dish until evenly distributed. Cool completely.

5.     Drizzle with chocolate on top and garnish with mini Oreo cookies.

6.      Cut into squares.

7.     Best if served the same day. Otherwise, store in an airtight container or plastic wrap for up to two days.

Salmon Avocado Toast
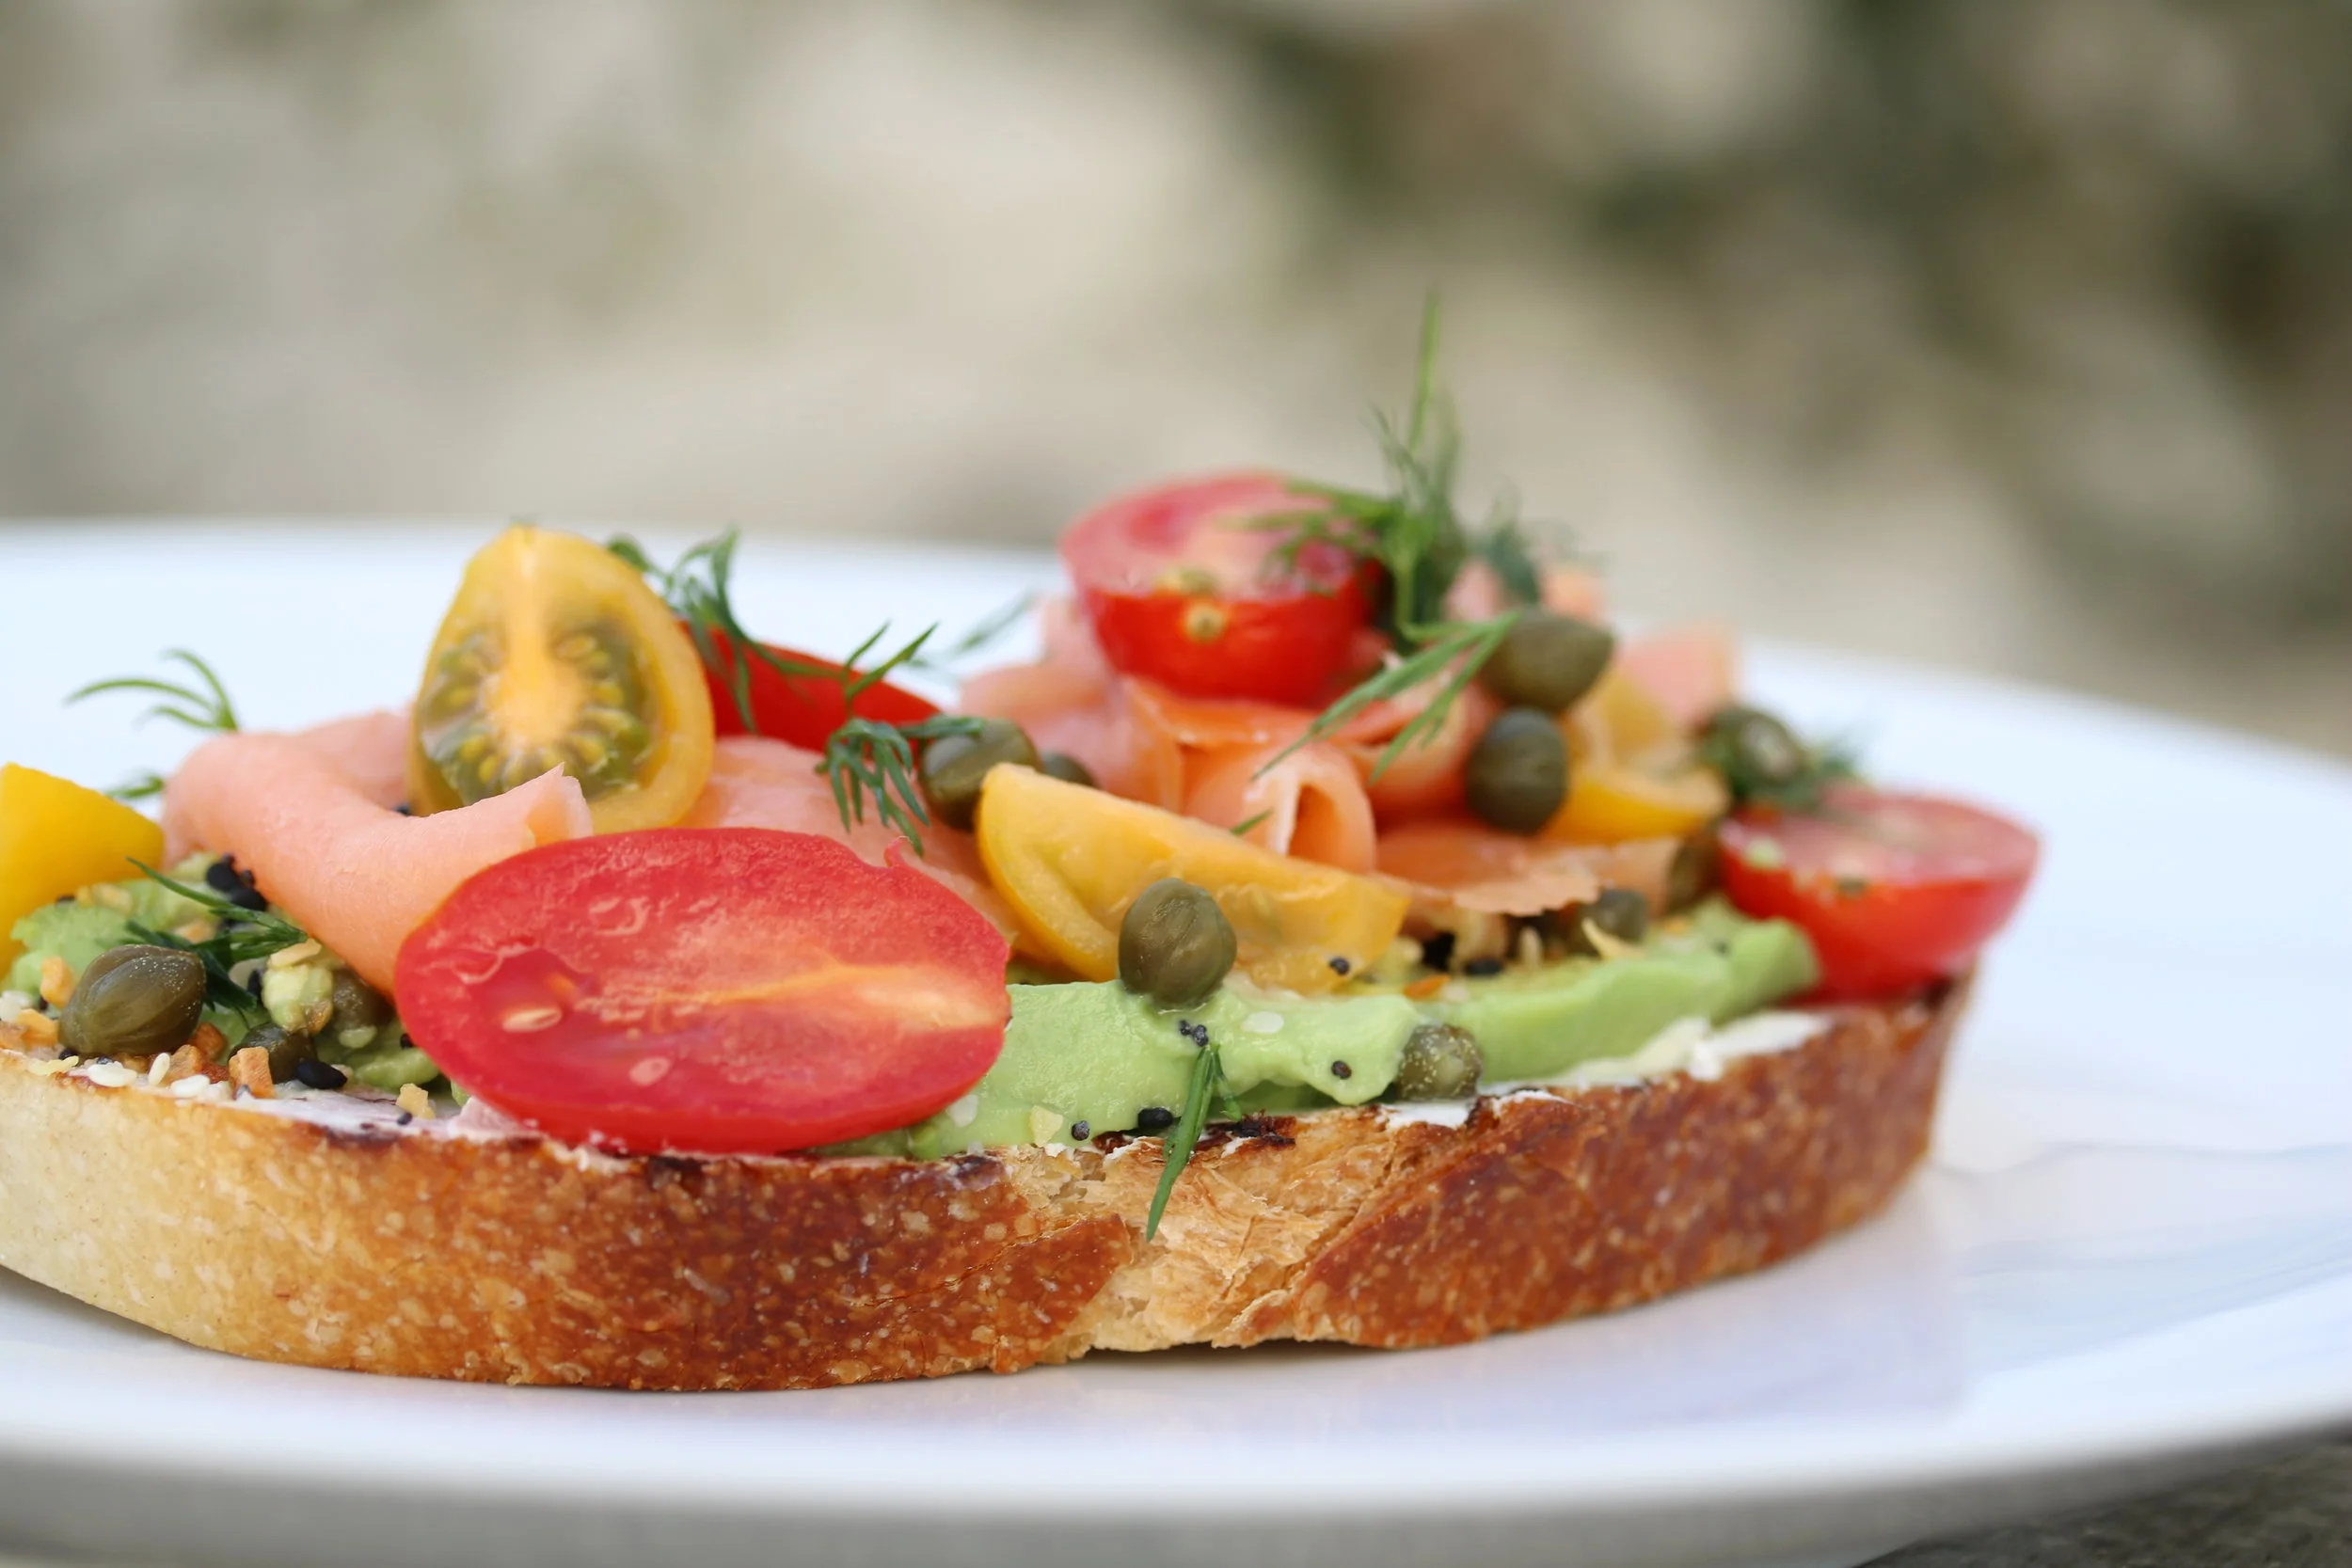
Ripe tomatoes, fresh salmon, creamy avocado.....

Ripe tomatoes, fresh salmon, creamy avocado.....

Salty capers and crunchy bread....

Salty capers and crunchy bread....

This is one of my absolute favorite snacks that you can enjoy anytime of the day. This recipe was inspired by me always ordering something similar at my favorite coffee shop but it became a $12 habit when I knew I could make it at home for a fraction of the cost. I pretty much keep all of these ingredients on hand so it's super quick to make whether for breakfast, lunch or linner!  Skip the salmon and you still have a ultra loaded avocado toast!

4931050080_IMG_4990 2.JPG

Salmon Avocado Toast Recipe

By Brandi Milloy

  • Butter
  • 1 slice crusty bread
  • 1 tbsp. cream cheese (jalapeño cream cheese for extra spice)
  • 1/2 ripe avocado
  • Everything But the Bagel Seasoning (if you can't find this, swap with garlic salt)
  • 3 pieces of smoked salmon
  • 3 ripe cherry or mini heirloom tomatoes
  • A few sprigs of fresh dill
  • 1 tsp. capers

Directions

  1. Heat a skillet on medium high heat. Butter your bread on one side and place it butter side down on the skillet to get it nice and toasty. Remove from heat and set aside.  
  2. Spread the cream cheese on the bread. Next, place sliced avocado on top. Sprinkle with Everything But the Bagel Seasoning. Top with sliced smoked salmon. Garnish with sliced tomatoes and dill. Sprinkle capers on top and enjoy!
My 2018 Food Trend Predictions
Hello Kitty Cafe

Hello Kitty Cafe

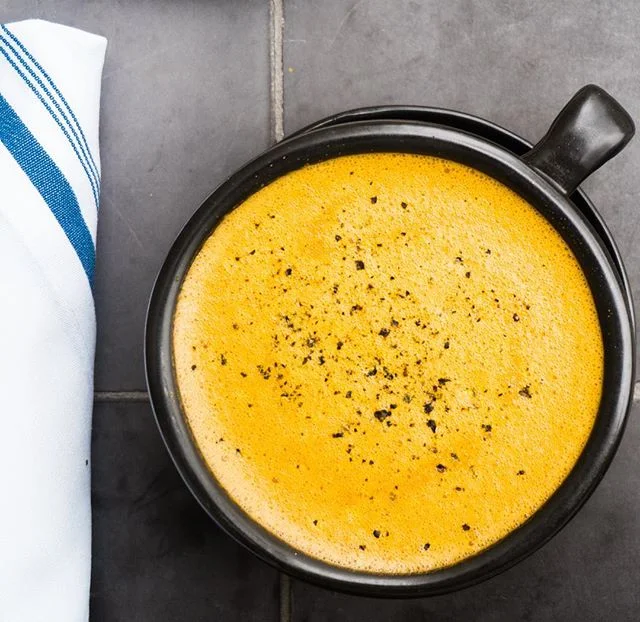
Part of being a food reporter and trend expert is studying consumer behavior, anticipating direction and being tuned in to what people are talking about, buying, photographing and exploring.  It's strategically figuring out and studying what people will become obsessed with before we all realize it and basically forecasting what is yet to come.  Actually-that's all BS; I'm just messing with you. These are simply my predictions. They are my own opinions based on what I think people will be eating, making and ordering in 2018. From turmeric lattes to instagrammable eats, I had the chance to be on KTLA and share my 2018 food trend predictions. Take a look at the foods I think will be dominating our dinner plates this year! You can watch my segment here

My Favorite Dessert Gifts to Send

I love sending desserts as gifts-especially to people who are really tough to shop for and seem to have everything! Many of these were on our dessert table at our wedding and friends still talk about how much they loved every single thing.  I get asked all the time what my favorite treats are around the country so I finally compiled my list of sweets that are so much fun to send and receive. Please note, these are in absolutely no specific order. I can't choose favorites because they are all so good! Also, I love that so many are owned by female entrepreneurs. Girl power!

BLISS & BAKER San Diego, CA

I crave these on a daily basis. The sticky sweet treats are cereal-ously delicious. My favorite flavor is their Salty Caramel Crispie but other favorites are Peanut Butter and Sugar Cookie. Started by a mother daughter team, Laura and Natalie, I just love them!

MOMOFUKU MILK BAR New York City, NY

I will never forget the first time I had Milk Bar. I had a slice of their 7 layer birthday cake. It's the yummiest, layered cake filled with cake crumbs that are almost like mini birthday cake truffles, sprinkles and vanilla frosting.  Each layer of the cake is brushed with a vanilla milk "soak" that makes it super moist and delicious. Chef Christina Tosi (who I have a major girl crush on btw) is the mastermind behind reinventing all of our childhood favorites. Other desserts I love from her: b'day truffles, confetti cookie, the list goes on.

EDOOUGHBLE Los Angeles, CA

All-natural cookie dough that's safe to eat! This edible cookie dough is a dream. Enjoy it on ice cream, cookies or just simply on a spoon. One of my favorite flavors is Cookies N' Dream. It's dark chocolate with vanilla frosting and chocolate sandwich cookies. Sometimes I even mix this with Peanut Butta Cup.  This is what you bring to girl's night!

MILK JAR COOKIES Los Angeles, CA

My husband, Mr. Amazing first introduced me to these cookies. He is practically a cookie connoisseur. He's had every cookie out there.  And let me tell you. There is no other cookie out there like this.  Milk Jar Cookies are soft, chewy and so large you can usually 

GARRETT'S POPCORN Chicago, IL

If you like sweet and salty, this popcorn is for you. It's half salty cheddar cheese and half buttery sweet caramel.  I survived on this popcorn when I lived in Chicago. Even if you don't like popcorn, you'll like this. It's like no other popcorn I've ever had.  It's light, fluffy, craveable and a great gift for anyone in your life. 

SUGARFINA Los Angeles, CA

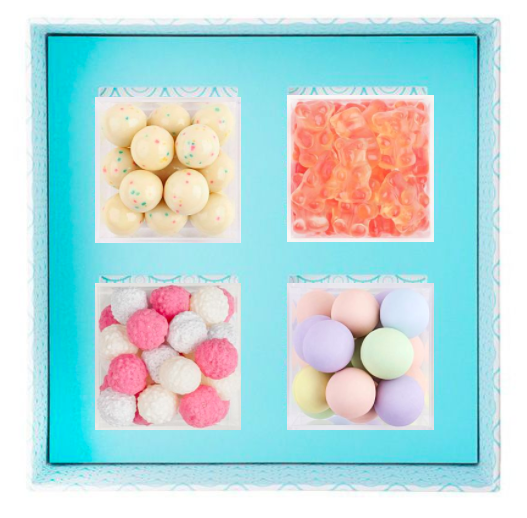
This is the candy shop of your dreams. Sugarfina features delicious gourmet candy from around the world. Everything they have is extremely unique. Some of my favorites are their Atomic Sours imported from France, Champagne Gummy Bears from Germany and their Fruity Loops from Greece.  Their store looks like a jewelry boutique with each candy housed in a clear bento box.  You can create your own box with any of their 120 candies. 

COMPARTES CHOCOLATES Los Angeles, CA

Compartes turns chocolate into works of art. Their handcrafted premium chocolate bars are my favorite. From the beautiful packaging to mouth watering flavors, it's a one of a kind edible gift.  You're not going to find these flavor combinations anywhere else! From White Chocolate Cereal to Salted Pistachio, Dark Chocolate Raspberry Rose and Donuts and Coffee, there is something for everyone!

A Candid Conversation on Motherhood, My Breastfeeding Journey and More
Photography Credit: Jenny Quicksall

Photography Credit: Jenny Quicksall

Milly and I had the privilege of hosting Munchkin's first FB LIVE this year with my friend Molly and her son, Callan where we talked all about motherhood, the ups and downs of breastfeeding, tips and tricks to getting your milk supply up, bottle feeding and so much more.  I hope to continue hosting more FB LIVEs and creating more parenting content on my YouTube Channel so if you haven't subscribed, be sure to subscribe now. I truly don't know where I would be without the community of Moms I've met in person and via social media. It's my goal to create a place for all Moms to share their stories and journey of motherhood so we can learn from and lean on each other. You can watch our first of many more discussions here. Thank you to everyone who has continued to support me through your viewership, engagement and more. Let me know what else you'd like to see on my site as I continue to create more content on food, travel, parenting and more. 

Old Fashioned Homemade Raspberry Jam
4314668576_IMG_4962.JPG

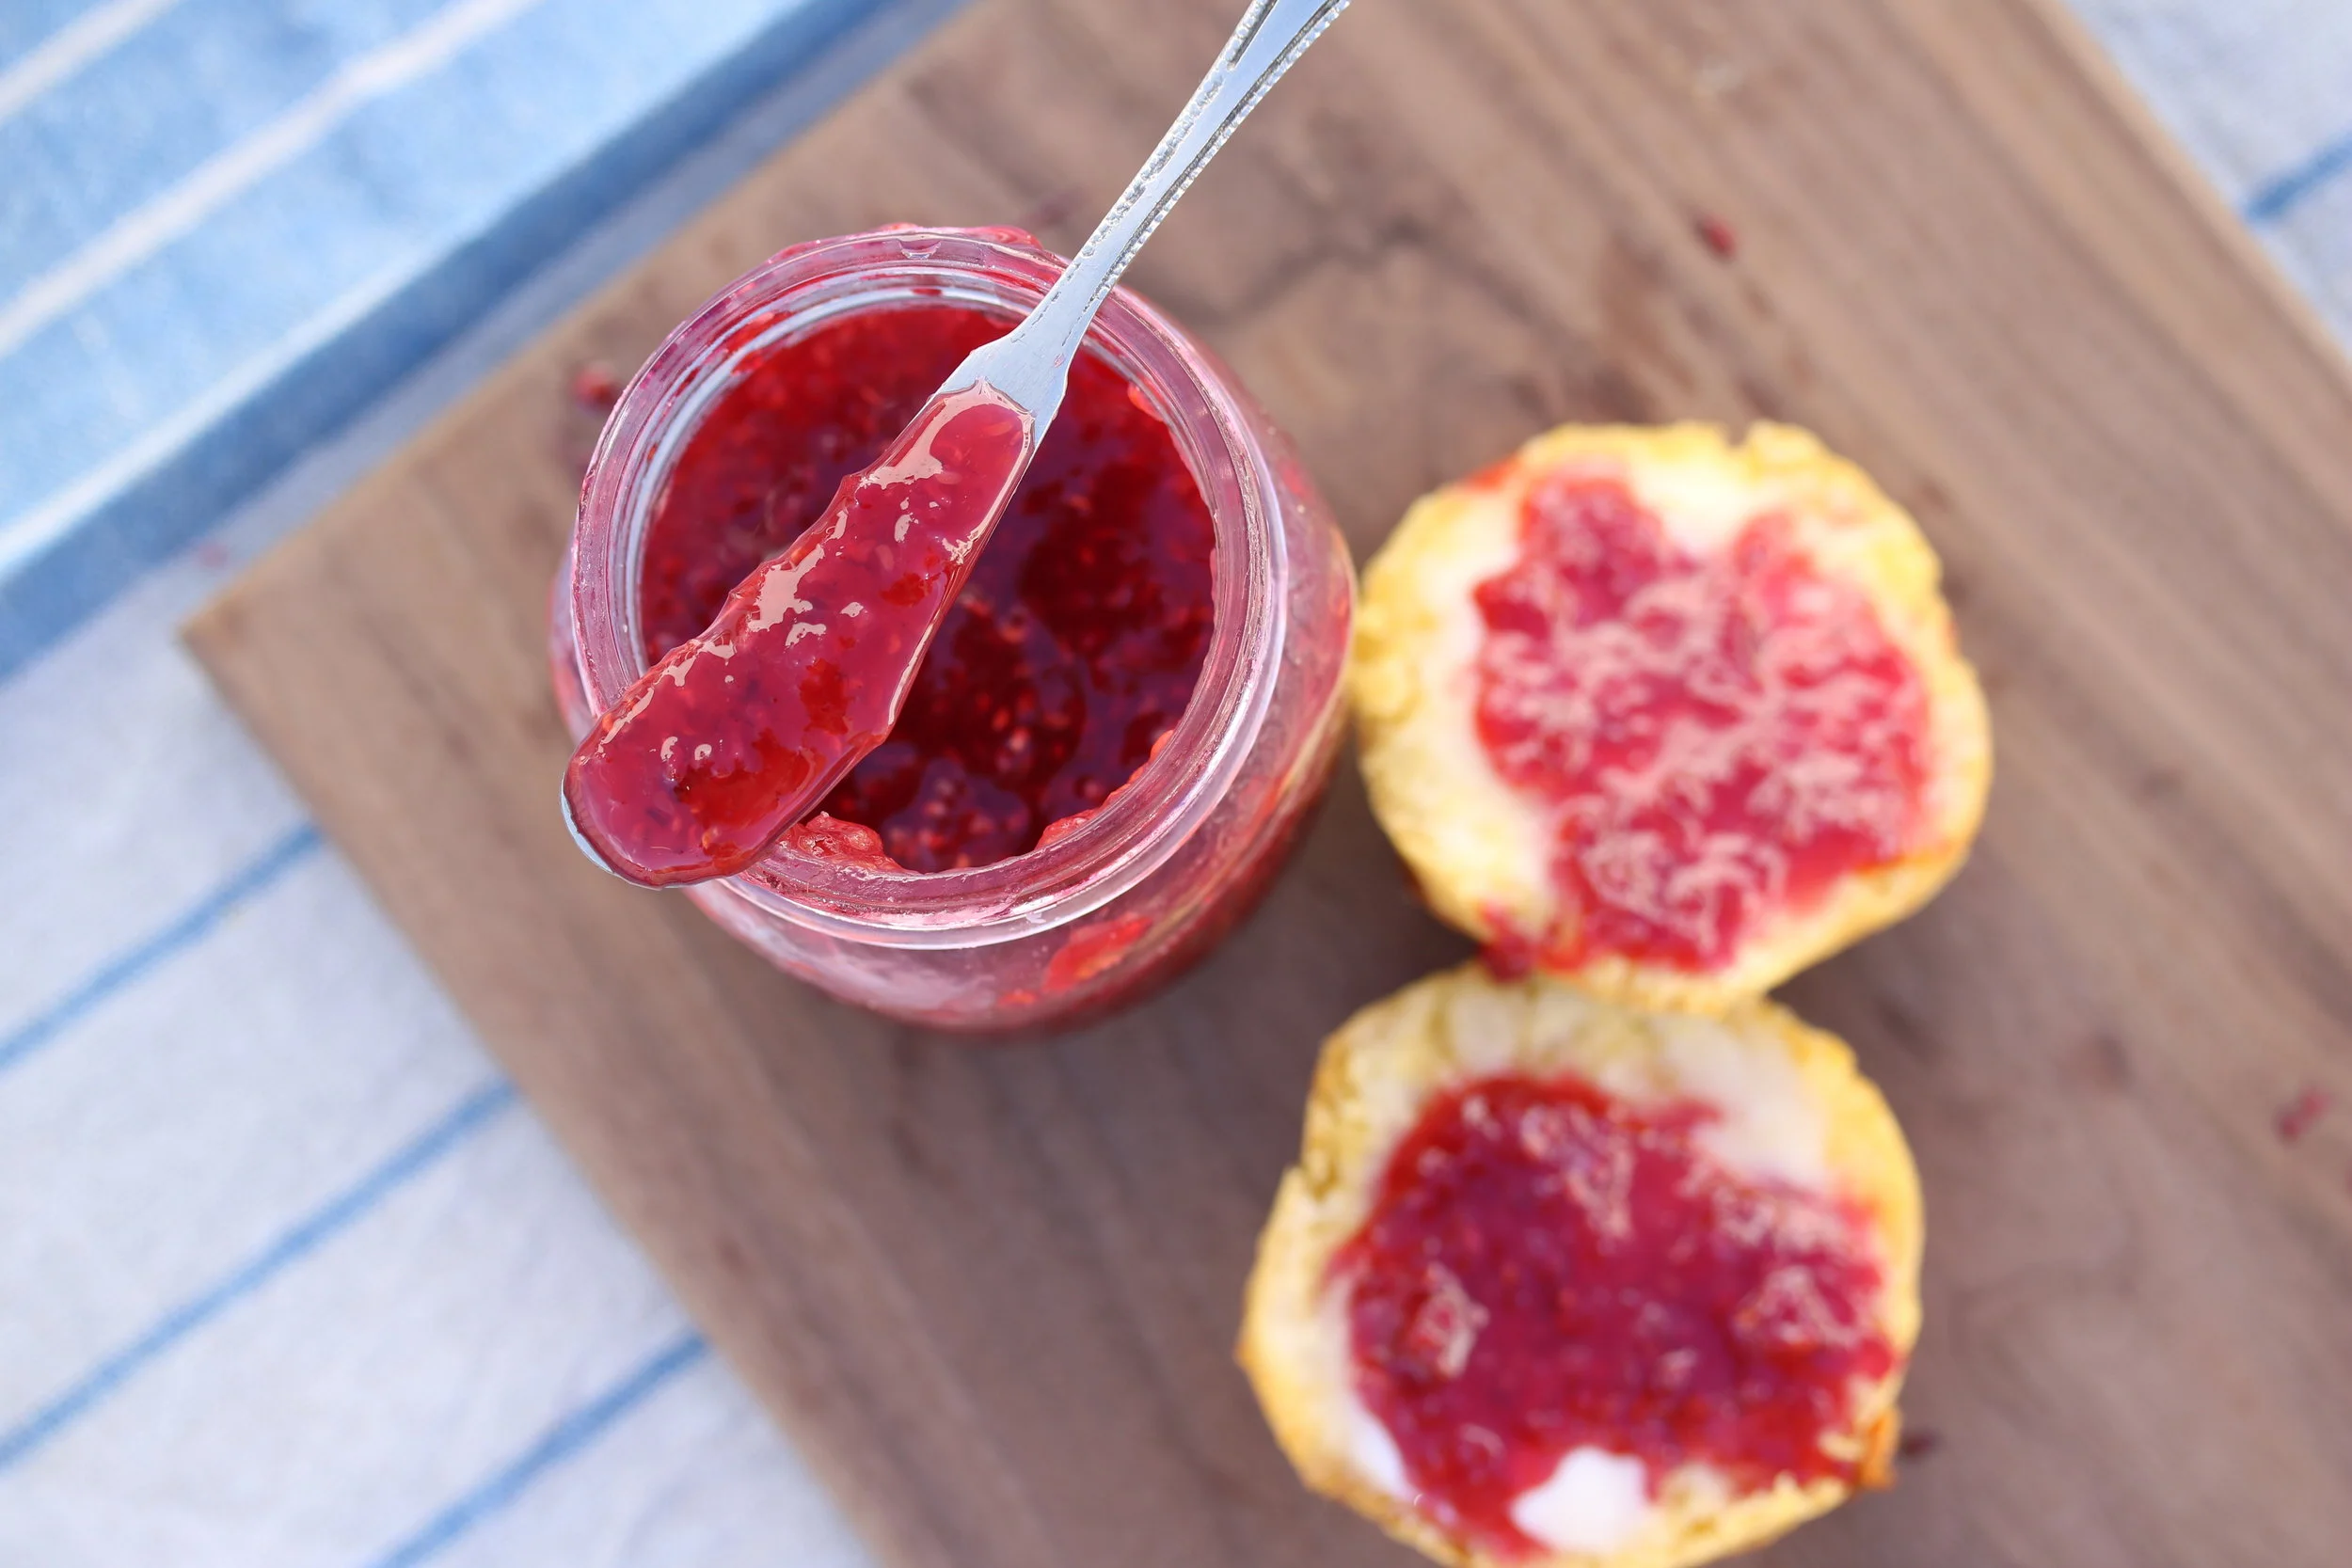
My mother in law makes the most delicious raspberry jam.  She gave us a jar once and we finished it off in less than a week.  I started craving it like crazy. Every time I saw her I would ask if she made some more (which probably got annoying-sorry). It's just that Mr. A and I make breakfast every morning and typically it involves some form of jam so it's top of mind every day.  And while I love buying fresh jam from the farmer's market, it can get pricey when it really is the simplest thing to make.  Whether it's smeared on sourdough bread under melty brie, bacon and eggs (seriously-try it!!!) or simply slathered on a buttered biscuit-we are jam people, folks. This recipe is inspired by my mother in law's. It takes about 15 minutes to make and you only need two ingredients. If you're like me, I'd make a couple batches as back up cause it's so yummy you'll end up adding it to just about everything you eat. 

4314668576_IMG_4958.JPG
4314668576_IMG_4959.JPG
4314668576_IMG_4965.JPG

Old Fashioned Raspberry Jam

by Brandi Milloy

Ingredients

  • 2 heaping cups fresh organic raspberries, rinsed
  • 1 cup organic sugar

Directions

  1. Place berries in stainless steel pot and bring to a full boil, mashing the berries with a wooden spoon. Boil for 1 minute on high heat, stirring constantly.  Add sugar and continue to boil for 3-5 minutes or until thickened.  Store in mason jar in refrigerator and enjoy!


Scoliosis: My Back Story
scoliosis scar pic.jpg

I've told this story hundreds of times and even now when I start to share my scoliosis journey it takes me back to 13 years old and being told by doctors I would need to get fitted for a back brace (that I would ultimately wear 23 hours of the day for almost 4 years) only to have 3 serious back surgeries thereafter.  My experience with scoliosis was challenging. There was a lot of bullying and moments of loneliness, feeling like I never belonged. The physical challenges were tough recovering from surgery after surgery. But ultimately all of these experiences surrounding my scoliosis shaped me into the person I am today. 

Photography Credit: Kyle Hartman

Photography Credit: Kyle Hartman

I had the opportunity to share my story with TODAY.com about embracing my scoliosis and my scar. You can read my interview here.  I was also a guest on POPSUGAR's Pretty Unfiltered where I share some of the difficult times I had when I was younger but also how I overcame those obstacles to be the strong woman I am now.