Posts in Food
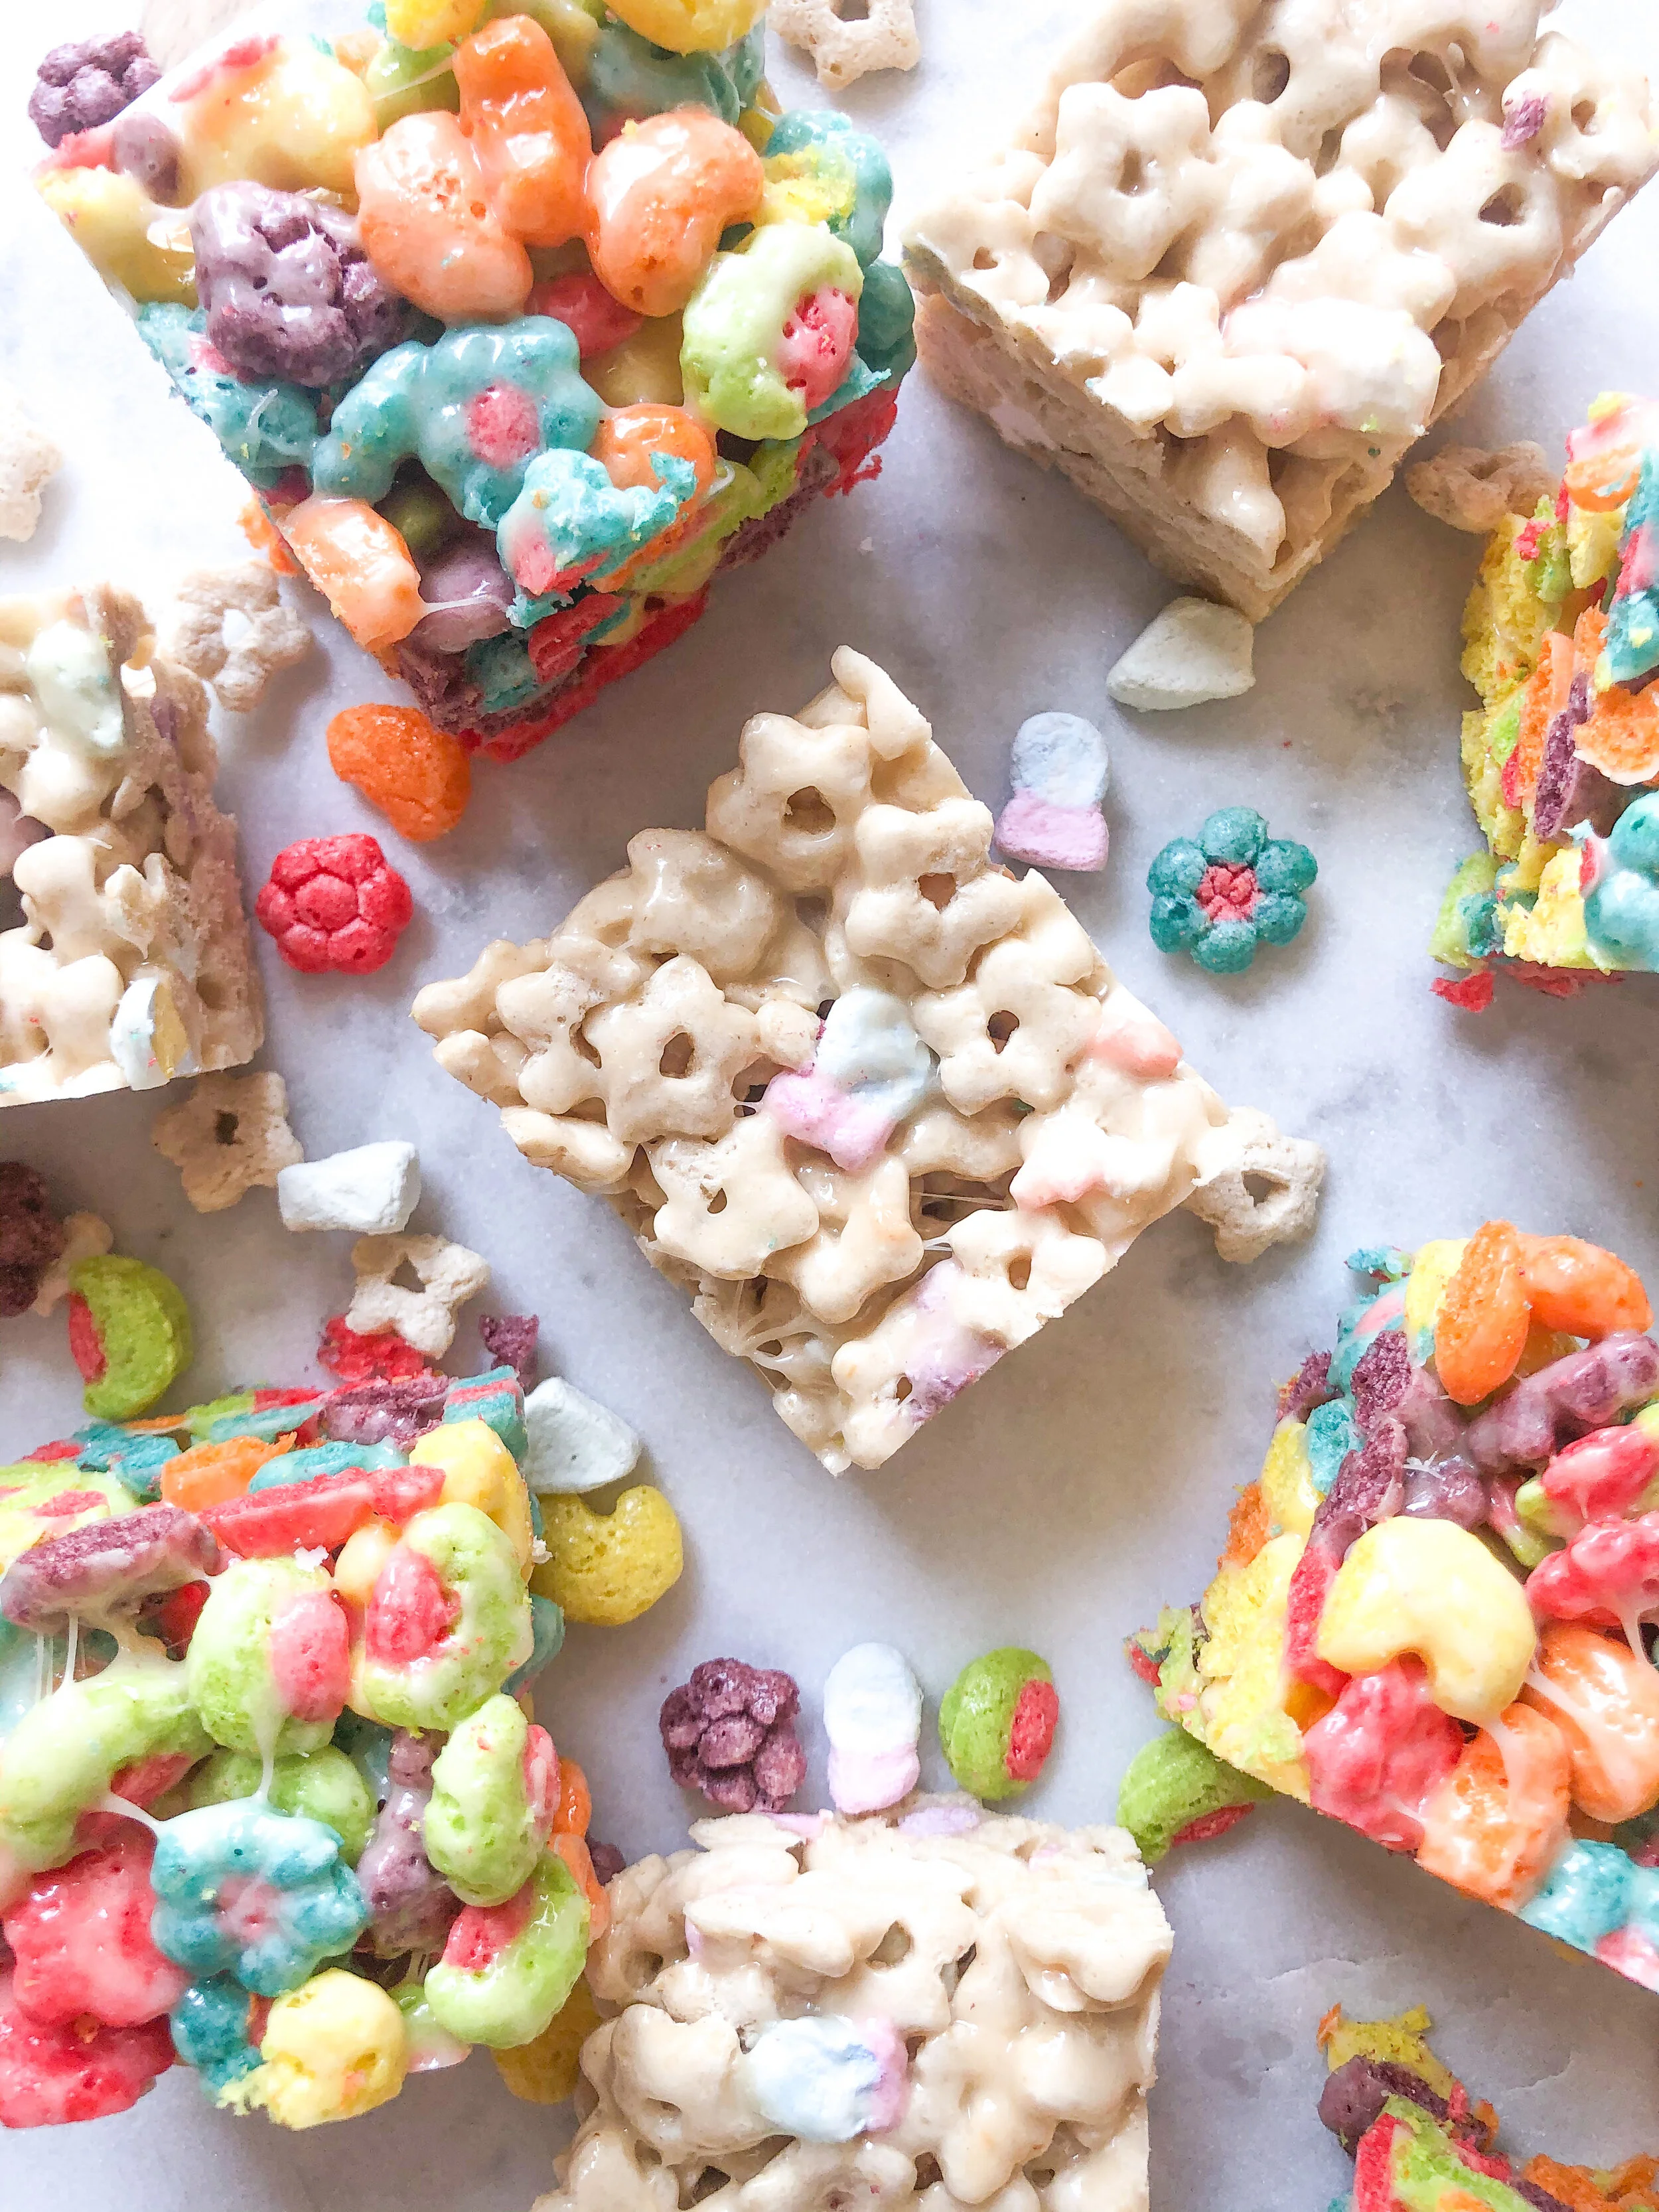
Colorful Marshmallow Cereal Treats
IMG_7955.JPG
IMG_7958.JPG
IMG_7954.JPG

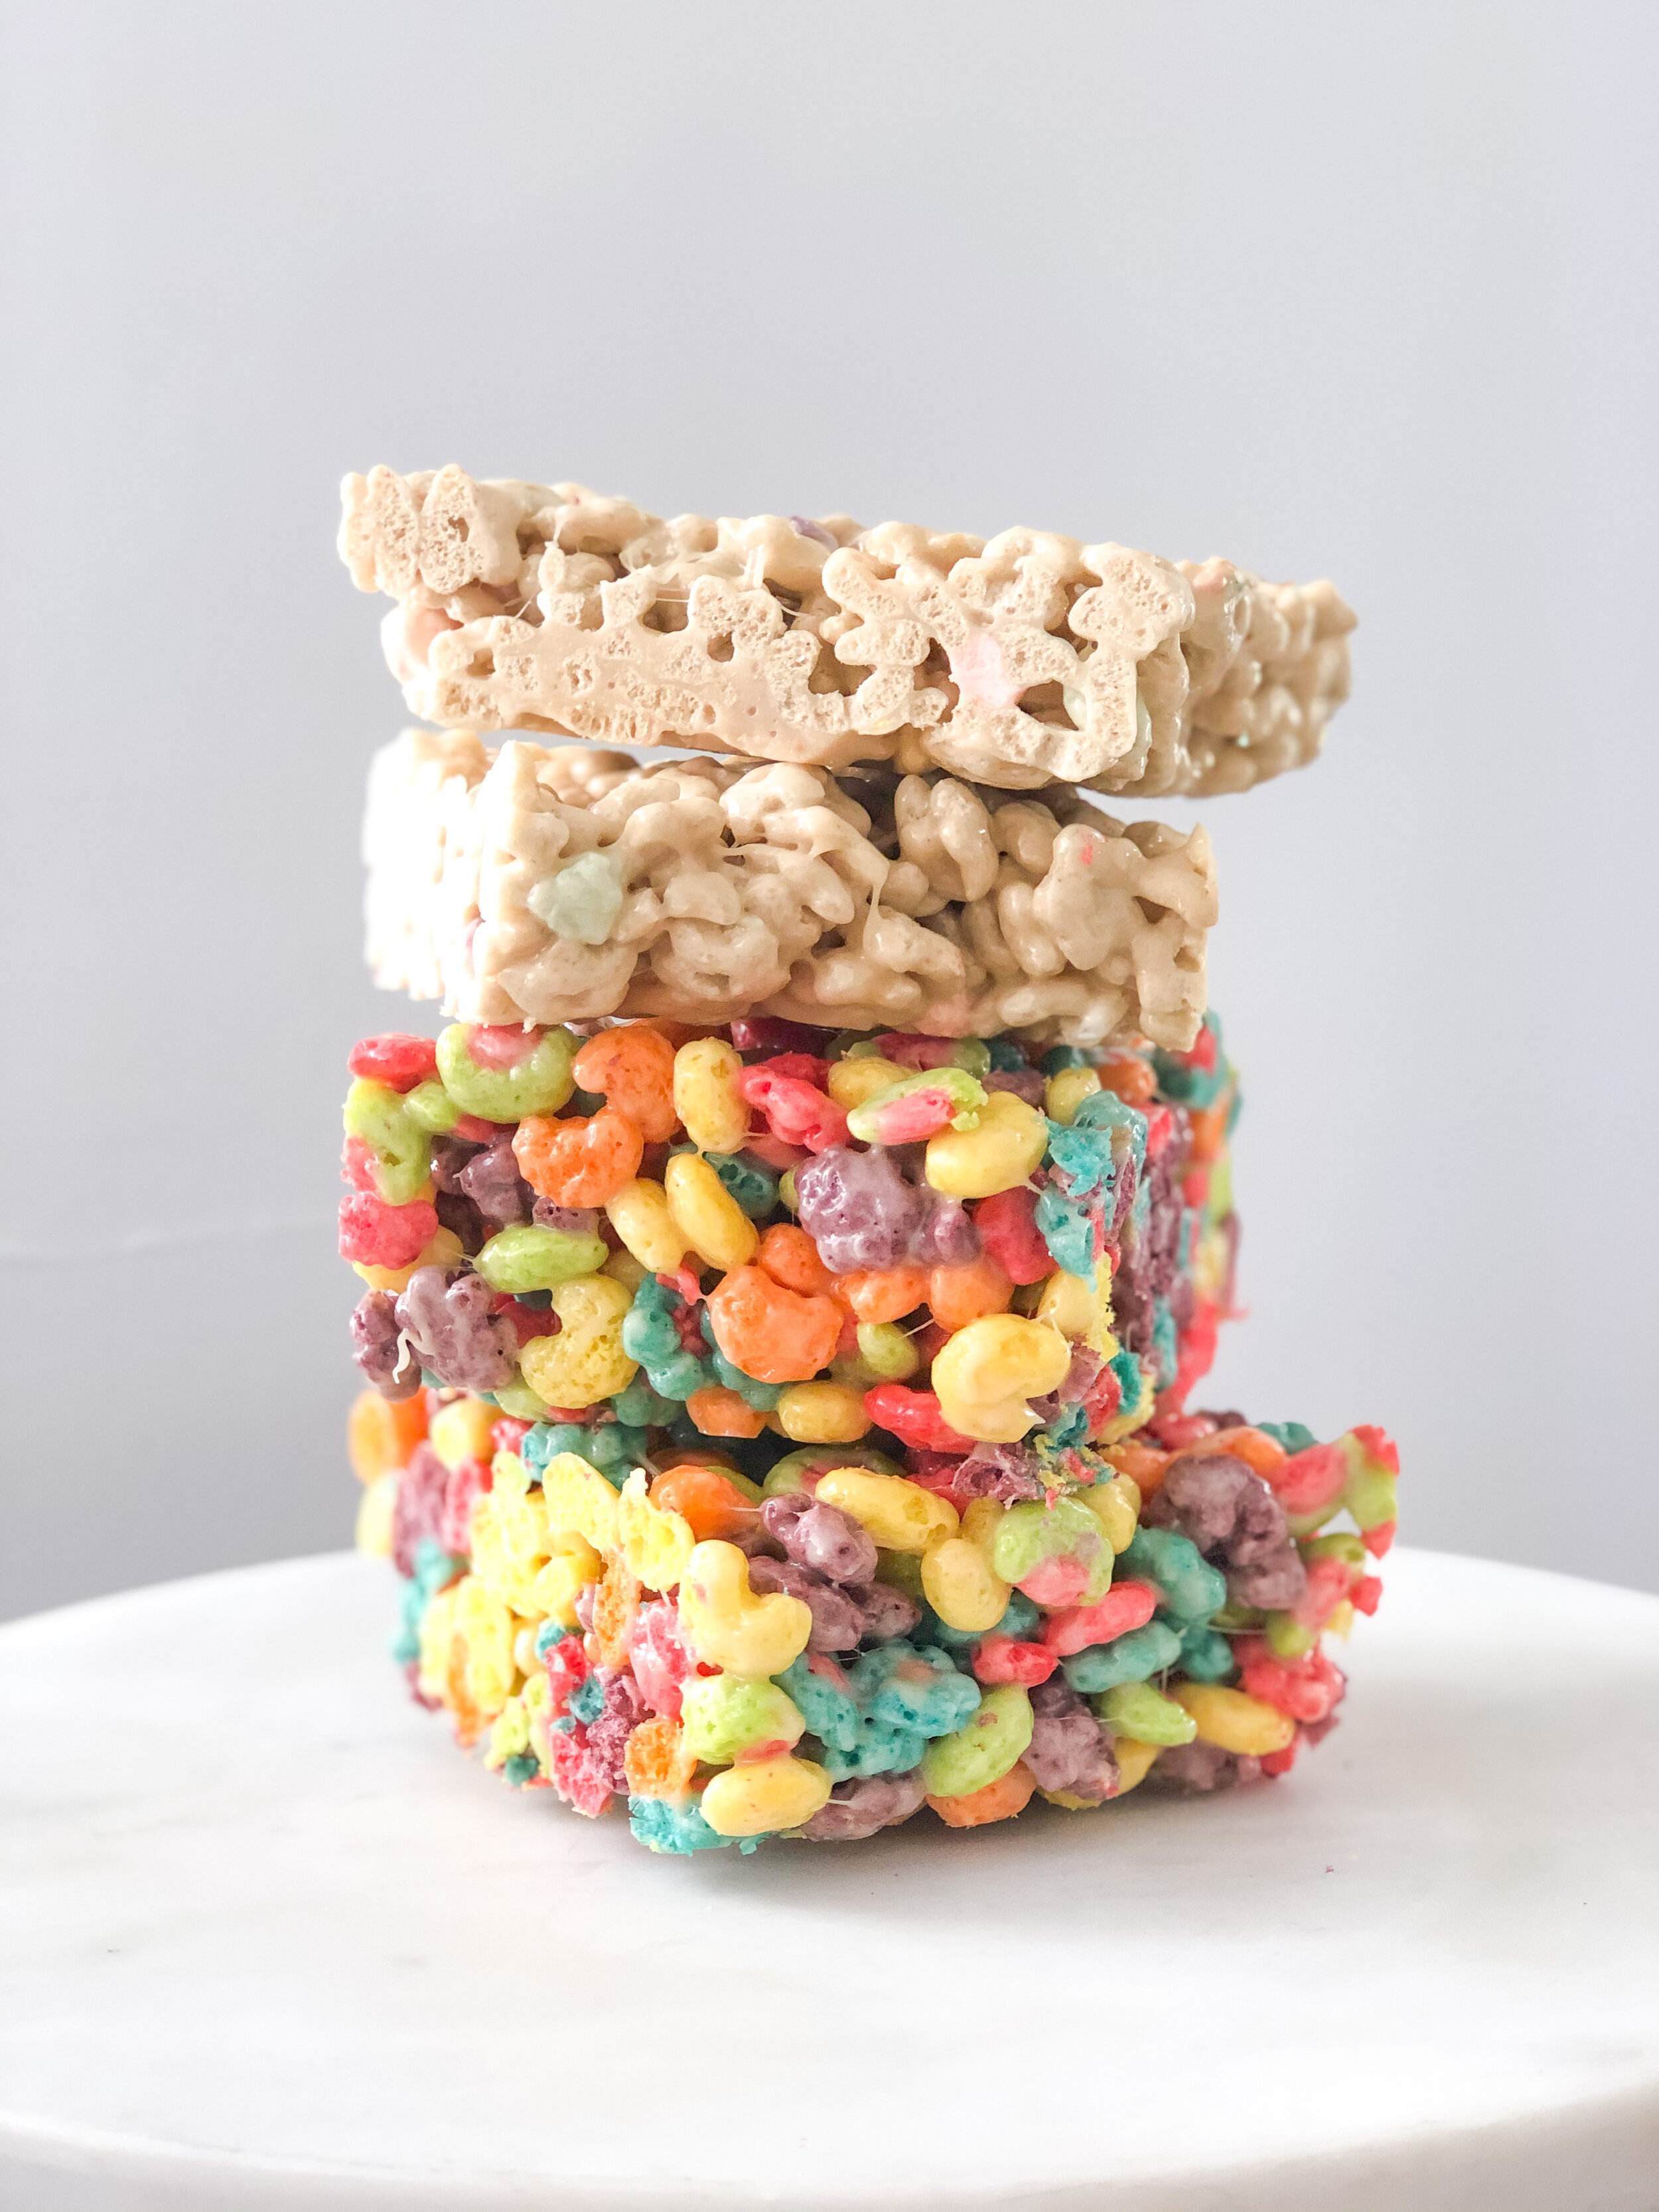
Dudeee when’s the last time you had a marshmallow cereal treat and I’m not talking about a Rice Krispie treat you picked up at the gas station as an impulse buy. I’m taking about the homemade kind where you melt butter down, add marshmallows and cereal and then try not to eat it all off the spatula before you press it into a pan?

Well these marshmallow cereal treats are nothing like either of those. They are made with brown butter which makes them have this nutty, salty flavor going on. I also use equal parts marshmallow to cereal cause the OG recipe just skimps on the good stuff and they dry out too easily and then I’m switching things up and using some tropical sugary marshmallowy filled cereal because #quarantinelife am I right?

This recipe is super easy to make and I did it in less than 15 minutes with Milly helping. I will say that I prefer the Lucky Charms cereal bar over the straight Trix. If I had some rice cereal I would have done half rice cereal and half of the Trix to make it the perfect balance but beware the Trix bars are super sweet but you’ll be fine.

If all these cereals are overwhelming you then move right along OR just follow my recipe and swap these cereals for some rice cereal-just don’t forget to brown the butter and add equal parts marshmallow! Scroll down for the recipe below and then post your pics on IG and tag me @BrandiMilloy

IMG_7941.JPG
IMG_7949.JPG
IMG_7943.JPG

Colorful Marshmallow Cereal Treats

by Brandi Milloy

makes 8 2x2 squares

Ingredients

  • 3 tbsp. butter

  • 3 cups cereal of your choice

  • 3 cups mini marshmallows

Directions

  1. Melt butter in a pot on a medium low heat until butter starts to foam and get brown. Sprinkle a bit of salt if you’re feeling fancy. Add marshmallows and lower heat and mix. Once marshmallows have melted, remove from heat and add cereal. Press mixture into a parchment lined loaf pan. Once cooled, remove from pan and cut into 8 squares and enjoy!

Grapefruit Spiced Compote

Thank you to Sunkist for sponsoring this post

IMG_8290.JPG

I’ve always been a big Grapefruit person. I love the sweet tart flavor of it. I was part of the generation of kids who watched their parents dive into grapefruit for breakfast with a spoon. My dad loves them and since I wanted to be just like my dad growing up I grew to love them too.

IMG_8287.JPG

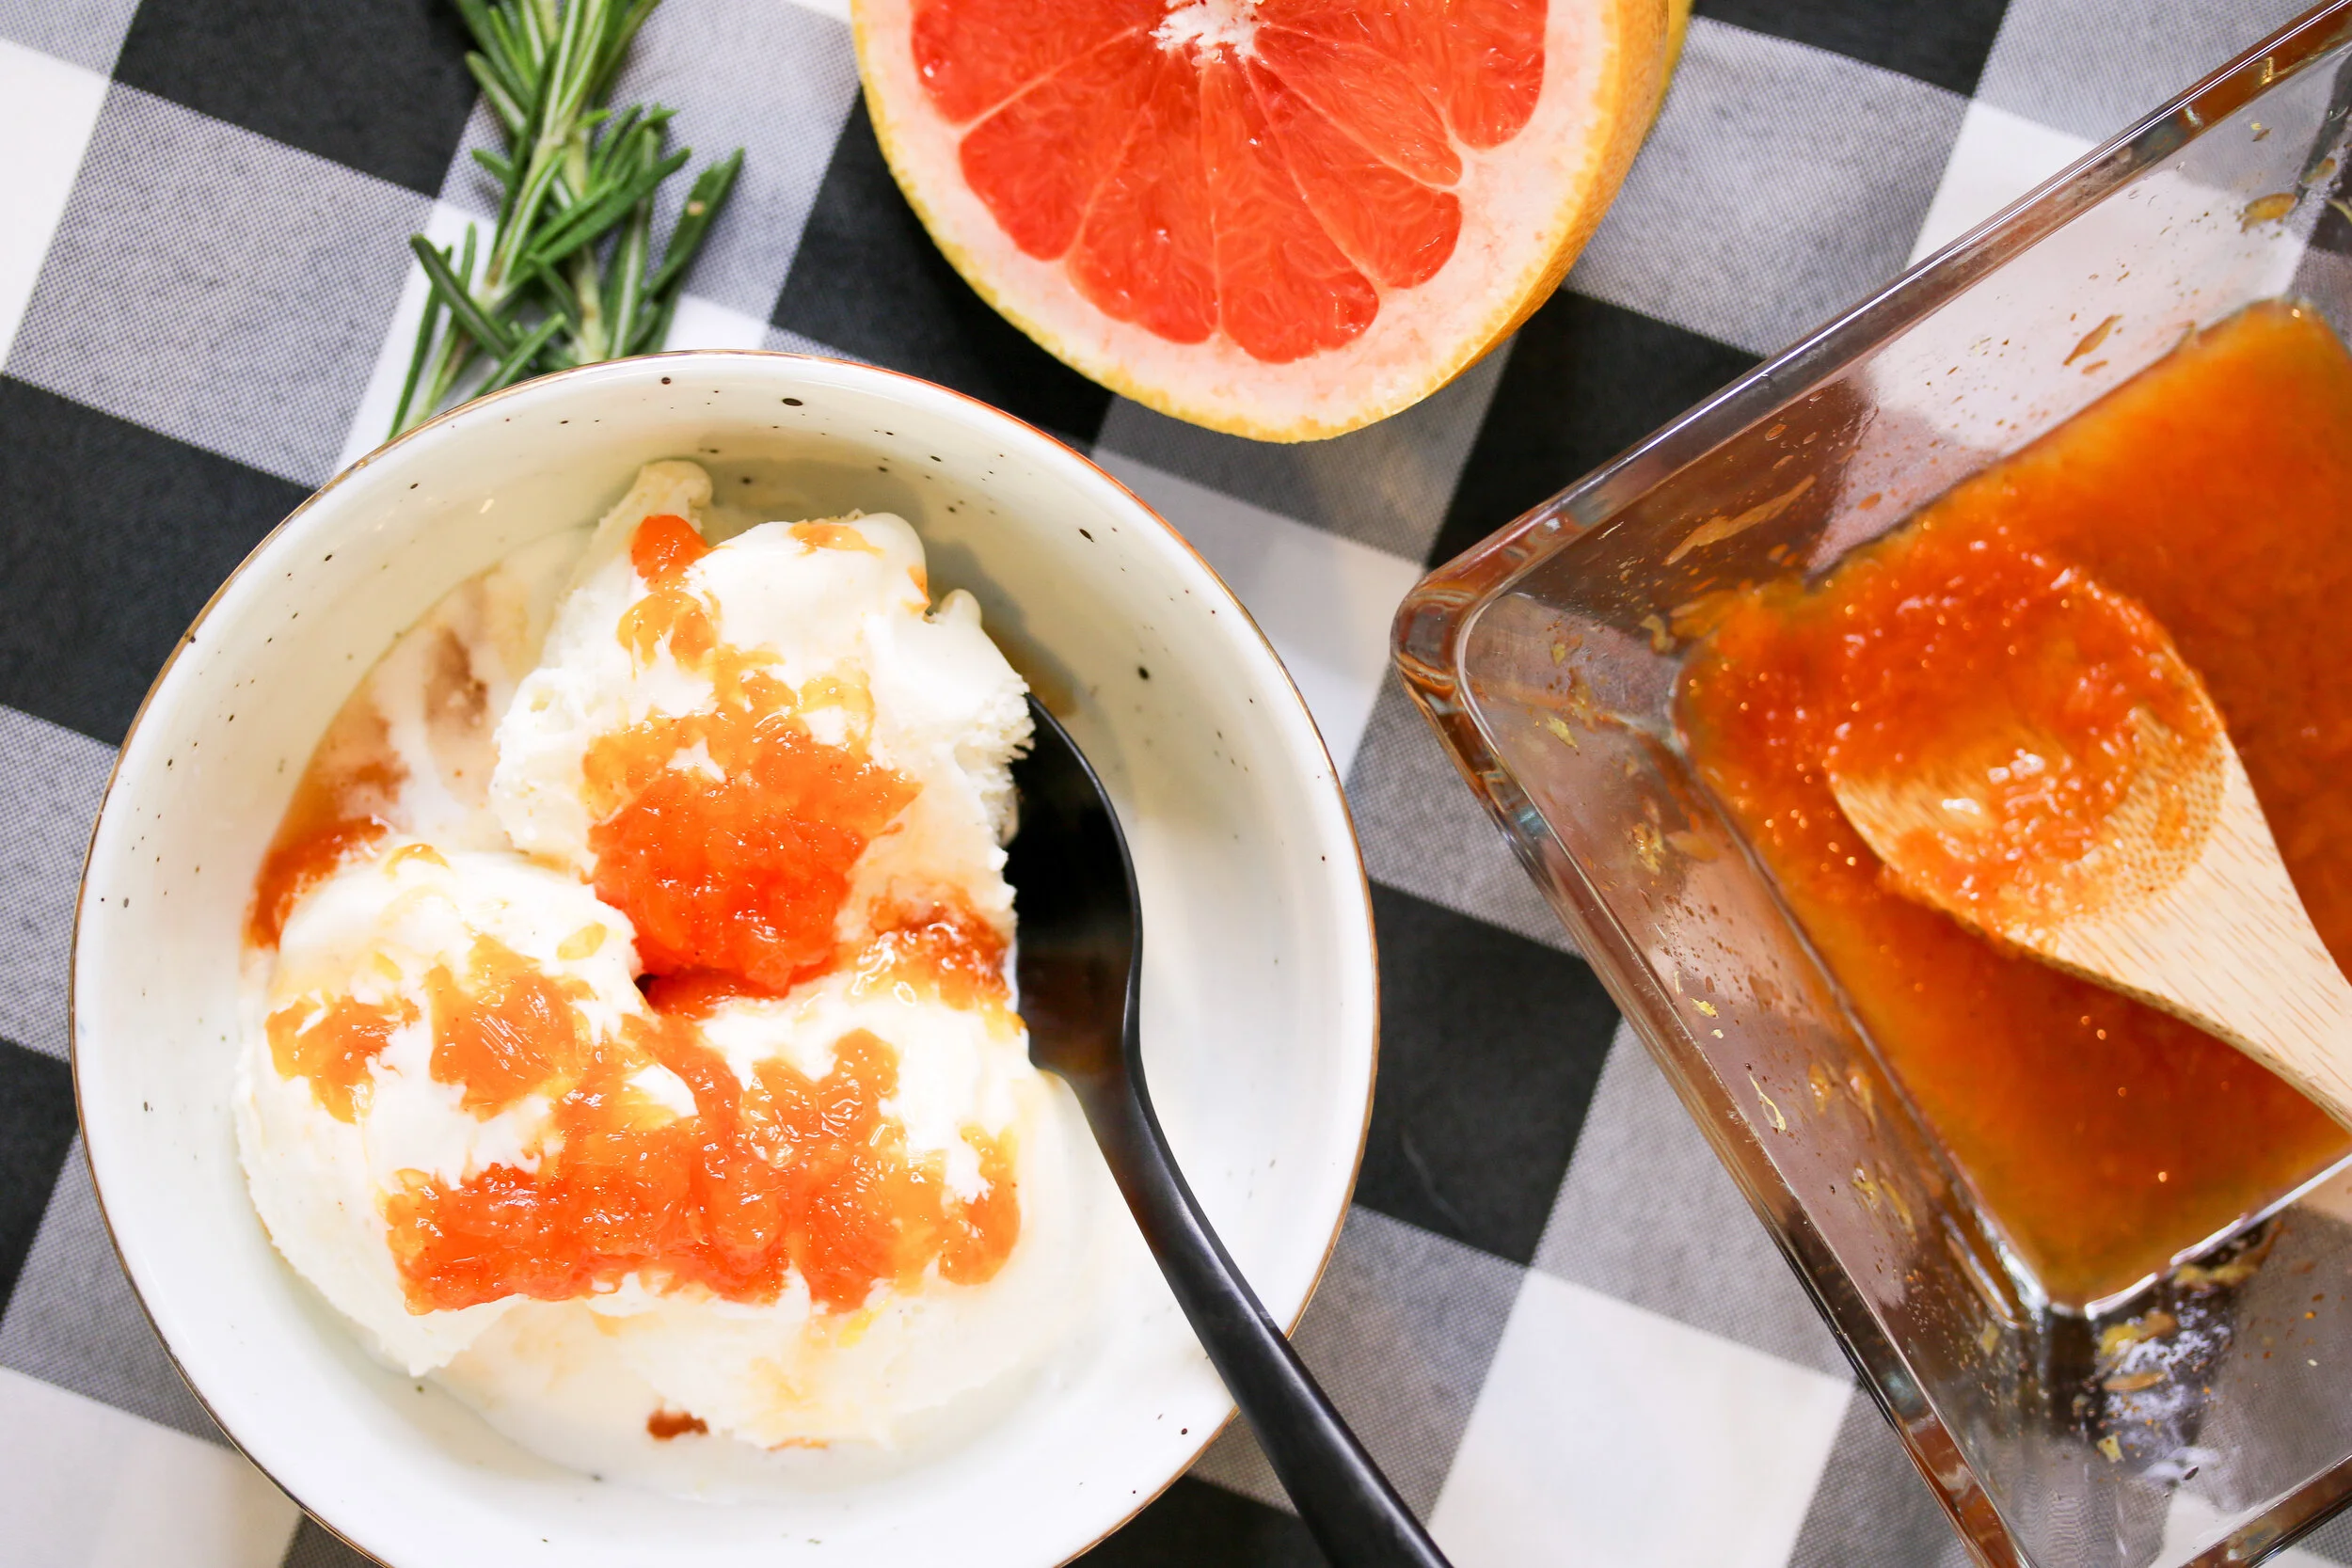
Anytime I see grapefruit on a menu I have to get it. It’s such a unique citrus with so many character traits and can be used in a variety of ways. When I came up with this recipe I wanted to feature all the complexities of grapefruit. It’s sweet but tart, bold, juicy and has beautiful color. The Sunkist California Star Ruby Grapefruit is my favorite. I used rosemary as a way to bring some unexpected earthiness to this compote and then a little cayenne gives it a mild spice! I love to pour this compote over vanilla bean ice cream, pancakes or waffles. Grapefruit is an extraordinary healthy fruit. Packed with Vitamin C, antioxidants and a good source of Vitamin A and fiber, it’s one of those citrus I always have on hand. Head to Sunkist.com/recipes for the full recipe and watch my IGTV episode here.

IMG_8291.JPG
One Pot Lemon Shakshuka

Thank you to Sunkist for sponsoring this post

IMG_8364+2.jpg
IMG_8359 2.JPG

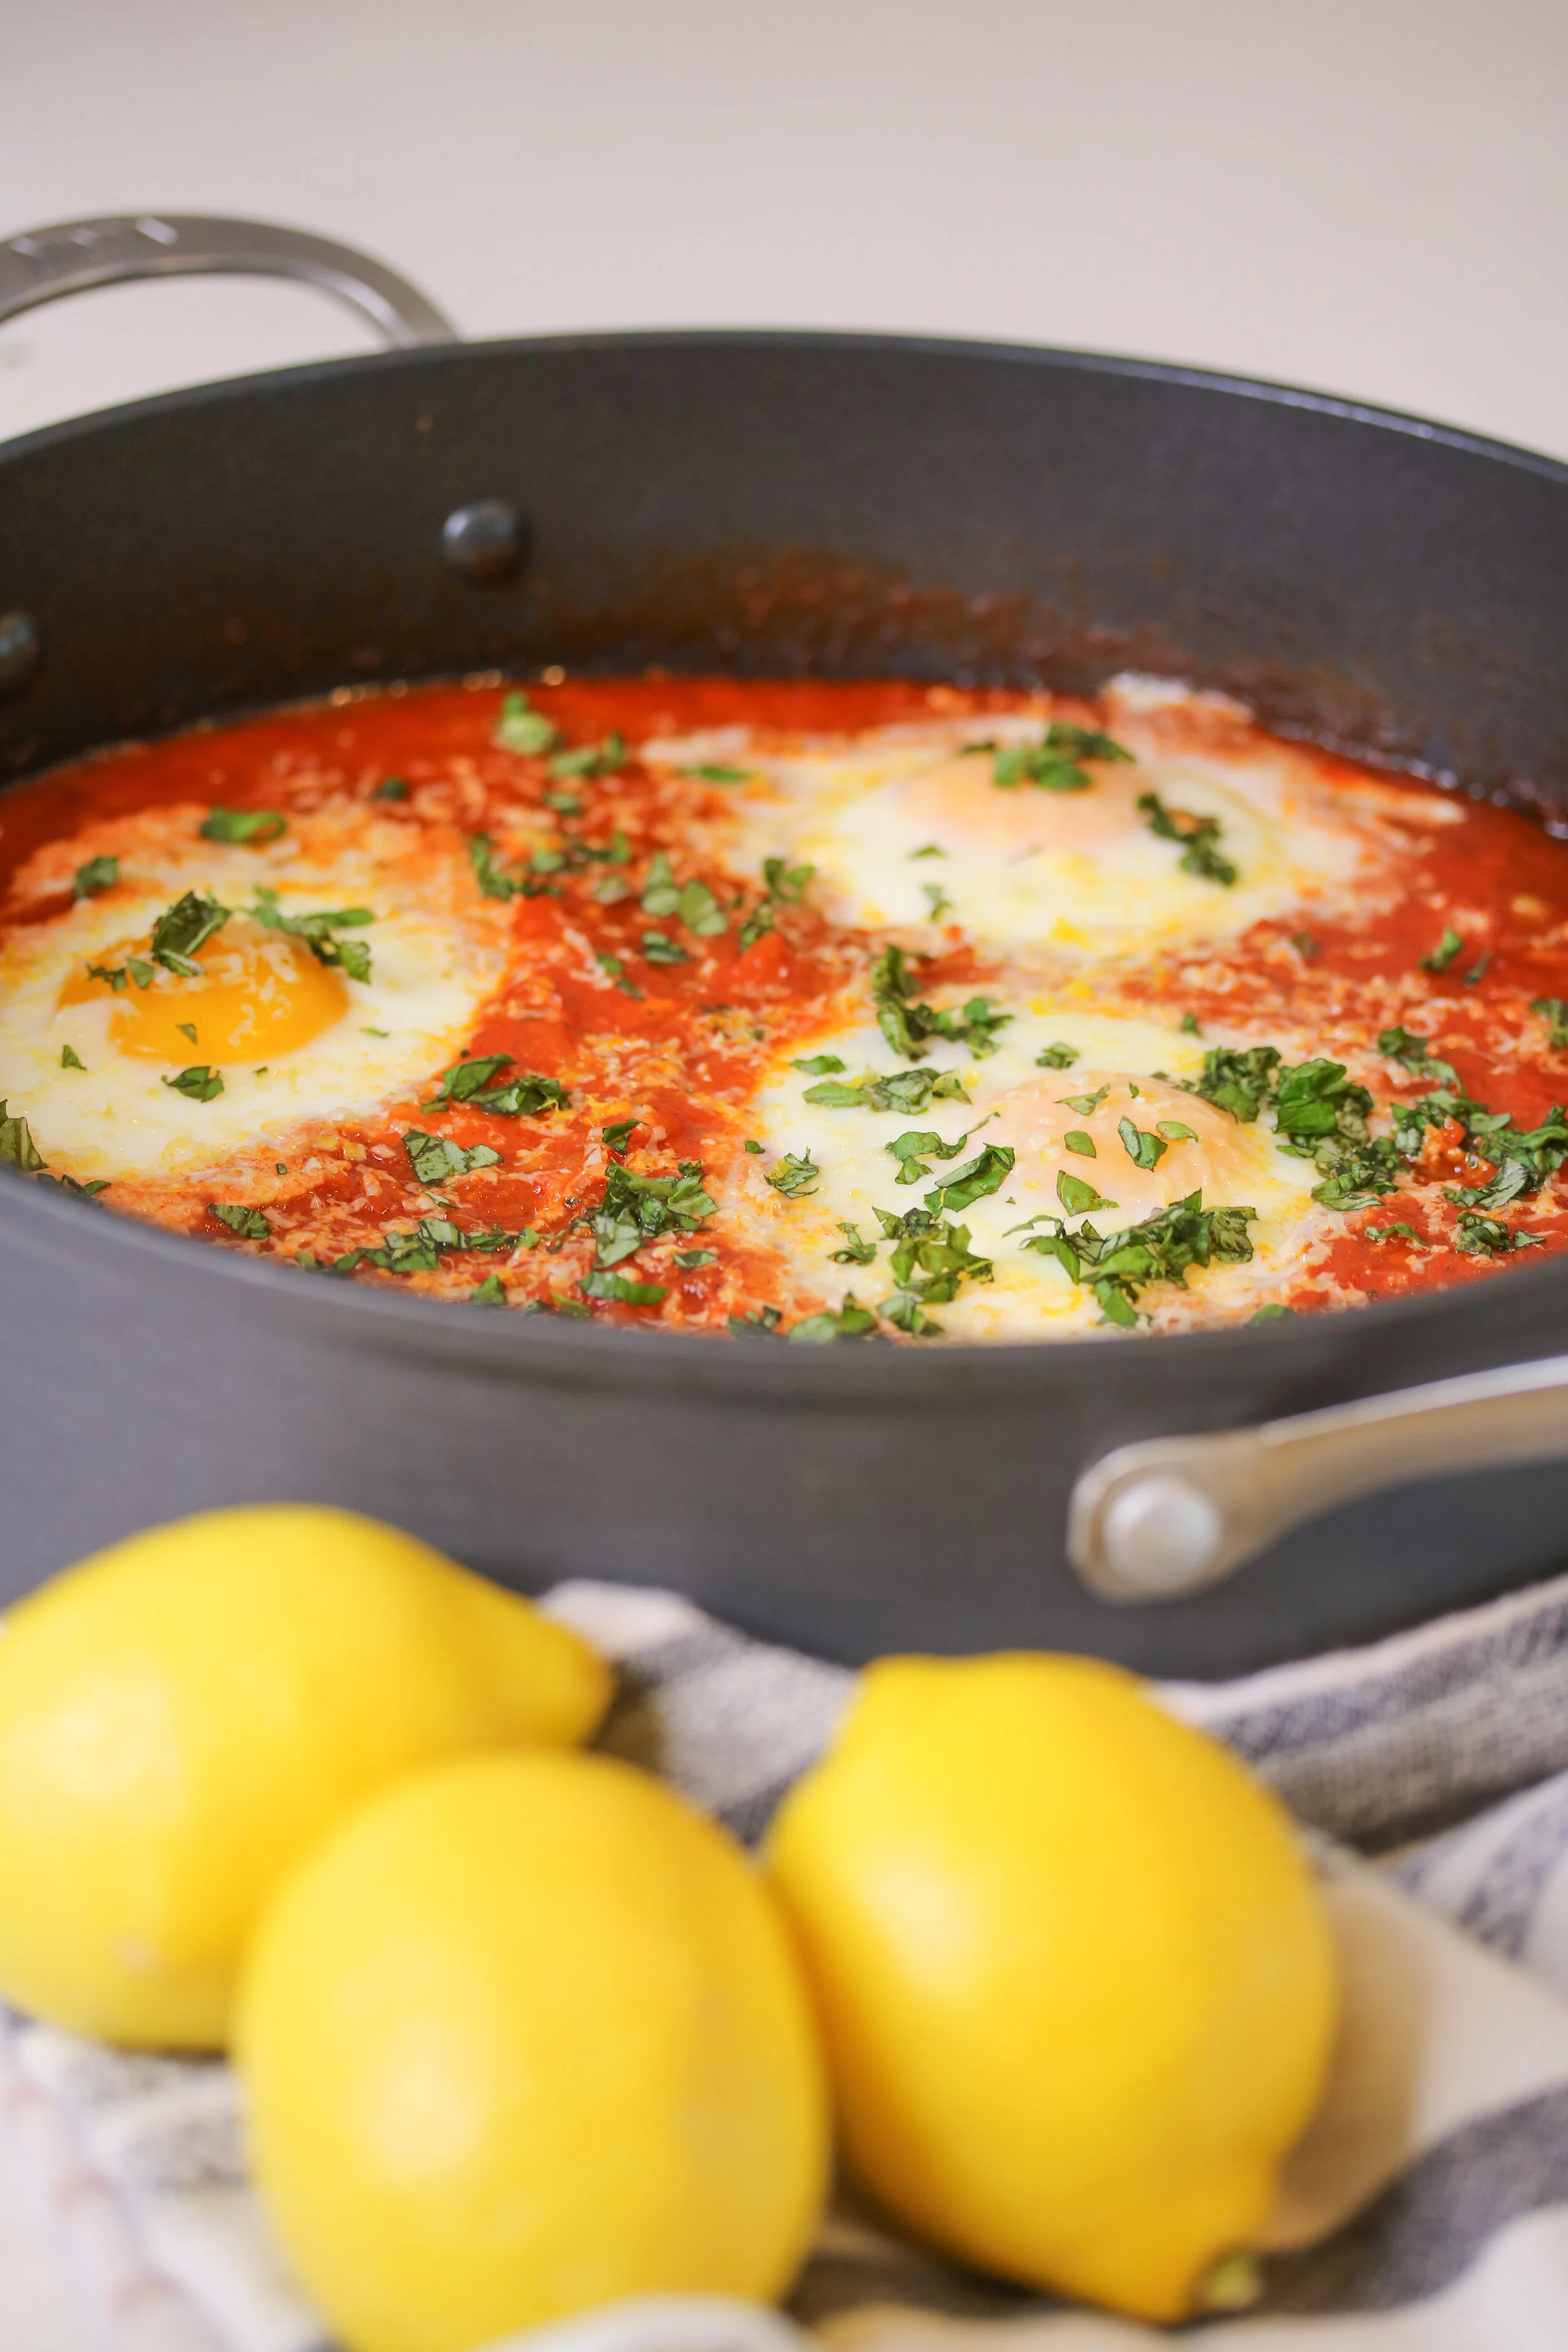
It’s no surprise I love breakfast. We eat it every morning and I’m not talking about some type of grab and go situation but a real warm meal together as a family. This is one of those recipes that will ensure everyone has a good day! It’s comforting, full of flavor and packed with Vitamin C from Sunkist lemons and zest so you are giving your body that much needed immunity boost and those added nutrients as well.

IMG_8369 3.JPG

I love keeping lemons on hand to add to my meals. Sunkist lemons are a great way to add that tart, bold and fresh flavor to any dish. Anytime I make this recipe it still wows me that you’re able to transform a few pantry staples into a beautiful and delicious meal! If you’re looking for more breakfast recipes check out my Orange Cream Cheese Frosted Cinnamon Rolls and my Sunkist Cara Cara Creamsicle Dream Smoothie. You can find the full recipe here or by going to Sunkist.com/recipes.

Spicy Lemon Cheese Dip
IMG_8255.jpg

Thank you to Sunkist Citrus for sponsoring this post.

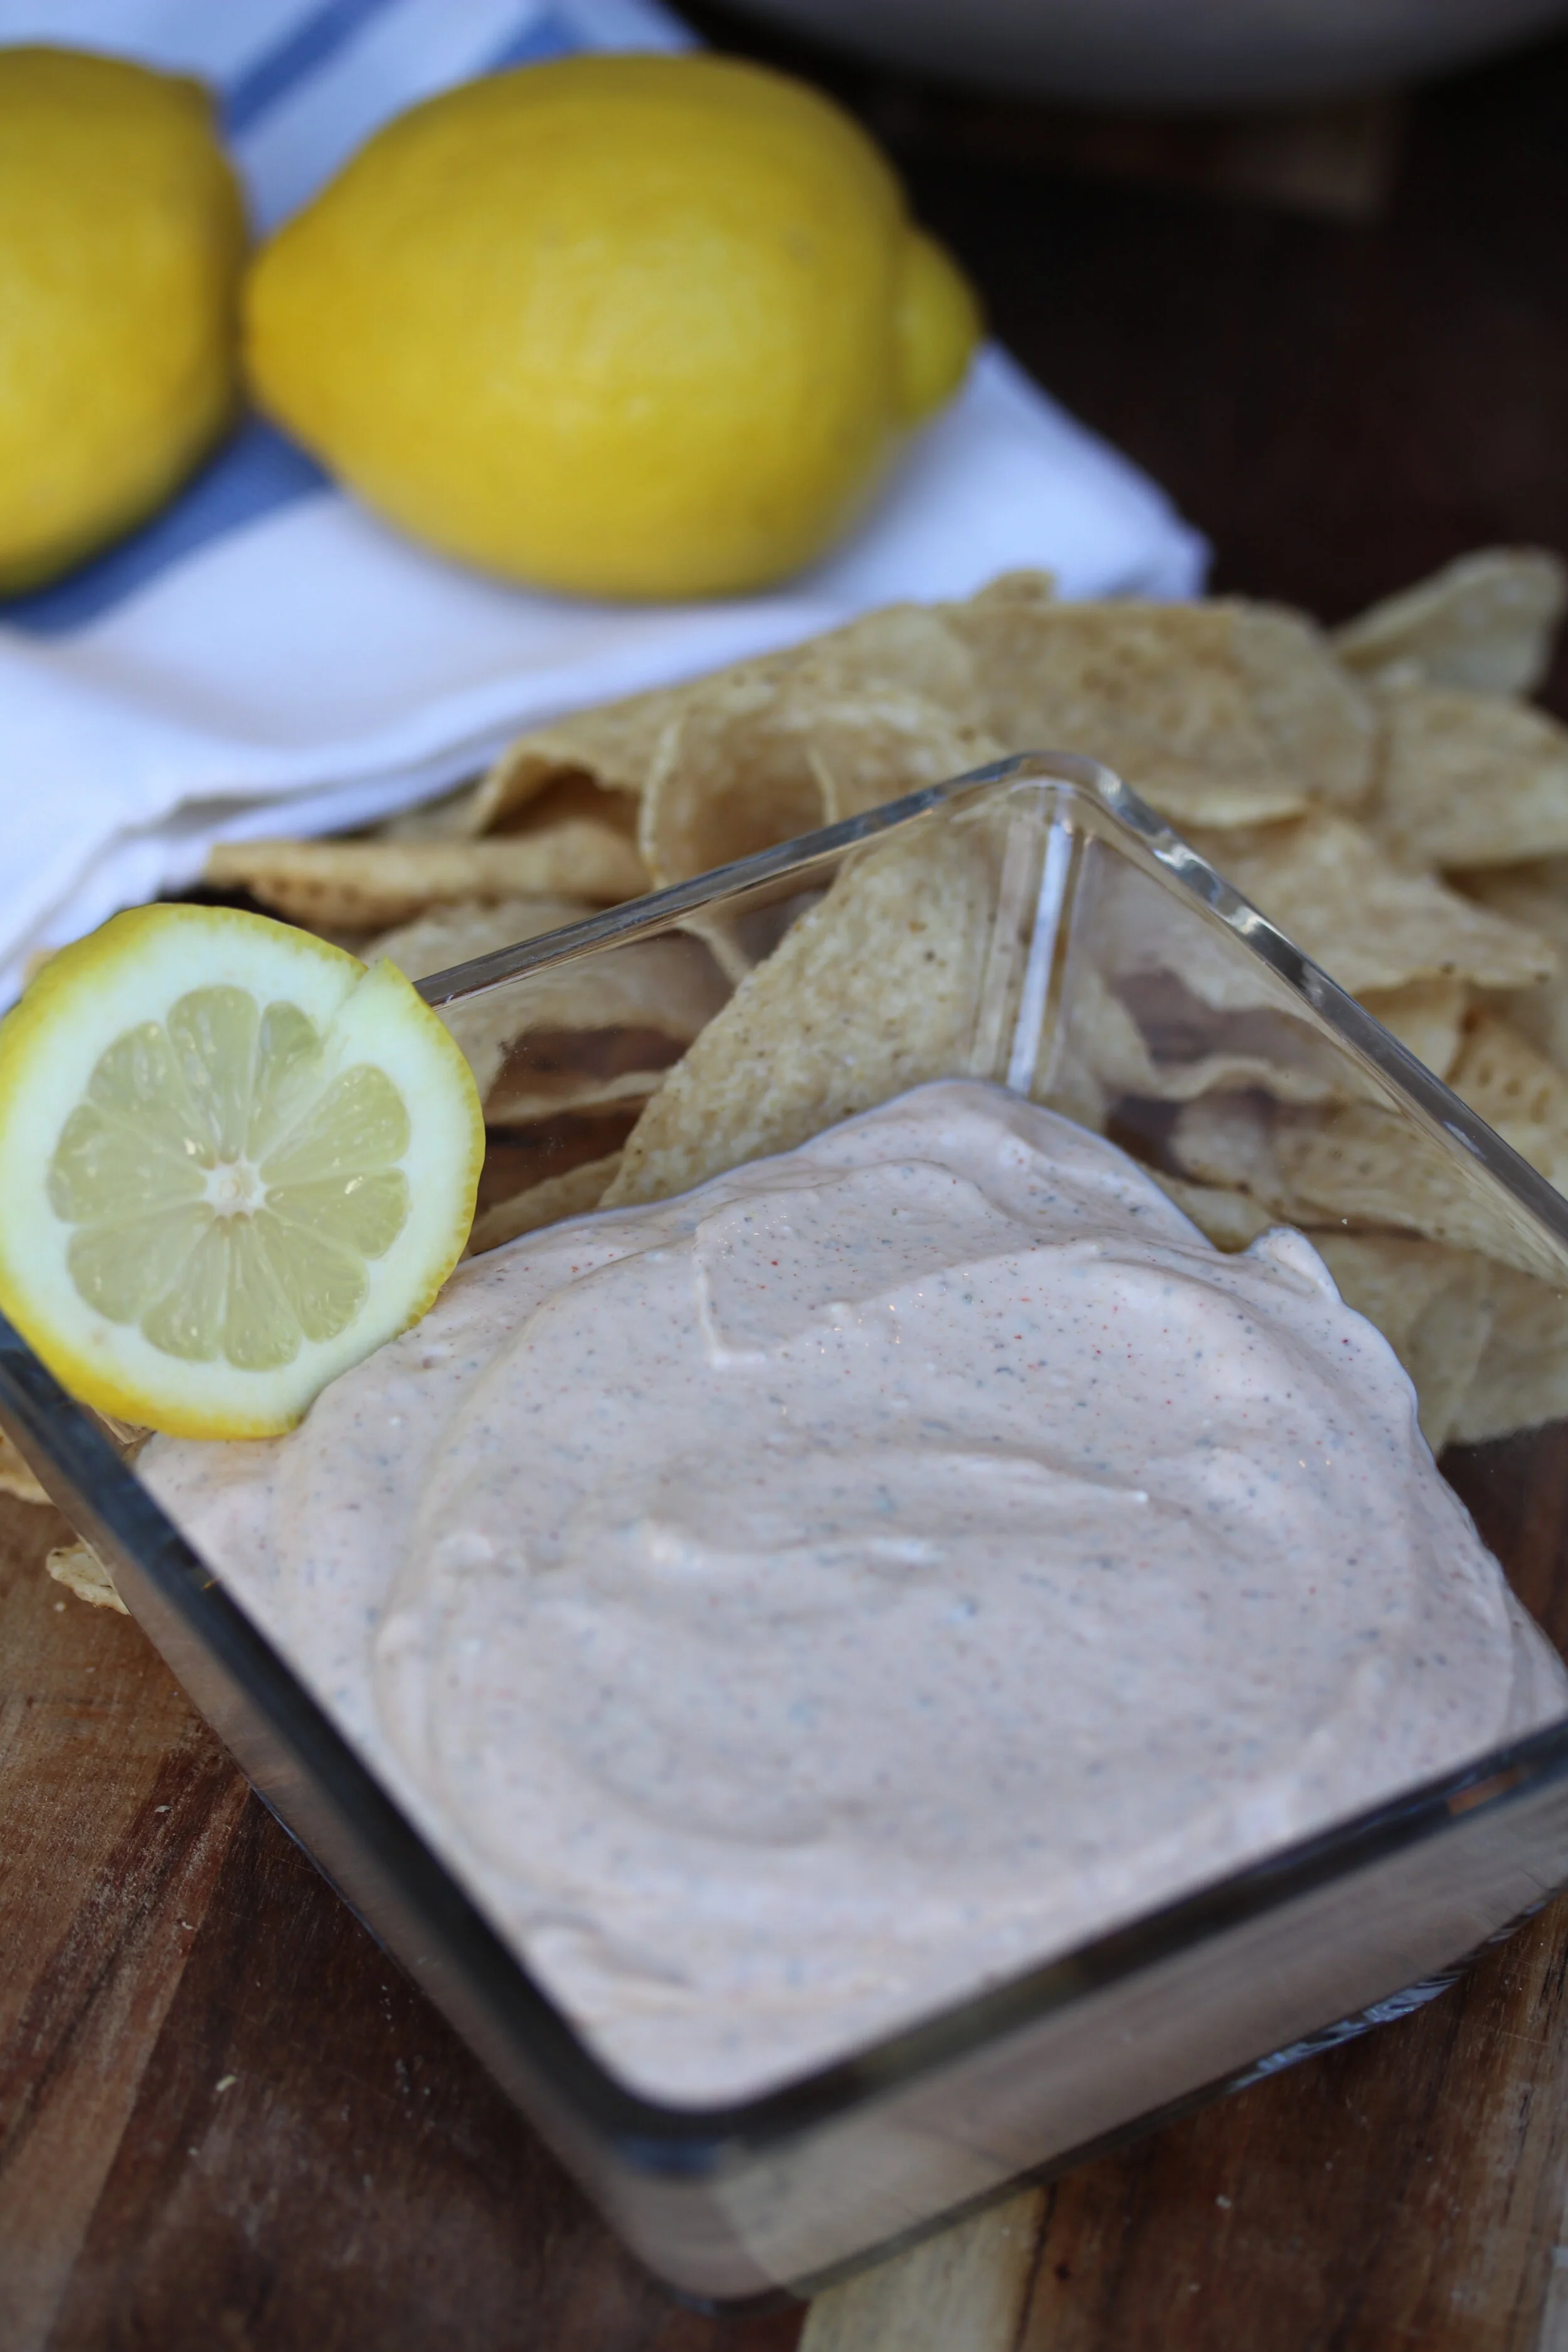
People used to call me the dip queen cause anytime they would come over and wanted a snack, I’d whip up a full on appetizer, usually in the form of a dip. With little effort you can make one of my go to dips that is reminiscent of a party dip but healthier. It is full of flavor, creamy, herbaceous and has the brightness and tang of lemon. It uses the lemon juice and zest of one whole lemon and zero to little salt. If you’re looking to reduce your sodium intake without sacrificing flavor, add lemon to your meals. Lemons are available year round so they are a countertop staple in our house. We have a running joke around there that if something doesn’t taste right we say “did you add lemon?”. Lemons can completely transform a dish and take it from ok to AMAZING. The acid for me is like electricity through a dish. It’s just wonderful what the tart flavor can do. I always have lemons on hand because of this powerful property plus they are an excellent source of Vitamin C! You can get the full recipe for my Spicy Lemon Cheese Dip here at Sunkist.com/recipes or you can watch me make it on IGTV.

IMG_8226.JPG
IMG_8227.JPG
Mocha Orange Whipped Coffee
IMG_8208 2.JPG

Thank you to Sunkist® Citrus for sponsoring this post.

I keep seeing this #WhippedCoffee trend on social. It started on Tik Tok but it’s really all over. I needed to know what all the hype was about. I finally decided to try it and let me tell you-it’s not that good. Instant coffee? Really? Well instead of just judging it-haha, I decided to try to make my own version that actually tastes good. And, I wanted to give it some flavor. I went with orange + mocha. The flavor is elevated, luxurious and it’s a winning combination and works really well with the coffee. These Sunkist® Navel oranges are such a classic and the orange zest adds so much amazing flavor! Citrus is something I always have in my house because it is so versatile and fun to cook with, but also because it can last up to 4 weeks in the fridge. It can really transform a meal. I’d love to know if you try this recipe and let me know what you think! You can find the full recipe here or by going to Sunkist.com/recipes

IMG_8215.JPG
IMG_8211.jpg
Orange Cream Cheese Frosted Cinnamon Rolls

Thank you to Sunkist for sponsoring this post

IMG_8166.JPG
IMG_8167.JPG
IMG_8185.JPG
IMG_8202.JPG

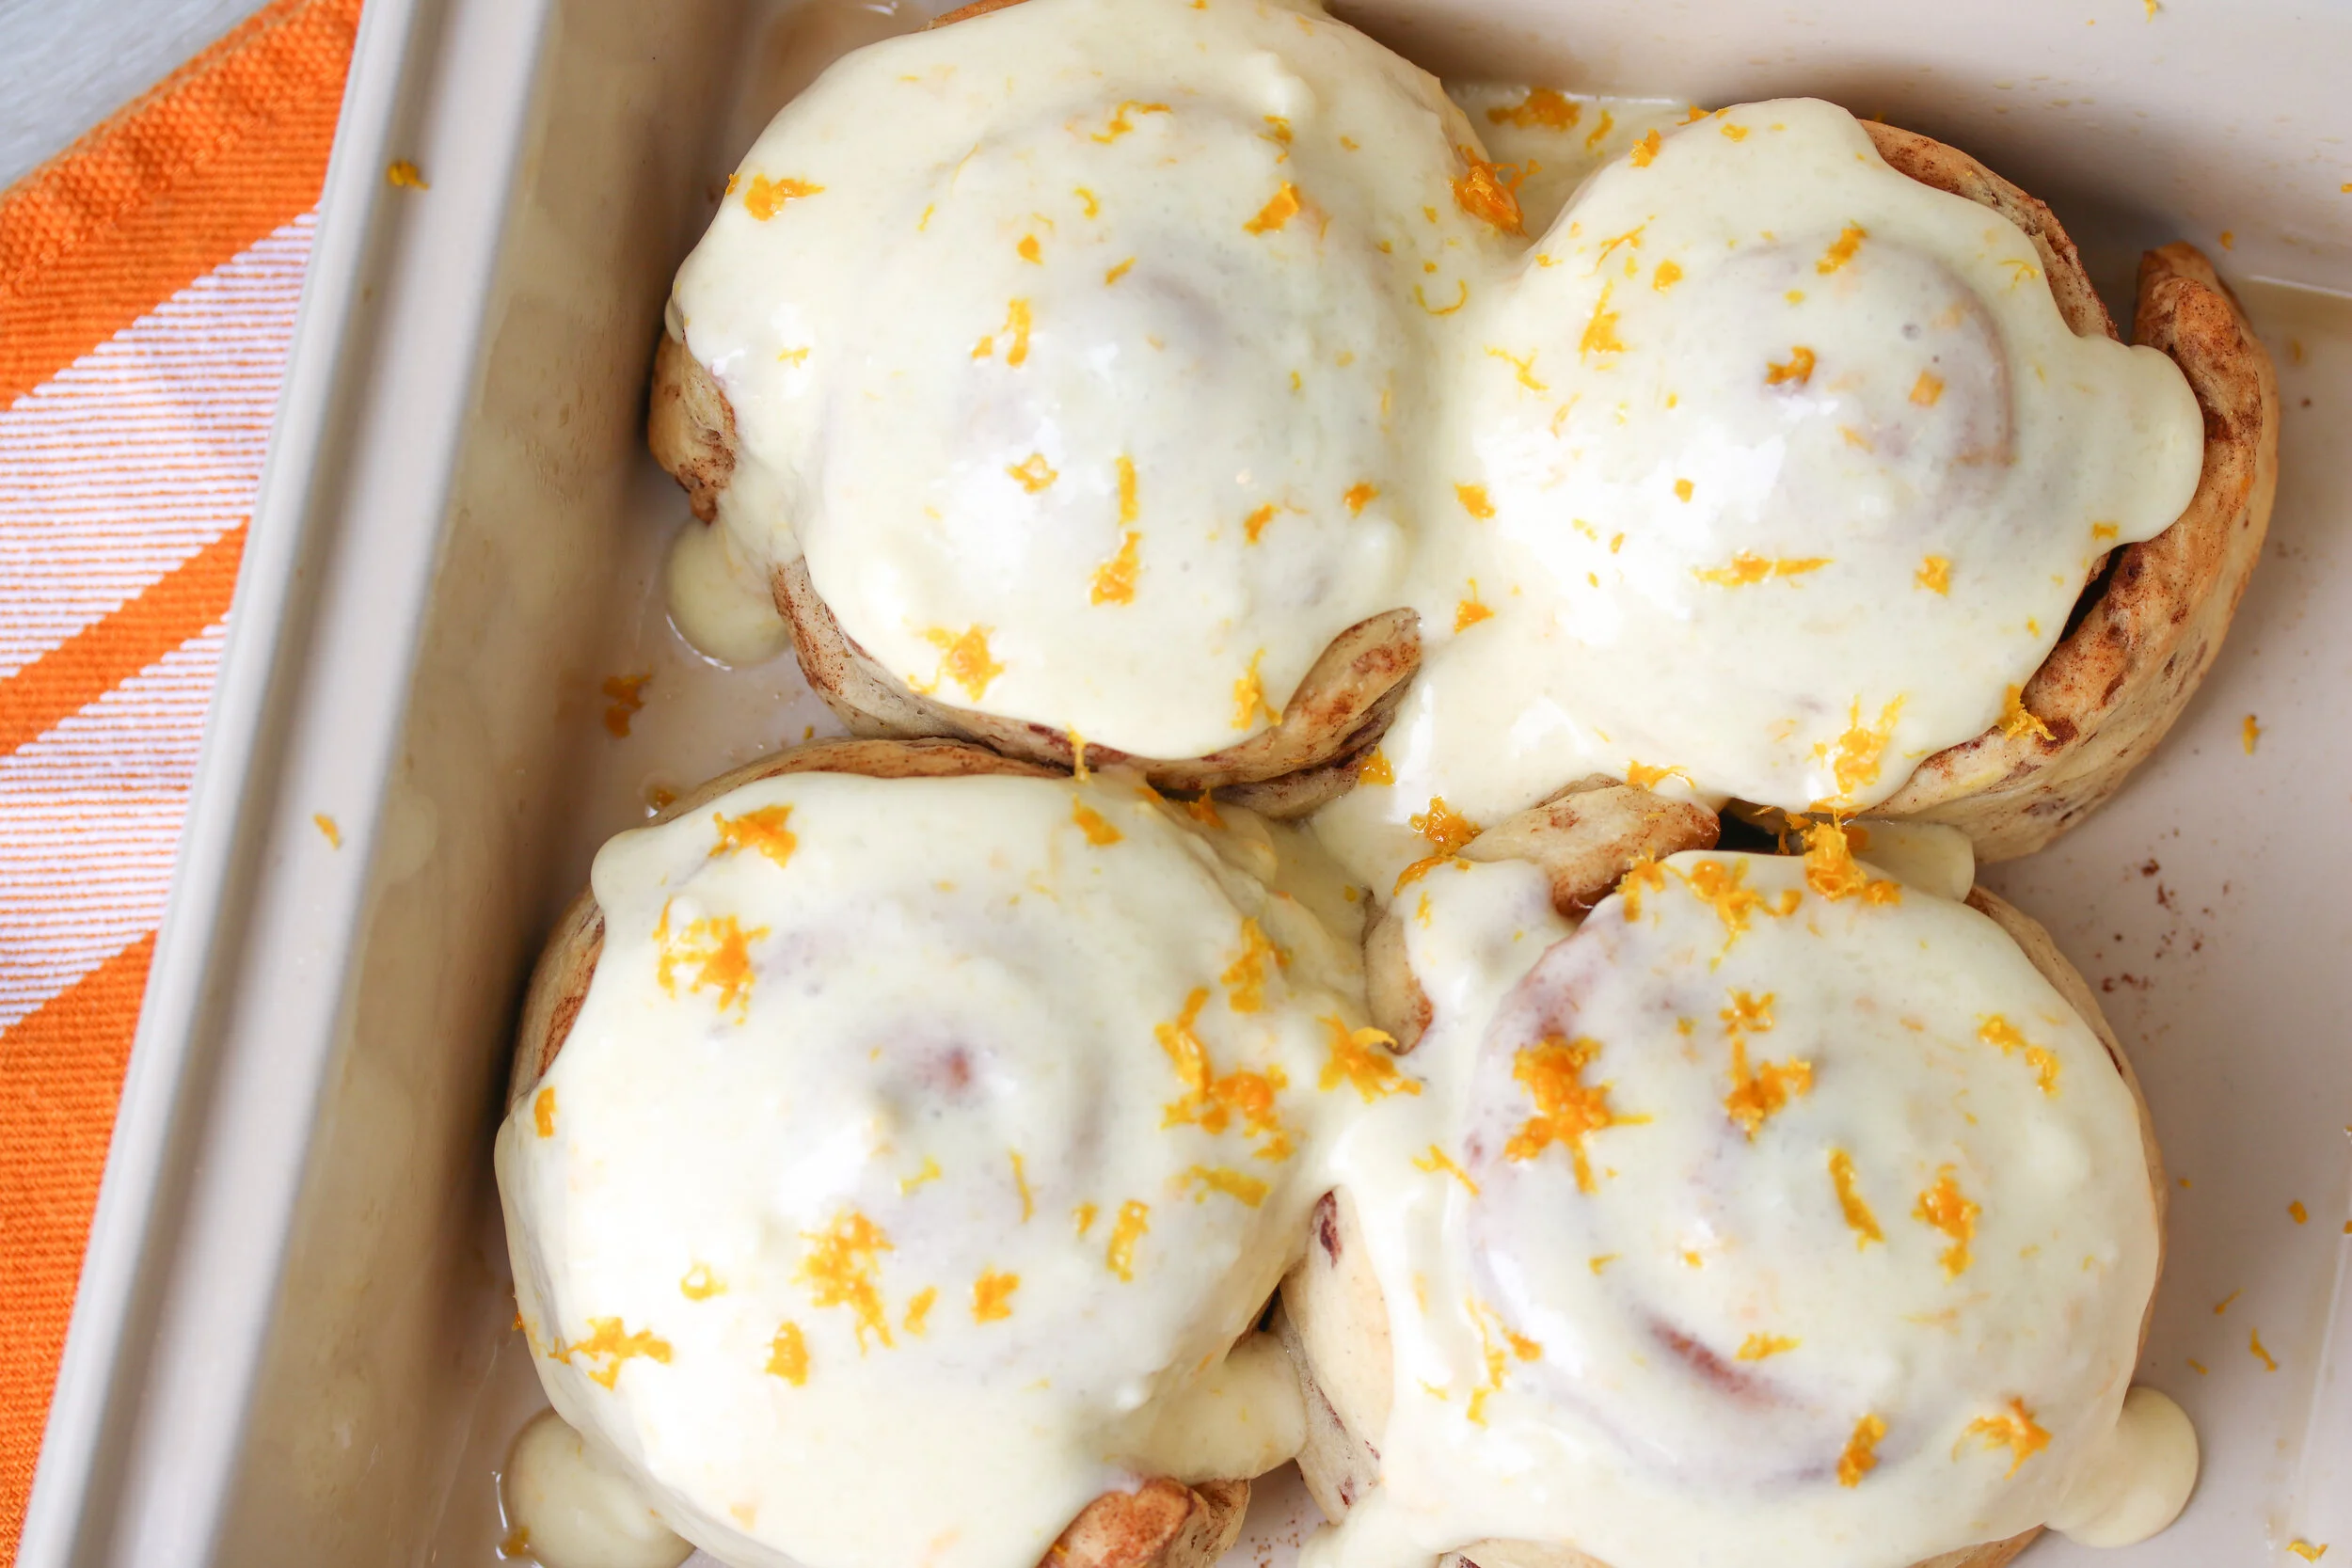
We just love making cinnamon rolls around here….and I’m not talking about the kind that take forever to make cause you have to let the dough rest and rise and all that fun stuff. Those are great but they take a while and you gotta have yeast on hand. When I’m craving cinnamon rolls I want them now, not later. This recipe features store bought cinnamon rolls in the tube but with a fresh, bright orange twist! I love keeping citrus on hand not only for flavor but for their nutritional benefit. Sunkist Cara Cara oranges offer the most vitamin C of the Sunkist citrus varieties, with 100% of the recommended daily intake in just one orange. If you’ve never had a Cara Cara you need to get them asap. They are juicy and sweet and their seedless interior has a rich pink hue. I love making fresh Cara Cara OJ. It’s delicious. Once you try a Cara Cara you won’t be able to stop thinking about them. They are so good. Anyway-back to the cinnamon rolls. So these semi-homemade rolls are slathered in a homemade Sunkist Cara Cara orange cream cheese frosting that is tart and sweet and full of that bright citrus flavor. The recipe makes plenty so you can frost the rolls twice! I like to frost them once right out of the oven and then again right before serving. Head to Sunkist.com/Recipes or here to get the full recipe!

Sunkist Cara Cara Creamsicle Dream Smoothie
6D4A7451.jpg

Thank you to Sunkist for sponsoring this post

I had to include the word “dream” in the name of this recipe because it’s such a dream the way these flavors all work together. This smoothie is simple, straightforward and oh so satisfying! It kind of reminds me of those frothy orange drinks we all drank in in the 80’s we’d get from the mall food court except the homemade version tastes way better and I know exactly what’s going in there. Plus this one is actually good for you because I’m using Sunkist Cara Cara oranges. They’re considered the power orange because just one Cara Cara provides 100% of your daily Vitamin C intake. It’s a no brainer for me that these should be in your daily rotation to keep your immunity up! They’re also a good source of fiber and rich in folate and if you’re like me-you start looking for them around December (they are available December through May). Sunkist Cara Caras are extremely sweet, with a slightly lower acidity level than navel oranges, super juicy, seedless and have a beautiful rich pink hue to them. In this recipe I include that you could add honey to sweeten but it’s totally optional since the Cara Cara is already sweet.

I just know you and your family are going to love this smoothie. GO watch my latest IGTV to see me make it with Sonny! The recipe is so simple, the flavor is straightforward- creamy, luscious, packed full of Vitamin C and feels like such a treat! Be sure to watch my latest appearance on KTLA where I featured my Sunkist Cara Cara Creamsicle Dream Smoothie as a healthy and easy activity to make with your children. And don’t forget to post your photos on instagram and tag me @BrandiMilloy and @SunkistCitrus

Sunkist Cara Cara Creamsicle Dream Smoothie Recipe

by Brandi Milloy

Serves 2

Ingredients

  • Juice of 2 Sunkist Cara Cara Oranges

  • 1/2 cup whole milk vanilla yogurt

  • 1.5 cups ice

  • 1 tbsp. honey or sugar to sweeten

Directions

  1. Add all of the ingredients into a blender and blend until smooth. Pour into 2 glasses to serve and enjoy!


Blood Orange & Cara Cara Iced Tea
Brandon Kidd Photography

Brandon Kidd Photography

I love Arnold Palmers. It’s pretty much my go to every time I eat out unless it’s late and I’m worried about the caffeine (then it’s sparkling water extra ice with lime please). Anyway—I love when I go to restaurants and order an Arnold Palmer and they say that their Arnold Palmer is different. I’m always down. “It’s made with strawberry lemonade” or “we have it but we make it with peach tea, is that OK?” Ummm yes to all of the above. I love it all. It’s the perfect mix of sweet from the lemonade and the bite from the tea.

This recipe was kind of an accident one afternoon when I was craving an Arnold Palmer and instead of grabbing a lemon from my fruit bowl, I grabbed a few blood oranges and Cara Cara’s. The result was glorious! Citrusy, juicy, sweet tea (but not too sweet cause it doesn’t need it). You’ve gotta try this and might as well make a big batch to share with guests. Tastes even better with a slice of blood orange as garnish. It really hits all the sense, ya know? Cheers!

Brandon Kidd Photography

Brandon Kidd Photography

Blood Orange & Cara Cara Iced Tea

by Brandi Milloy

Serves 4

Ingredients 

  • 6 cups water

  • 2 Sunkist Cara Cara Oranges

  • 2 Sunkist Blood Oranges

  • 4 black tea bags

  • 1/4 cup organic honey or agave

Directions

1. Into a large pot, heat 3 cups of water just until boiling. Remove from heat. 

2. Peel rind off oranges and place in pot. Add tea bags to steep for 5 minutes. Stir in honey.

3. Juice oranges and pour juice into pot and stir.

4. Into a large pitcher, pour 3 cups of cold water. Place strainer over pitcher and add tea and juice mixture. Serve with ice and slices of orange.

Brownie Cookie Dough Party Bars
Brandon Kidd Photo

Brandon Kidd Photo

This post isn’t about my favorite brownie or chocolate chip cookie dough recipe. You can use whatever recipe you want for those OR go ahead and get a box or brownie mix and a log of cookie dough from the store.

0072_BrandonKiddPhoto.jpg

The key here is to make sure you don’t over bake your bars. In fact, slightly more than half baked is more like it. Just pour your brownie dough into a prepped 8 x 8 pan and then drop your cookie dough on top until the brownie batter is covered. Bake at 350F for about 30 minutes. Remove from the oven and allow to cool. What makes these bars over the top delicious is the buttery cream cheese frosting and my favorite sprinkles. Just slather the frosting all over the bars and cut into squares. Add sprinkles and you’re everyone’s best friend. The end.

Brandon Kidd Photo

Brandon Kidd Photo

Cream Cheese Frosting

by Brandi Milloy

Ingredients

  • 4 oz cream cheese, room temperature

  • 1/4 cup butter, room temperature

  • 1 3/4 cup powdered sugar

  • 1 tsp pure vanilla extract

  • tiny pinch of salt

Directions

  1. Mix cream cheese and butter together until combined. Add powdered sugar, vanilla and salt and mix until smooth.

  2. Enjoy by the spoonful if you please


Brandon Kidd Photo

Brandon Kidd Photo

Brandon Kidd Photo

Brandon Kidd Photo

Blood Orange Ruby Chocolates
Brandon Kidd Photography

Brandon Kidd Photography

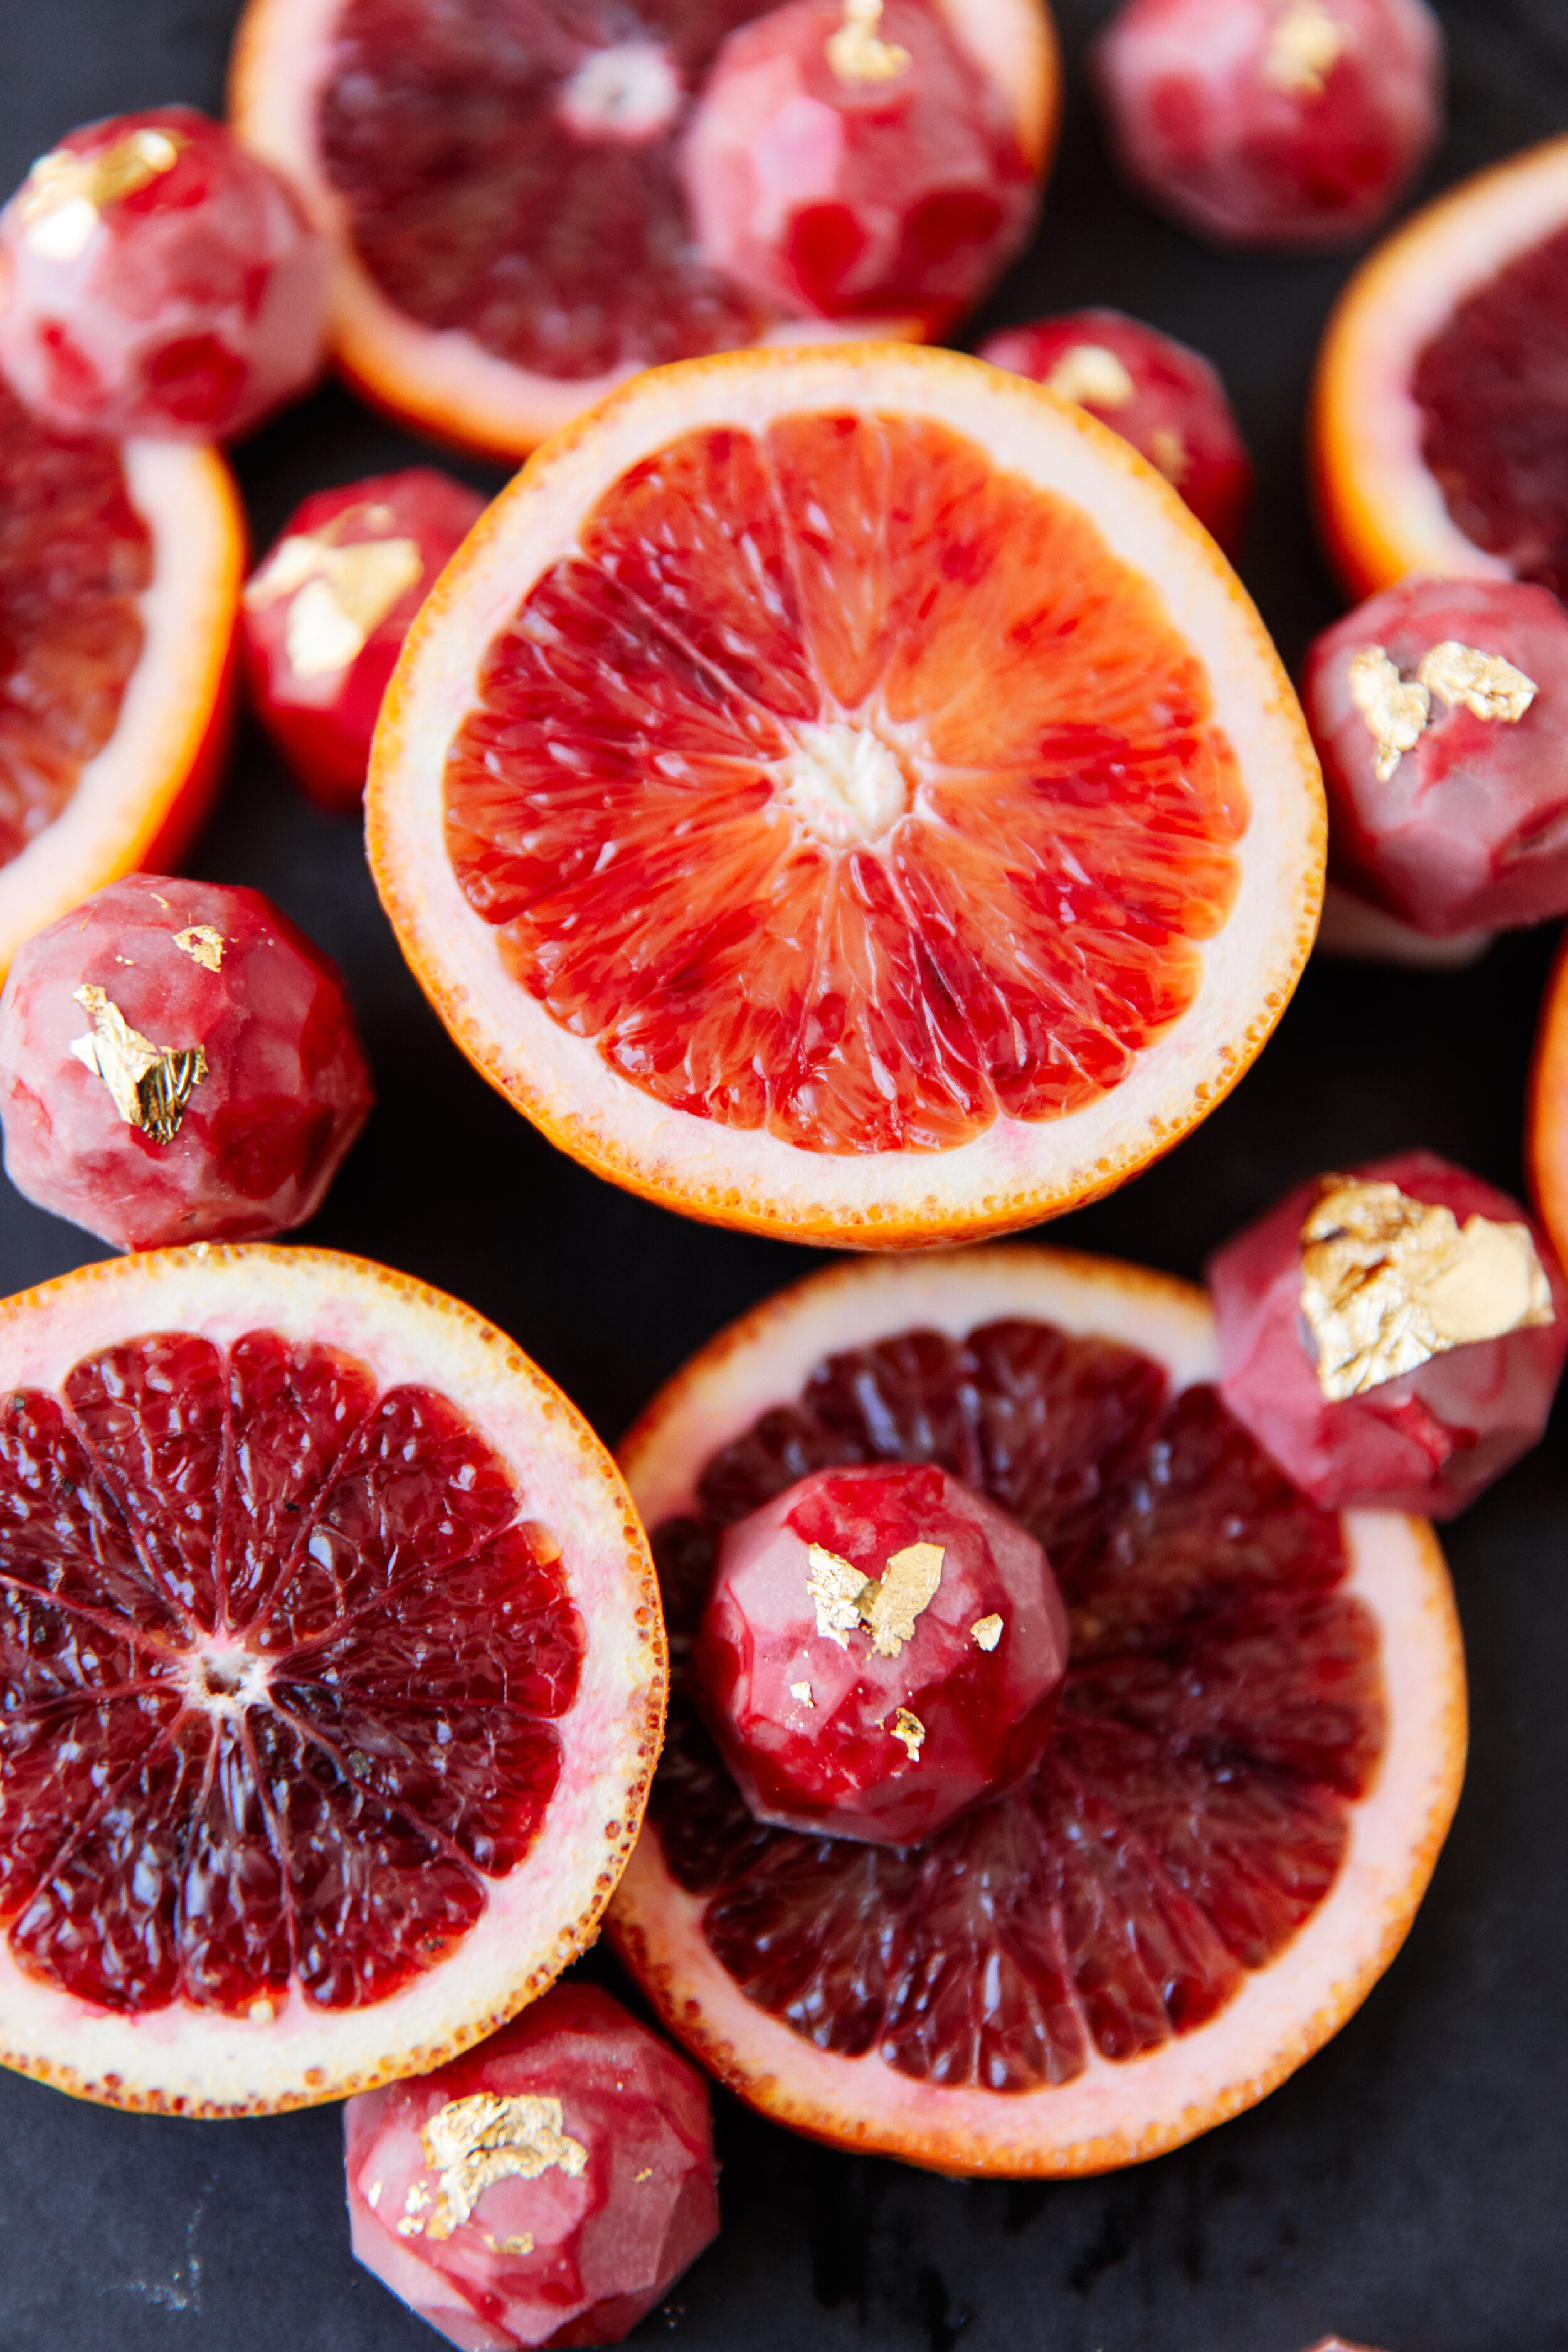
A few weeks ago I had Ruby chocolate for the first time and was totally blown away by the flavor. It pairs so nicely with Sunkist blood oranges! You can watch the video of me trying this custom chocolate bar made by @ChefSally here. It inspired me to make a smaller version using my favorite gem mold.

I love how these ruby chocolates feel like they are SO much more elevated and custom than they are! This is an easy recipe to get you started if you’re interested in making custom chocolates. You can find the full recipe on the Sunkist Citrus website. Be sure to tag me when you post yours!

Brandon Kidd Photography

Brandon Kidd Photography

Brandon Kidd Photography

Brandon Kidd Photography

Brandon Kidd Photography

Brandon Kidd Photography


Sugar Cookies For Santa
sugar cookies.jpg

Sugar Cookies for Santa Recipe

by Brandi Milloy

Ingredients

  • 5 cups all-purpose flour

  • 1 tsp. baking powder

  • 1/2 tsp. salt

  • 1 3/4 cup unsalted butter, room temperature

  • 1 3/4 cup granulated sugar

  • 2 large eggs, room temperature

  • 2 1/2 tsps. pure vanilla extract

  • 1 tsp. almond extract

Directions

  1. Into a large bowl, whisk together your dry ingredients: flour, baking powder and salt and set aside.

  2. In a stand up mixer, cream together your butter and sugar until smooth and creamy. Add your eggs, vanilla and almond extract and beat on high until combined being sure to scrape down the sides.

  3. Add your dry ingredients to the wet ingredients and mix on low until combined. Divide your dough into 4 equal parts. On a floured piece or parchment paper, roll out each portion until about 1/4” thick. Cover in plastic and keep in refrigerator for 2-4 hours to chill.

  4. Cut out cookies and place in a preheated oven at 350F for about 11-12 minutes or until barely golden but still soft in the center.

  5. To make a simple cookie frosting, mix 4 cups powdered sugar with about 1/4 cup of cream or milk (you can also use water instead). Add 2 teaspoons of vanilla or almond extract and 1/2 teaspoon of salt. Mix until smooth. If frosting is too thick, add some cream, milk or water a teaspoon at a time until desired consistency.

Blueberry Bacon Bites

Thank you to the U.S. Highbush Blueberry Council for sponsoring this post

Blueberry Bacon Bites Recipe

by Brandi Milloy

Ingredients

  • 8 oz. bacon or 8 slices bacon

  • 1/2 cup packed brown sugar

  • 1/4 tsp. cracked black pepper

  • 2 cups blueberries

  • 1 tbsp. maple syrup

  • 1 roll refrigerated crescent dough

Directions

  1. Preheat oven to 350F. Into a bowl add your bacon, brown sugar and black pepper and mix to coat. Place bacon on baking sheet and bake in oven for 18 minutes, rotating halfway through. Remove from oven and cool.

  2. Meanwhile make your blueberry spread by adding blueberries and maple syrup into a pot. Place on medium high heat and bring to a boil. Cook for about 3 minutes and then remove from heat and let it cool.

  3. To assemble, lay out crescent dough on a baking sheet keeping the dough in one large rectangle shape. Brush about 4 tbsp. of the blueberry spread onto dough. Top with bacon and bake at 350F for about 15 minutes. Chop into pieces and serve warm or room temperature.

Blueberry Almond Oat Breakfast Cookies

Thank you to the U.S. Highbush Blueberry Council for sponsoring this post

6D4A8706.jpg
6D4A8290.jpg

Breakfast cookies are basically my excuse to eat cookies for breakfast! Ha, actually they are the easiest make ahead meal for mornings when we have zero time to sit down and have breakfast together. They are so simple to throw together-you literally just toss all of the ingredients in a bowl, mix, top with blueberries and bake!

6D4A8218.jpg
6D4A8713.jpg

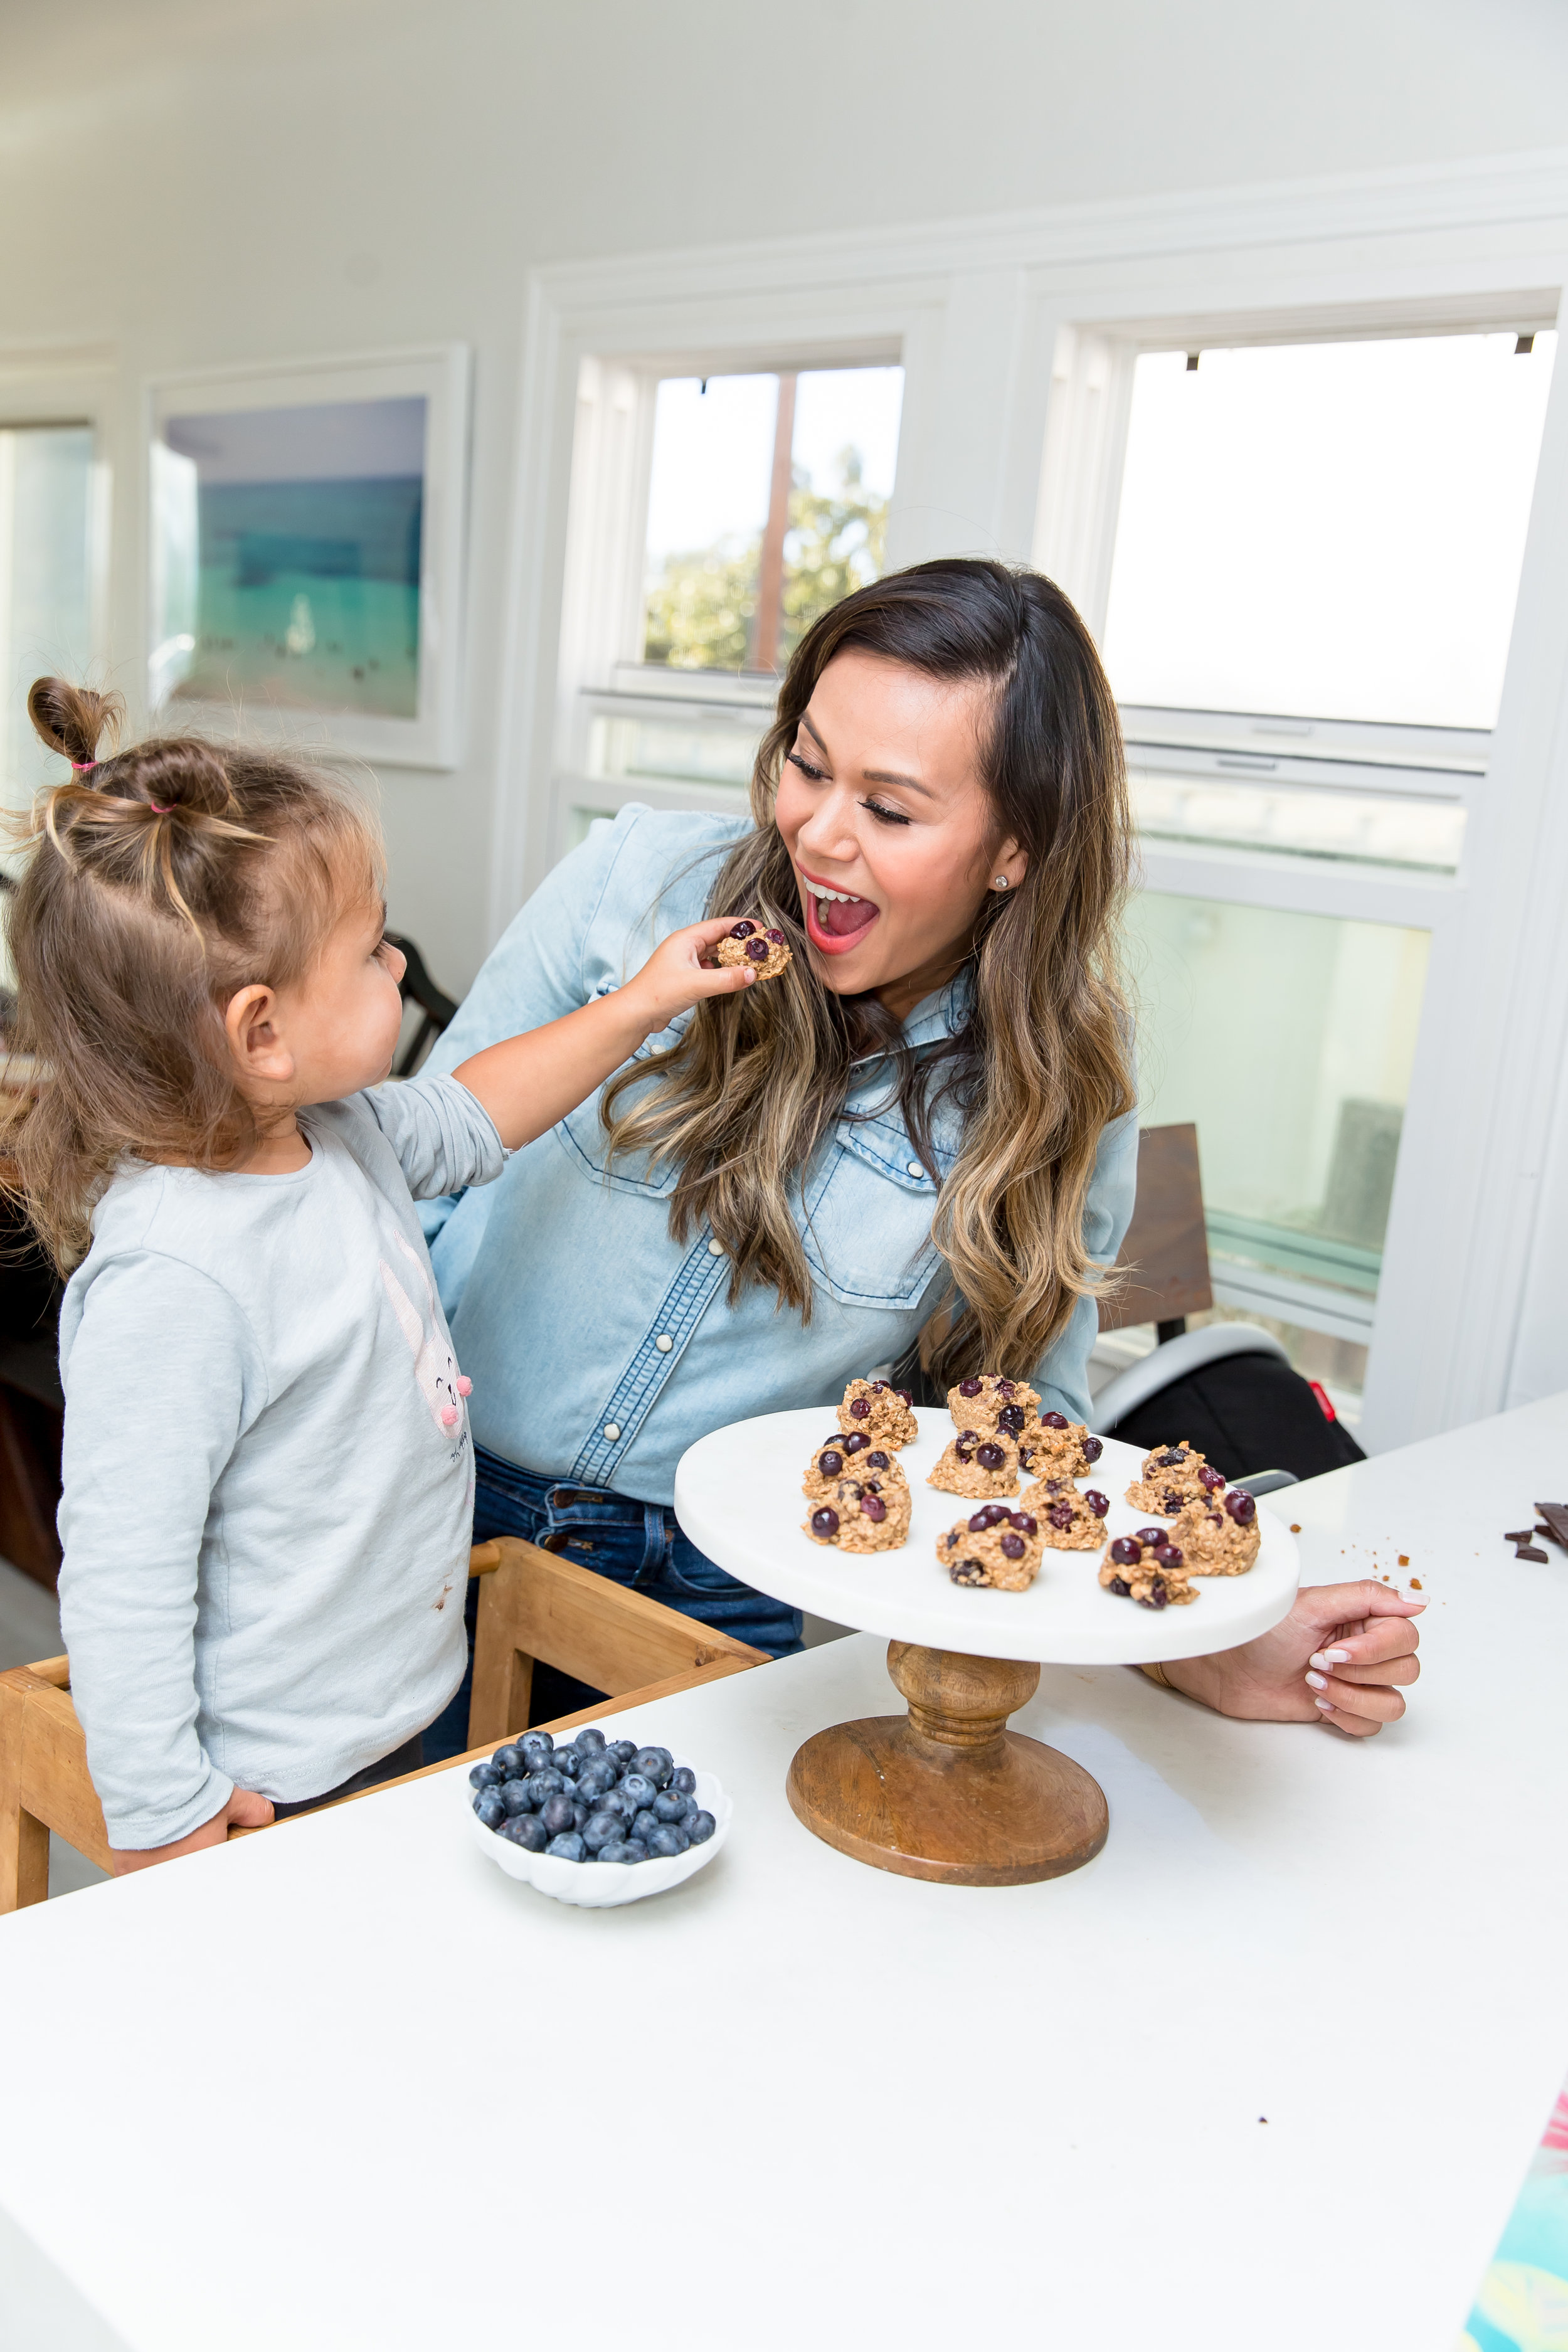
I keep these on hand for snacks and they are in high rotation for playdates and meet ups. This is one of those recipes I love to make with Milly. She enjoys mashing up the banana, adding the oats, measuring the ingredients, topping the mounds with blueberries (if she hasn’t eaten all the bluebs by then!) and scooping the batter onto the baking sheet. You can make this recipe using fresh or frozen blueberries but just keep in mind that if you use frozen always thaw and rinse them beforehand. I hope you enjoy making this recipe with your family and when you do, I’d love to see your photos so post them on Instagram and tag me @BrandiMilloy. You can also watch me make these with Little A on my IGTV Channel. Enjoy!

6D4A8267.jpg
6D4A8246.jpg

Blueberry Almond Oat Breakfast Cookies

by Brandi Milloy

Ingredients

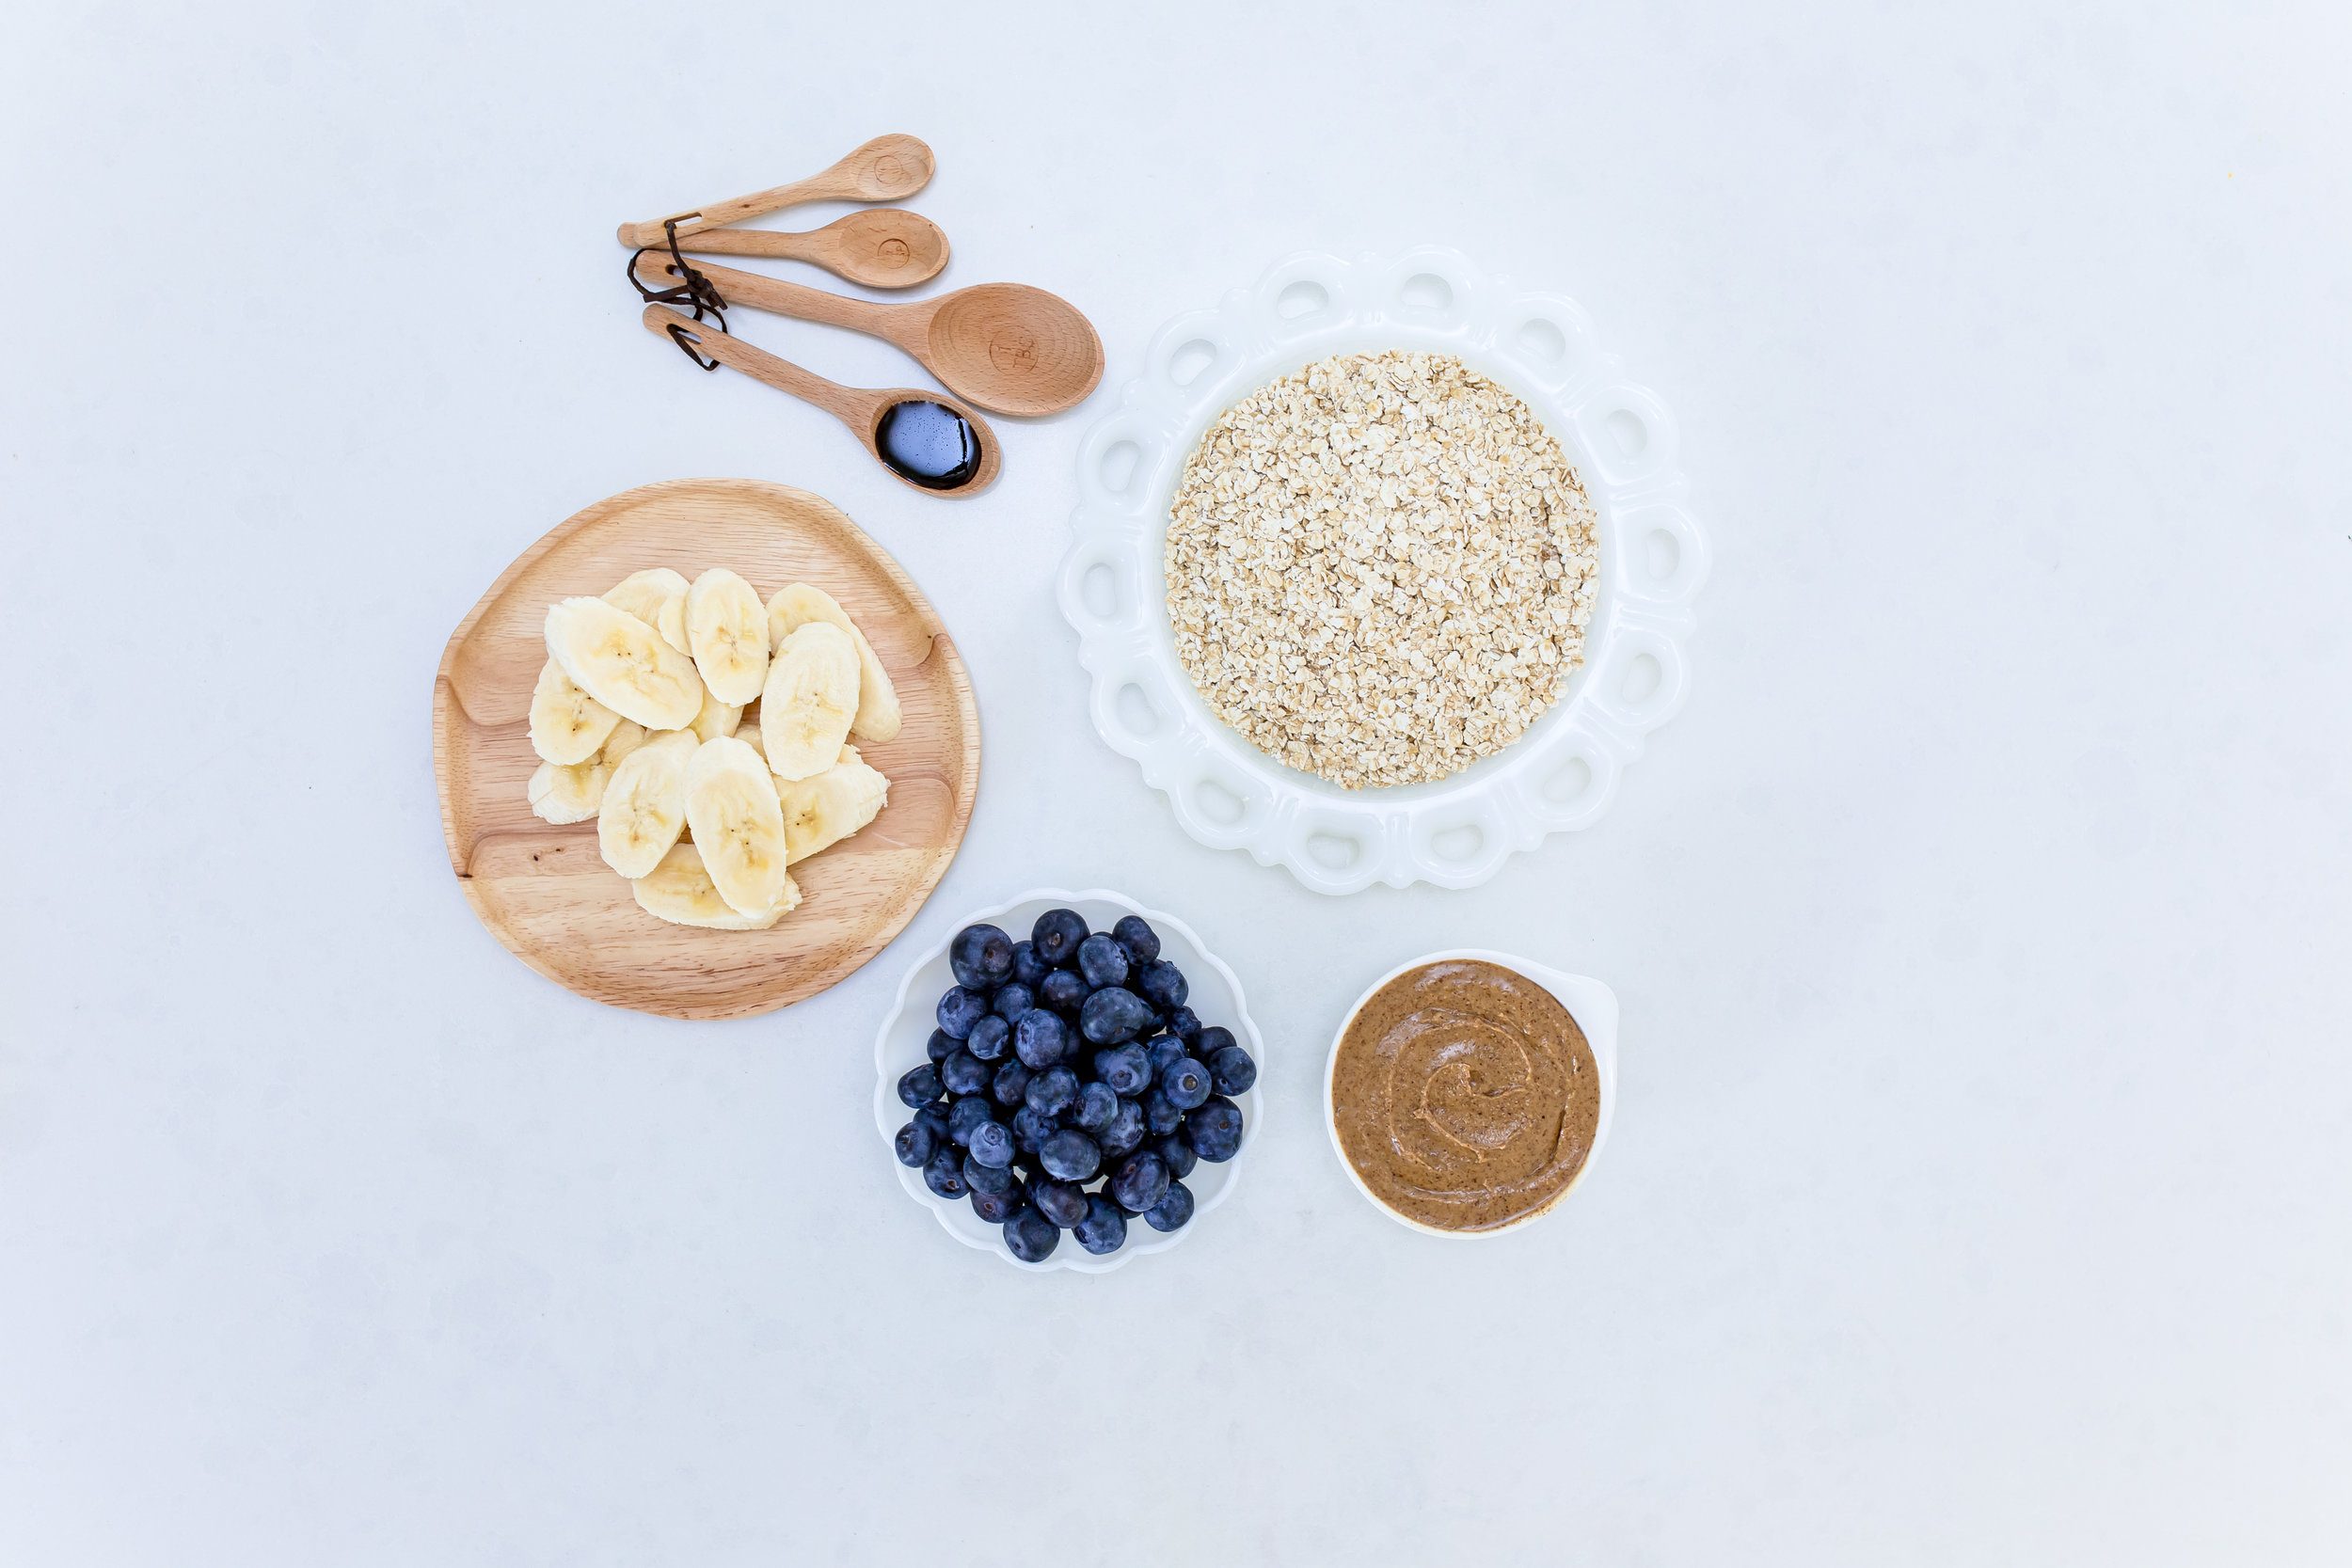
  • 1 cup rolled oats

  • 1 ripe banana, mashed

  • 1/2 cup almond butter

  • 1 tsp vanilla extract 

  • 1/2 cup blueberries

Directions

  1. Preheat oven to 350F. Into a bowl mix the oats, banana, almond butter and vanilla. Fold in half of the blueberries. Scoop batter onto baking sheet forming 1 1/2” mounds. Top each mound with remaining blueberries.

  2. Bake for about 15 minutes. Serve warm or keep in refrigerator up to 3 days and enjoy!

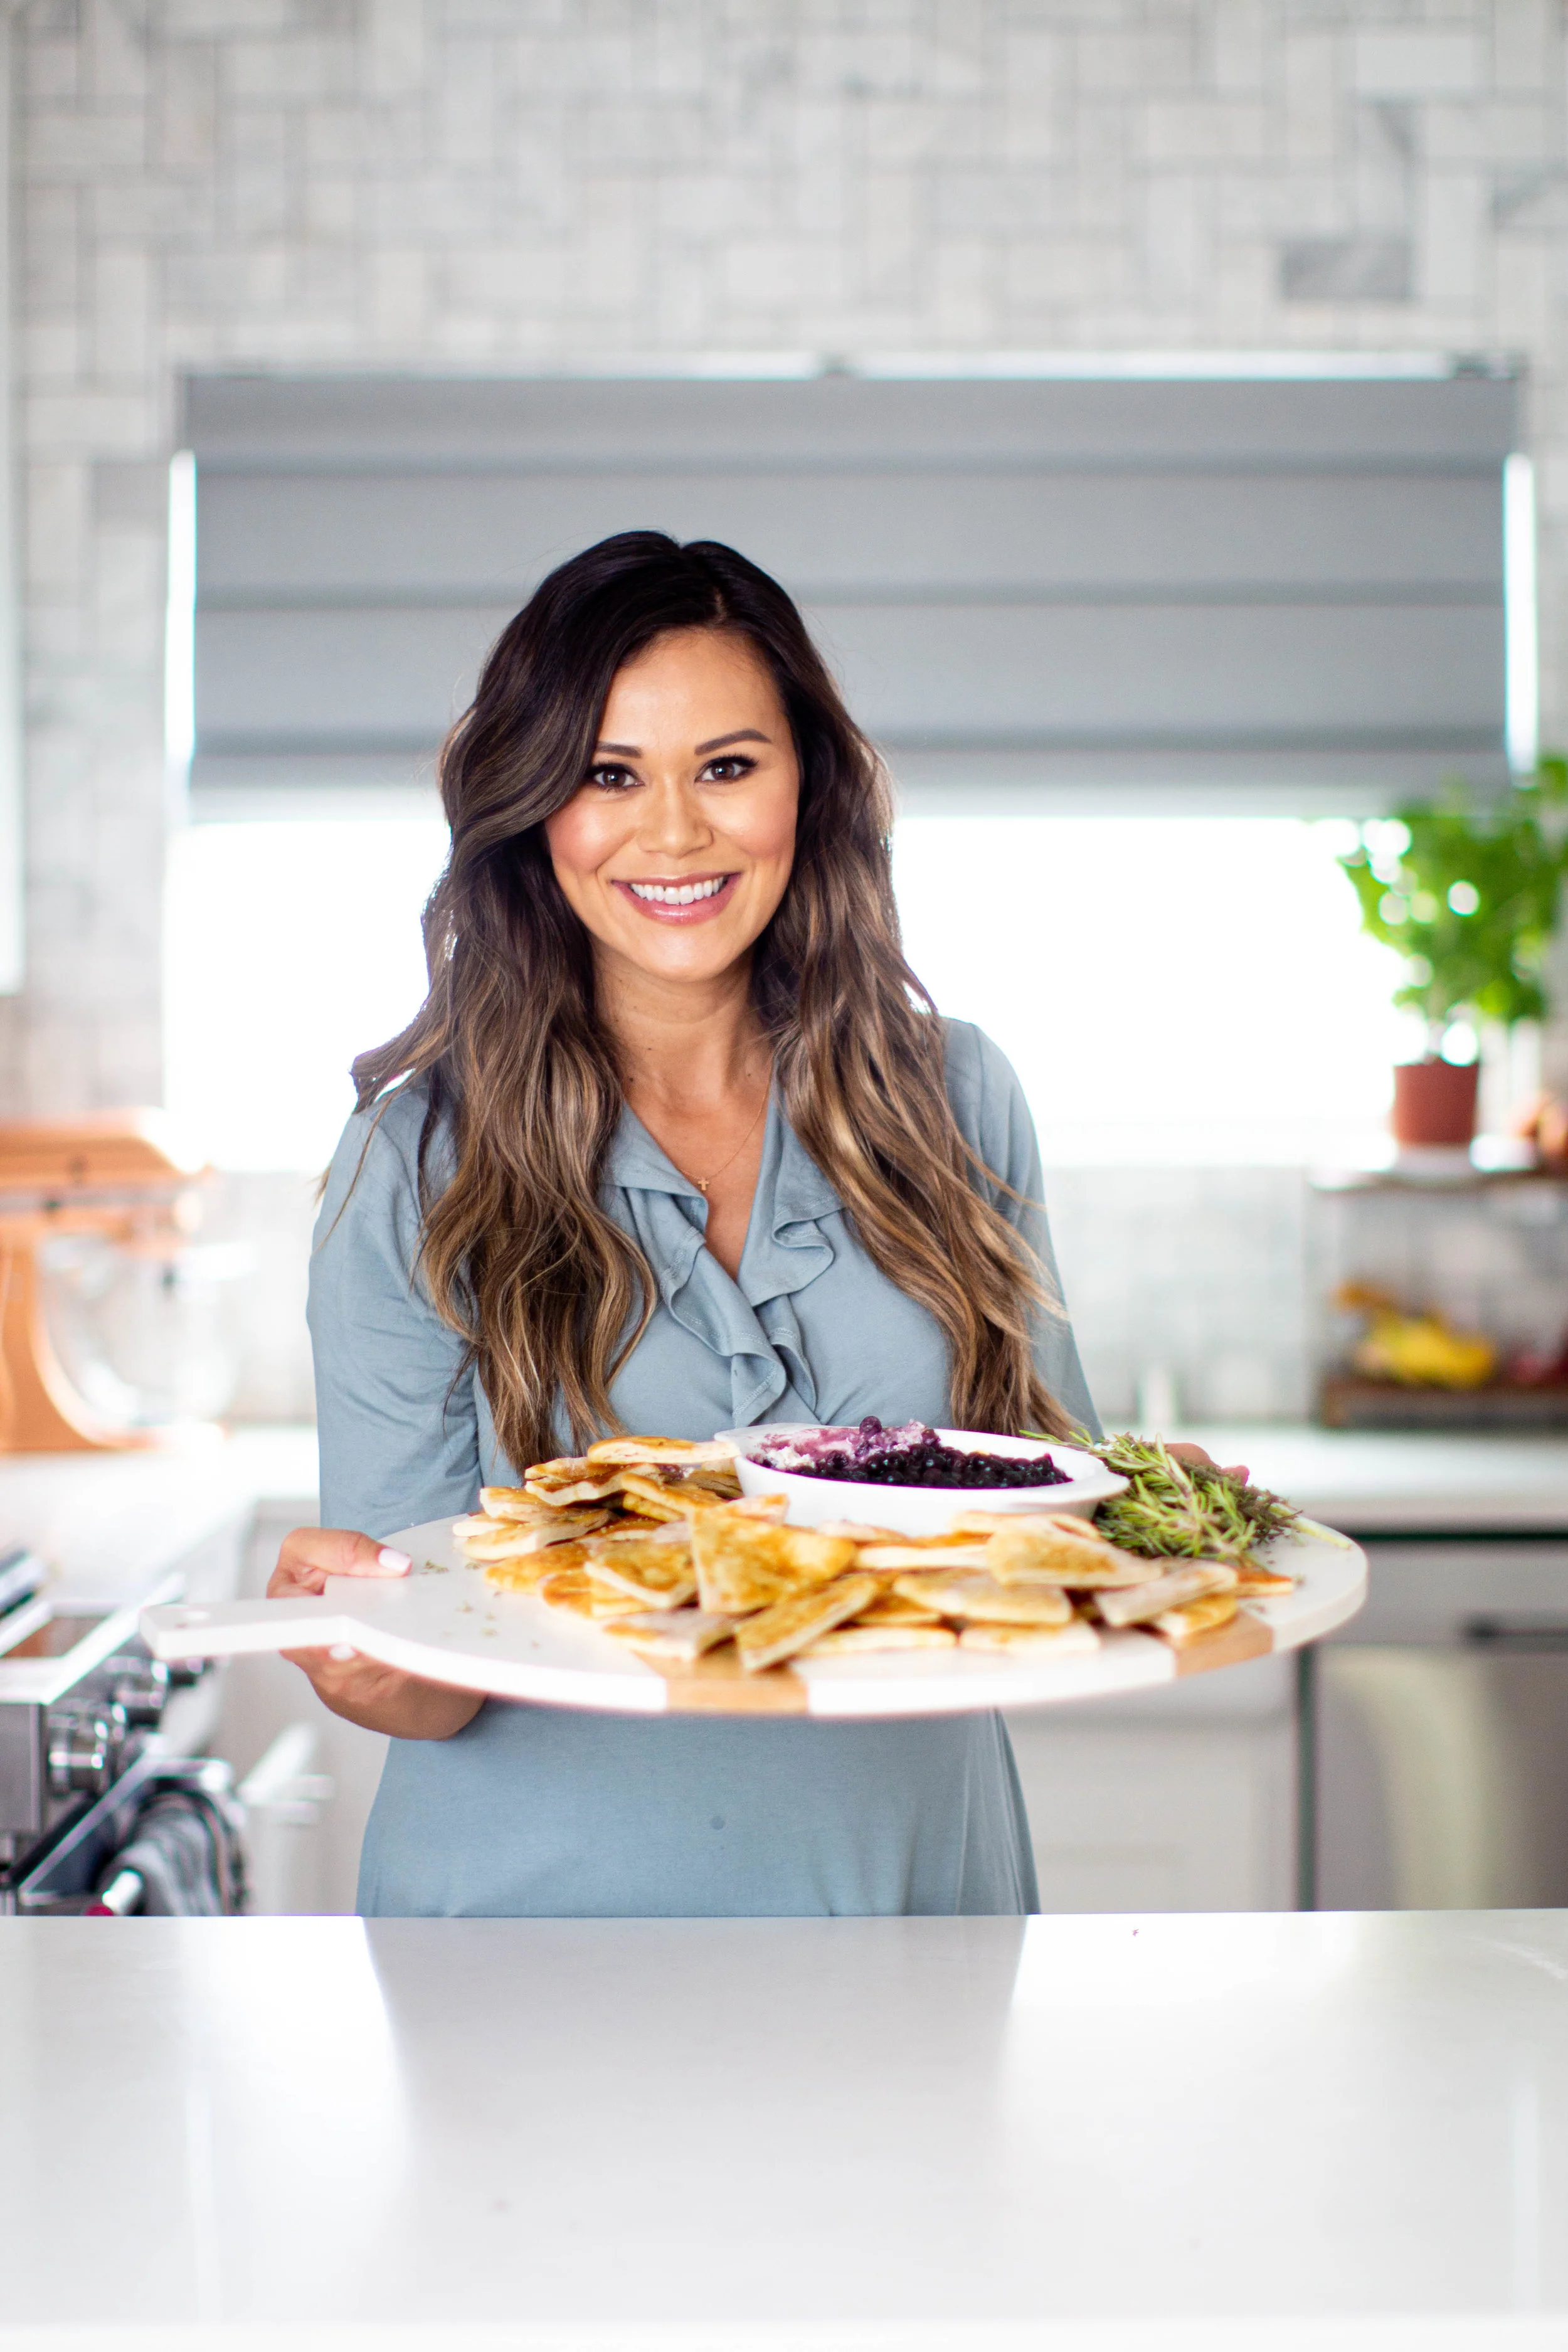
Homemade Pita Chips
IMG_2290.jpg

You can elevate even the lamest store bought dip by simply making your own chips. I love homemade pita chips. They are so easy to make and brownie points if you serve them warm-they make everything even better. Pita holds up pretty nicely in the freezer so you might as well keep a bag of pita bread on hand just so you can always make these chips. Baked with a little EVOO and garlic salt, they are so easy to make and versatile enough for any flavoring, really! Enjoy!

IMG_2267.jpg

Homemade Pita Chips

by Brandi Milloy

Ingredients

  • 1 bag of 16 oz. pita bread

  • Olive oil

  • Garlic salt

Directions

  1. Preheat oven to 375F

  2. Using a pizza cutter, slice pita into chips by cutting each pita into half and then in thirds.

  3. Place on baking sheet and brush with olive oil. Sprinkle with garlic salt.

  4. Bake for about 8-10 minutes or until warm and slightly crispy.

Blueberry Goat Cheese Dip

Thank you to the U.S Highbush Blueberry Council for sponsoring this post

IMG_2283.jpg

Blueberry Goat Cheese Dip

by Brandi Milloy

  • 1.5 cups blueberries (frozen or fresh)

  • 2 tsp. balsamic glaze

  • Freshly cracked black pepper, about 1/2 teaspoon

  • 4 oz. goat cheese

  • 4 oz. cream cheese

  • 1/2 cup shredded parmesan cheese

  • 1 tsp. chopped rosemary

  • 1 tsp. chopped thyme

  • 1 tsp. chopped sage

Directions

  1. Preheat oven to 375F.

  2. Rinse and dry your blueberries. If you’re using frozen blueberries, thaw and rinse them first before using. Pour blueberries into a bowl and toss in glaze and pepper to coat. Set aside.

  3. Into a bowl, add all of the cheeses and herbs and mix well to combine. Spread evenly into baking dish. Pour blueberries on top and bake for about 15 minutes or until hot and bubbly.

  4. Serve with homemade pita chips (recipe below).

IMG_2292.jpg
IMG_2267.jpg

Homemade Pita Chips

by Brandi Milloy

Ingredients

  • 1 bag of 16 oz. pita bread

  • Olive oil

  • Garlic salt

Directions

  1. Preheat oven to 375F

  2. Using a pizza cutter, slice pita into chips by cutting each pita into half and then in thirds.

  3. Place on baking sheet and brush with olive oil. Sprinkle with garlic salt.

  4. Bake for about 8-10 minutes or until warm and slightly crispy.

Banana Crumb Muffins
banana crumb muffins1.jpg

Ok so I don’t know if it’s this pregnancy or what but I’ve been on a crumble kick lately. I’ve always loved baking and eating carbs and finding reasons to bake but the desire to do this has been on another level. If you follow me on Instagram you’ve seen me post at least 1 new baked treat a week to bring to the birth center for our midwives and team in anticipation for baby #2. It’s becoming pretty comical I guess since this has been going on for a month now! I’ll share more after baby is here but we’ve been on a bit of a rollercoaster for the past 8 weeks in anticipation for baby. We went from baby trying to come too early to now-baby coming after our due date. The eviction notice has been served, kid!

Anyway, this week I decided to make my banana muffins with crumble on top! We always have bananas on hand and they had been ripe for a few days now and I wasn’t feeling like my usual chocolate chip banana bread so I decided more muffins it is!!! My friend and I have an ongoing joke that the reason baby is so cozy is because I keep feeding him/her muffins. Possibly!!!

These muffins are SO good. They are a little messy cause as they bake the buttery brown sugar crumble kind of melts into them so the wrappers get a little buttery but I rather have a moist, buttery muffin than a dry dense one, right? You can make this recipe into a crumble cake if you want but I love the individual servings of muffins so much more! Don’t forget to post your pics on Instagram and tag me. I love to see them!

banana crumb muffins.jpg

Banana Crumb Muffins

by Brandi Milloy

Ingredients

  • 2 cups flour

  • 3 tsp. baking powder

  • 1 tsp. salt

  • 3 ripe bananas

  • 2 eggs, room temperature

  • 1 cup granulated sugar

  • 1/2 cup powdered sugar

  • 1 tsp. real vanilla extract

  • 1/2 cup butter, room temperature

  • 1 cup milk

  • 1/4 cup cold butter, cubed

  • 1/2 cup brown sugar

  • 1/2 cup flour

Directions

  1. Preheat oven to 350F and line your muffin tin with liners. This recipe makes about 21 muffins.

  2. In a medium bowl, whisk together your flour, baking powder and salt. Set aside.

  3. In a large bowl, mash bananas. Mix in eggs, sugar, vanilla and butter.

  4. Add milk and flour and mix until combined.

  5. To prepare crumb topping combine the cold butter, brown sugar and flour and cut them together with a fork until crumbly. Sprinkle evenly over muffins and bake for about 25 minutes. Allow to cool before serving.


Blueberry Grain Bowl

Thank you to the U.S Highbush Blueberry Council for sponsoring this post

6D4A5907.jpg

I think the secret to a really delicious grain bowl is variety. It’s like building a really good sandwich. It’s gotta be the right ratios of textures and flavors. It has to be interesting! You eat with your eyes so if something isn’t beautiful and appetizing, I’m not going to enjoy it. This Blueberry Grain Bowl is super satisfying. From the peppery arugula to the juicy blueberries and creamy feta cheese, there is so much going on your tastebuds will be dancing! I like keeping these ingredients on hand for an easy grain bowl build. This bowl is also a staple during the summer months for our beach playdates-just wait to add the dressing! Be sure to share this recipe with a friend and leave me a comment below sharing your favorite grain bowl topping!

6D4A5984.jpg

Blueberry Grain Bowl Recipe

By Brandi Milloy

Ingredients

  • Arugula

  • Couscous, cooked

  • Grape tomatoes, sliced and seasoned with salt

  • Greek feta cheese

  • Blueberries, rinsed

  • Beets, steamed and sliced

  • Avocado

  • Creamy Dressing, recipe below

  • Dried chickpeas

  • Dried oregano, for garnish

  • Cooked chicken or shrimp, optional

Directions

  1. Into a bowl, add your arugula. Top with couscous, tomatoes, cheese, blueberries, beets and avocado. Drizzle dressing on top and garnish with chickpeas and dried oregano. Serve immediately.

Creamy Italian Dressing

Ingredients

  • 1/2 cup sour cream

  • 1/3 cup lemon juice

  • 1/4 cup extra virgin olive oil

  • 1/2 tbsp. honey

  • 2 tsp. mustard

  • S & P to taste

Directions

  1. Whisk all of the ingredients in a bowl. Keep in refrigerator up to 5 days.

Blueberry Banana Maple Muffins
IMG_2738.JPG

Wanted to get this recipe up really quick since so many of you have asked for it on IG! I decided to make these for Milly’s 2nd birthday breakfast and to have on hand throughout the week. Baby #2 will be here any day now and you can never have enough snacks around for a growing toddler!

I came up with this idea because I wanted to make something super easy for her and we always have both of these on hand. We keep blueberries in our refrigerator (fridge & freezer) all the time. And then Mr. A eats a banana every morning with almond butter and often we end up with over ripe bananas that we usually toss in the freezer for weekly smoothies. This time though, I looked at those brown bananas and decided to put them in some Milly muffins. Excuse the basic post on this one. I haven’t had time to take gorgeous photos of these but they are delicious in every way! Don’t forget to post pics anytime you use a recipe and tag me. I love to see them! xo, Brandi

Use a cookie or ice cream scoop to make even sized muffins

Use a cookie or ice cream scoop to make even sized muffins

Blueberry Banana Maple Muffins

by Brandi Milloy

(Makes about 16 muffins)

Ingredients

  • 1/2 cup unsalted butter, room temperature

  • 2/3 cups maple syrup (can always use granulated sugar instead)

  • 1 large egg, room temperature

  • 2 small ripe bananas, mashed

  • 1/3 cup milk

  • 1 tsp. almond extract

  • 2 cups all-purpose flour

  • 1 1/2 tsp. baking powder

  • 1 tsp. baking soda

  • sprinkle of salt

  • 2 cups blueberries (I used frozen-see below for a tip-keep blueberries in freezer until adding to batter but you can also use fresh blueberries if you have them on hand)

  • brown sugar or turbinado sugar, for topping

Directions

  1. Preheat oven to 350F and line muffin tin with cupcake liners.

  2. Into a bowl using an electric mixer, cream together the butter and maple syrup. Add egg, banana, milk and almond extract and keep mixing.

  3. In a separate bowl, whisk together flour, baking powder, baking soda and salt. If you are using fresh blueberries add the flour mixture to the banana mixture and mix just until combined. If you are using frozen blueberries, add 3/4 of the flour mixture to the banana mixture and mix. Then add your frozen blueberries to the remaining flour mixture and toss. This will keep the frozen blueberries from sinking to the bottom of the muffins.

  4. Scoop batter into muffin tins until they’re about 3/4 of the way full and top with a generous sprinkle of brown sugar or turbinado sugar.

  5. Bake for about 25 minutes or until a toothpick inserted into the center of the muffin comes out clean. Cool on wire rack.